
Beautiful cinematography is within reach for virtually any narrative film – even those shot with no-budget at all. But to maximize production value when working on a small scale, it’s all about embracing your limitations.
In this article, I break down my approach to achieving the best final product on a no-budget production.
Many of the techniques outlined here are inspired by my latest feature film, which I am not only directing, but also serving as DP and sound recordist.
Working this way has forced me to think outside the box with regard to production workflow and technical strategy. And today, I share all of my findings with you.
Below is everything I think you need to know to capture great results in camera on a no-budget production.
Keep in mind, if you do have some budget behind your film, these guidelines may not apply to you. My advice is specific to projects being shot without any financing at all.
Camera Choice
Camera choice is crucial with no-budget cinematography. Not because you need the highest end camera, but because you need the right camera that can execute under a specific set of circumstances.
On a low/no budget production, your lighting requirements, on-set workflow, and shooting style are vastly different than on a fully budgeted production. It’s tempting to shoot on the “best” camera you have access to, but most high end cinema cameras are not ideal for no-budget productions.
Despite owning an Arri Alexa, I decided to shoot my latest feature film on the Fuji X-T4 for this reason. By most technical measures, it is an objectively lower quality camera than the Alexa. But that doesn’t mean it is not the right tool for the job.
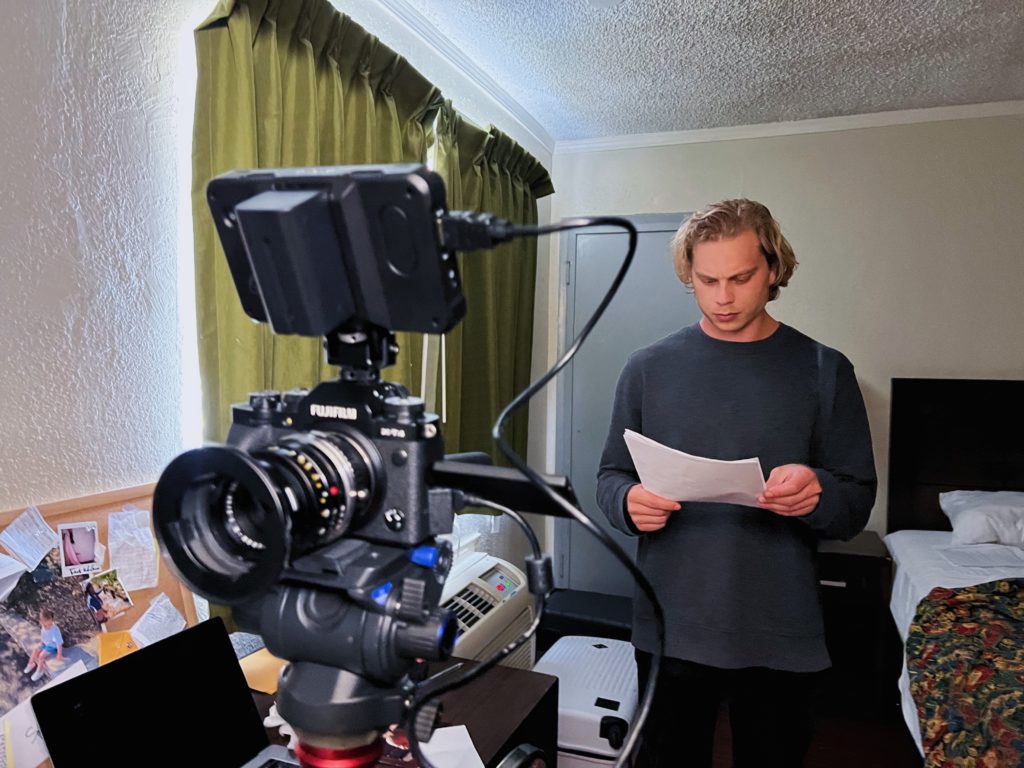
On our no-budget feature, there is no crew (other than myself) and we have a short amount of production time to capture a lot of material. This is the case many similarly bootstrapped narrative features.
Big cameras, heavy rigs, or anything that requires additional support slows down no-budget productions and severely limits shooting opportunities.
With that in mind, the key to great camera choice on a no-budget production is to focus on your most critical needs.
Do you need great low light performance? Small form factor? Image stabilization?
Most cameras today do a bit of everything, but none do it all well. Know what you’re up against from a practical sense, and then pick the camera that excels in whichever area is most important to you.
And when it doubt, consider shooting on the camera you already own. Whether it’s an iPhone loaded with Filmic Pro or a DSLR – using your own gear (even if outdated) may have some huge upsides.
There’s something to be said about working with a camera you know inside and out. You instinctually know the limitations of the camera, where it shines and where it doesn’t. Plus, you always work more quickly with a tool you’re familiar with, with increases shooting frequency and quantity.
Pick the tool that will capture your film with the least amount of resistance, not the most amount of resolution.
No-Budget Lighting
When working on a truly no-budget level, I have one primary recommendation when it comes to lighting:
Use exclusively natural and available light.
This applies even if you are experienced with lighting.
Lighting on a no-budget production is not just about aesthetics. It has to prioritize what is best for the project on a more fundamental level, not just what will create the cleanest final image.
Perfect studio lighting is all well and good for big budget productions. But over-emphasizing lighting on a no-budget film almost always forces you to make sacrifices in other (more important) areas. Using traditional film lighting means more downtime in between setups, and less material captured overall.
The last thing you want is a perfectly lit movie without enough shots to cover a sequence properly.
That said, you of course still want to aim for high quality visuals. And there’s no reason why you can’t achieve amazing results in camera, even without traditional film lighting.
Natural light is the most beautiful source (in my opinion), so long as it is shaped and modified properly on set. The same goes for available light, like a practical lamp in a motel room or a buzzing sign in an alleyway. These type of sources have their own charm, and add a really unique feel to the final product.
There are of course caveats to working with natural light too. Exposure can be a challenge, as can mixed color temperatures. Not to mention when shooting in daylight, the sun will be a constant moving target, which can cause continuity headaches.
But in the right hands, working with natural or available light offers the best of both worlds for a no-budget production.
It helps you move extremely quickly by eliminating setup time in between shots, while also delivering a realistic, natural look that can be further stylized in post.
If you absolutely must use a traditional light source, I recommend at most using a single lamp.
One LED panel or a china ball might be all you need for some extra exposure on your talent. More lamps = more complexity, more shadows, and less time. When in doubt, keep it simple.
Blocking
When working with natural or available light, blocking can make or break your shot. Since you can’t move lights around to meet your talent, you have to position your talent so they can best take advantage of the available lighting in the space.
Say for instance you are shooting an interior scene in a dark room. Imagine there is one large window on the back wall, but no windows or light coming from any other side.
One option is to backlight your talent against the window, and create an intense silhouette effect.
Or you can do the exact opposite. Place the camera in front of the window and shoot into the room. This will allow you to harness the window light to expose your talent more evenly. Two vastly different looks that can both work.
It’s beyond the scope of this article to outline every possible lighting scenario you might encounter. But I will share one rule of thumb:
When in doubt, position your talent so the key light is opposite camera.
This will create more exposure separation between your talent and the background. If the key light is in front of the talent, you’ll generally get a much flatter image with less depth.
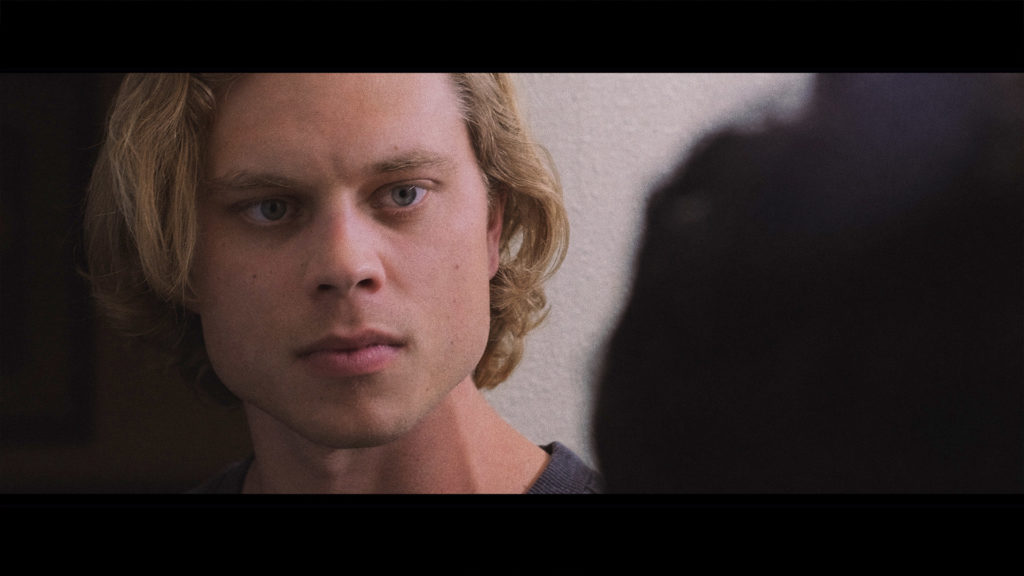
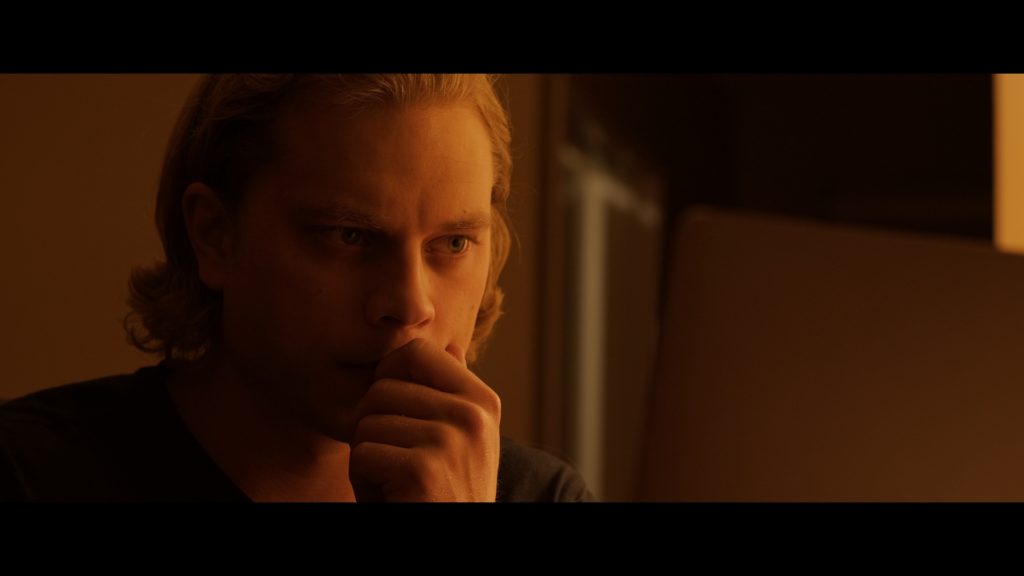
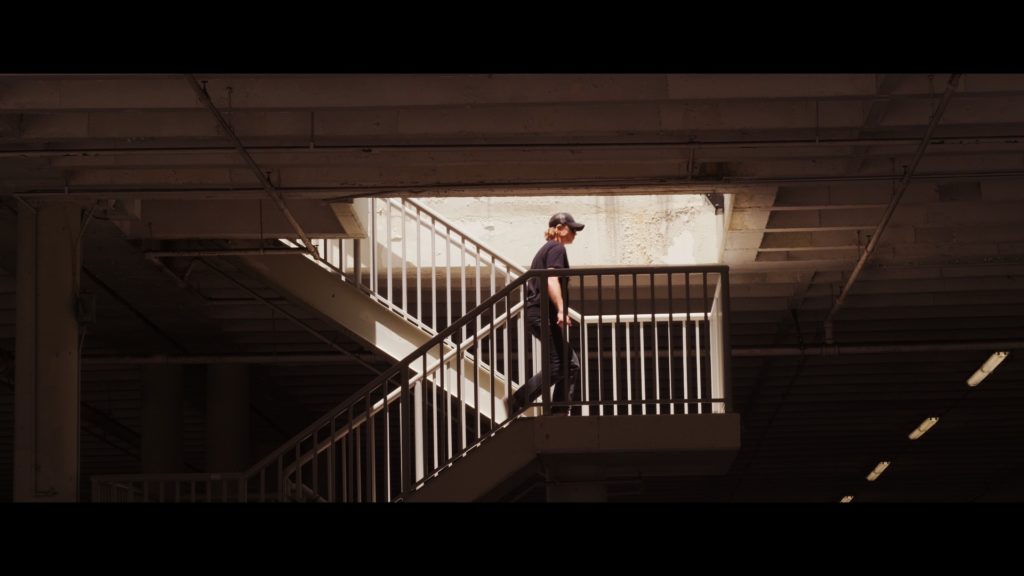
Here are two examples from a scene in my latest feature. In both cases the key light is a single practical lamp placed on the opposite side of talent (furthest from camera).
These shots are ungraded, but give you an idea of the final look –
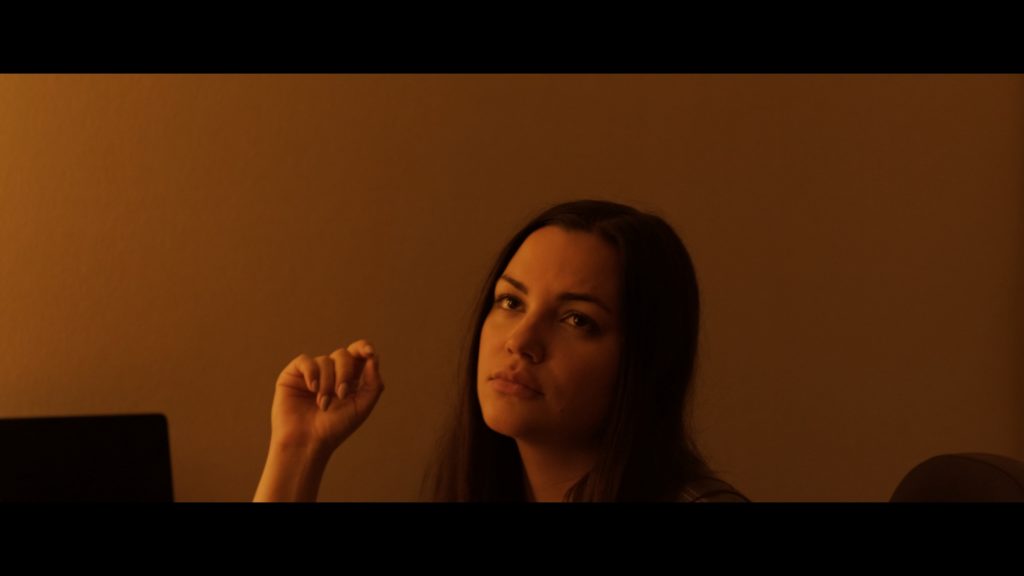
Keep in mind, every shot and scene will always call for its own strategy, so the techniques I’m sharing here are just a jumping off point. Always assess each shot individually and determine which approach is right for the task.
Framing
With no-budget cinematography you are limited in many ways – Less ability to control your light, fewer opportunities for complex camera moves, and so on.
But there is one tool that is constantly available to you that can help drive up your production value: Framing.
A great frame can go such a long way in adding polish to your final image. Conversely, even the most perfectly lit image won’t look great if framed poorly.
I recommend taking time to develop a strong framing style in pre-production. Set some rules or guidelines you can follow from scene to scene, and stick with them.
Try to build a visual language for your film that is distinct – whether by using lots of negative space, embracing extreme closeups, or trying out any other technique that fits.
Framing costs absolutely nothing to get right, but it so often overlooked. Pay extra attention to it during prep and production and your film will benefit.
Lenses & Focus Pulling
Assuming you are working with no crew (or a very small crew), there is a good chance you will need to avoid focus pulls. This can be both a challenge as well as an opportunity.
Not being able to pull focus means you will either need to:
- Rely on a camera with great autofocus
- Never rack focus in any shot
Option #1 is great for films with loads of action sequences, but where you don’t have a dedicated focus puller. In those cases, you’ll likely want to use a mirrorless camera with strong autofocus – like the A7S III. This of course would also help dictate your lens choice, because your glass will need to be compatible with the Sony AF.
Option #2 may work well for films that require less coverage or are more dialogue driven. On these films you can potentially avoid pulling focus entirely – which is what I am doing on my latest feature.
On my feature, I avoid pulling focus by locking the focal plane and having my actors walk in and out of it. This of course has an impact on my blocking (and the overall stylization of my film), but it works well aesthetically and simplifies my technical setup.
Best of all, not having to pull focus opens up a wide array of lens choices. Cinema lenses for example, are not necessary since I don’t need to worry about the length of my focus throw, or how smooth the pulls will look.

Cinema lenses are still an option, but so is DSLR glass, or vintage lenses that aren’t re-housed. On my film, I’ve been shooting exclusively with a Leica R 50mm lens and have been really happy with the results.
On-Set Production Workflow
There are a few more general rules of thumb that I believe can benefit any no-budget production.
First off, if you’re struggling to cover movement in any given scene – break the scene into smaller chunks.
Camera movement without proper crew support is always a challenge, even with a solid rig and strong autofocus. If you can’t quite shoot the scene in a single take (like you may have intended), don’t hesitate to break it into several smaller shots. Counter-intuitively, adding more shots will speed you up – since each individual shot will be less complicated.
It’s critical to match your coverage angles well too.
You might have great lighting and nice framing, but if there is no uniformity to your shots, they will feel disjointed. When working quickly, you are more likely to overlook inconsistencies in coverage – for example accidentally shooting one close-up center framed and the other with lots of negative space. Create some guidelines up front to ensure all of your angles match and can cut well together.
Most importantly, take advantage of the freedom that working this way offers.
You may not get to experiment with the most complex lighting setups or camera moves on a no-budget production, but you can benefit from more coverage, a faster pace, and the perks of working spontaneously.
Improvise and be open to new ideas. Get extra shots. Try new angles. That’s the whole point of working this way – it’s all about turning your limitations into creative opportunities.
And don’t forget how much ability you have in post to stylize and perfect your image with color grading tools, film grain, and more.
Hopefully this was helpful for some of you working on no-budget narrative productions!
I expand on no-budget cinematography at length in my No-Budget Feature Film Blueprint. This is practical guide for how anyone can make a feature film of their own, even without financing and while working full time.
Click here to sign up for my newsletter and receive exclusive articles like this every week.
For exclusive filmmaking articles every Sunday, sign up for my newsletter here!


3 Comments
Steve
atAs a “soundie” I’m wondering what method you are using to record dialogue in the scenes?
Noam Kroll
atHi Steve! I recently published an article about this topic, you should be able to pull it up by searching the site.
Chanel
at“Try to build a visual language for your film that is distinct”
I smell a whole separate future article.