Right now I am in the midst of directing a “one-man-band” feature film experiment that requires I record location sound by myself – without any crew. This is something I’ve never done before, and had to develop a new approach from the ground up.
My goal from the get-go was to keep things as simple as possible on set. I am DP’ing the film too (in addition to producing, directing, PA’ing, etc.), which means my focus is always split.
The only way to juggle camera and sound when working this way is to take an ultra minimalistic approach across the board.
For sound, that meant using prosumer gear I already owned, applying good technique, and finding some little workarounds on set.
So far, I’ve been really happy with the results. The quality is great, even without a dedicated sound recordist. It doesn’t feel like a sacrifice in any way.
Don’t get me wrong though, a great location sound recordist/mixer/boom op is worth their weight in gold. You are always best served by working with a professional whose sole expertise it is to capture audio.
But the point is if you choose to do it yourself, or have to do it yourself, you can. It’s one less barrier to entry if you’re trying to bootstrap a short or indie feature.
The feature film I am working on warranted this type of approach, because it was an experiment from the beginning. I wanted to push my limits and see what was possible under the most stringent limitations. That meant shooting it all myself, and recording my own sound.
If you’re in the same boat, read on. Below I share some initial findings from this feature film project – including a breakdown of the gear I’m using, my technical approach, and creative workflow.
Location Sound Recording Gear
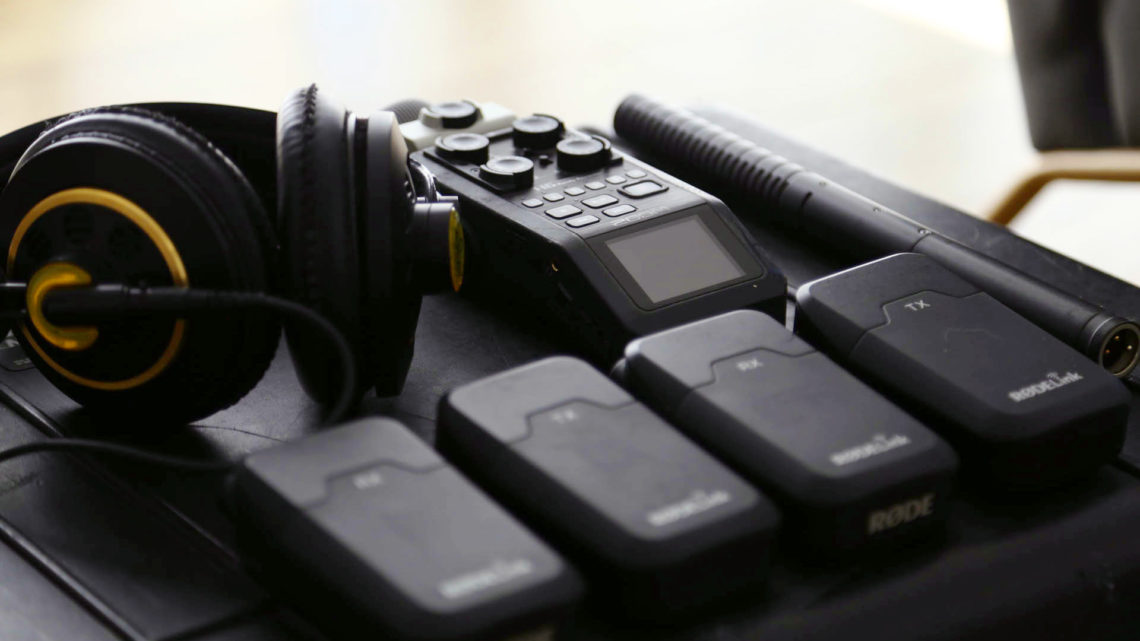
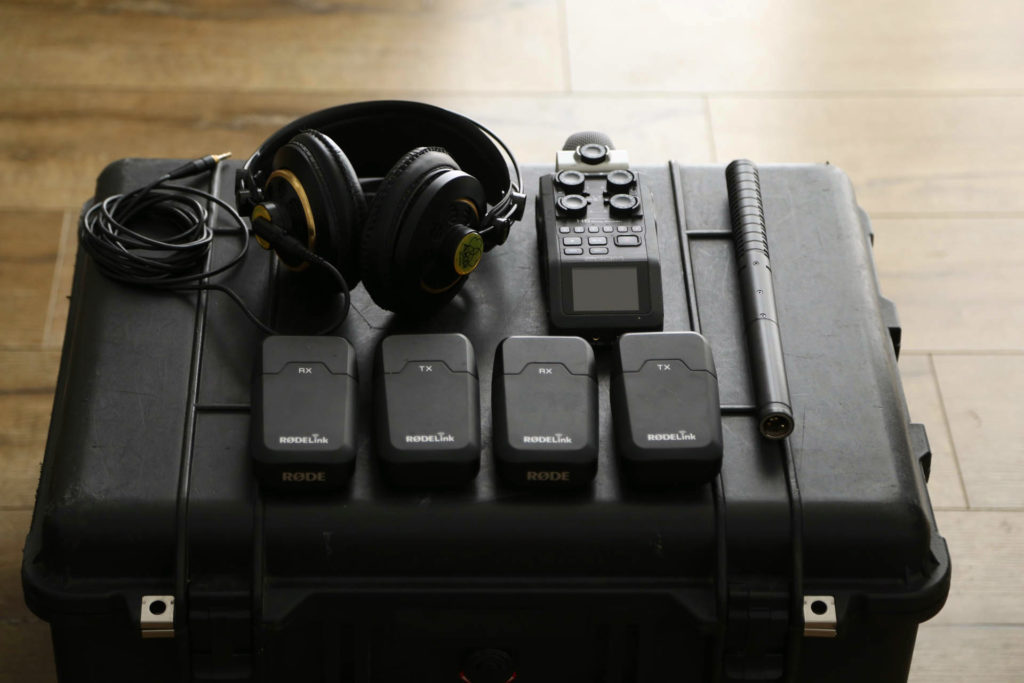
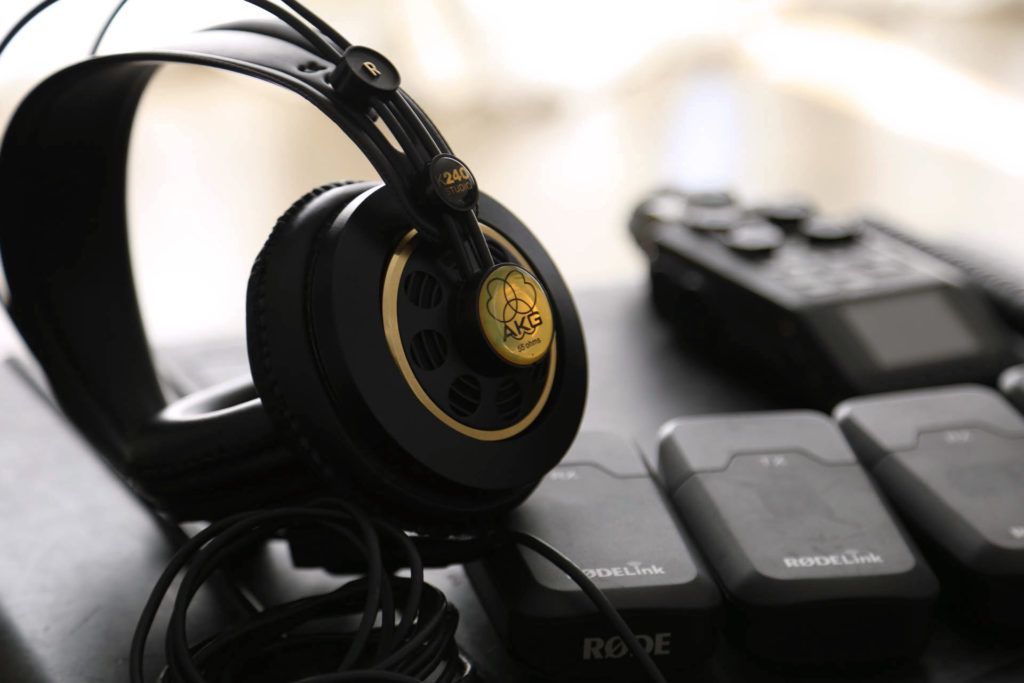
My sound kit is extremely minimal. Virtually the entire movie will be recorded using the following only:
2 x Rode Link Wireless Wav Mics
1 x Rode NTG2 Shotgun Mic
1 x Zoom H6 Recorder
That’s it!
I chose to use this gear for one reason: It’s what I already owned.
Again, I wanted to keep it simple. And working with gear I was familiar with would reduce technical hiccups on set.
A professional sound recordist would likely use higher end gear for a feature like this… Sennheiser Mics instead of Rode, a Sound Devices mixer in place of a Zoom.
But even entry level lav / shotgun mics are capable of producing great sound in the right hands. Just as a a mirrorless camera can hold its own against an Alexa with the right DP behind the wheel.
There are always better tools out there that will add a slight edge to audio quality. But the difference between the highest end gear and prosumer gear is not huge. Especially when you consider what can be done in the mix, and the impact of technique on final sound quality – which is far more important than gear ever will be.
Lav Mounting Technique
When it comes to wireless lav mics, it’s all about placement. It doesn’t matter if you have the best mic in the world, if it’s not positioned well it won’t sound good. Obvious, but worth stating.
It’s also critical that they are mounted well. Nothing sounds worse than scratchy audio or muffled sound from a poorly mounted wireless lav.
But there is no one right way to mount a lav mic. It is usually dictated by wardrobe choice, which can vary significantly from actor to actor.
For example, if your talent is wearing a button up shirt, you might clip a mic capsule inside the collar where it can be easily hidden. Or you could tape it up in between the buttons on the shirt. But if they are wearing a t-shirt, you would likely mount it straight to the chest.
There are also different adhesives you can use to mount the mics to clothing or skin. Including gaff tape and moleskin.
I wanted to find the easiest solution that would work without fail in the most amount of shooting environments.
After some testing, I decided to stick with the triangle technique, which I’ve used before.
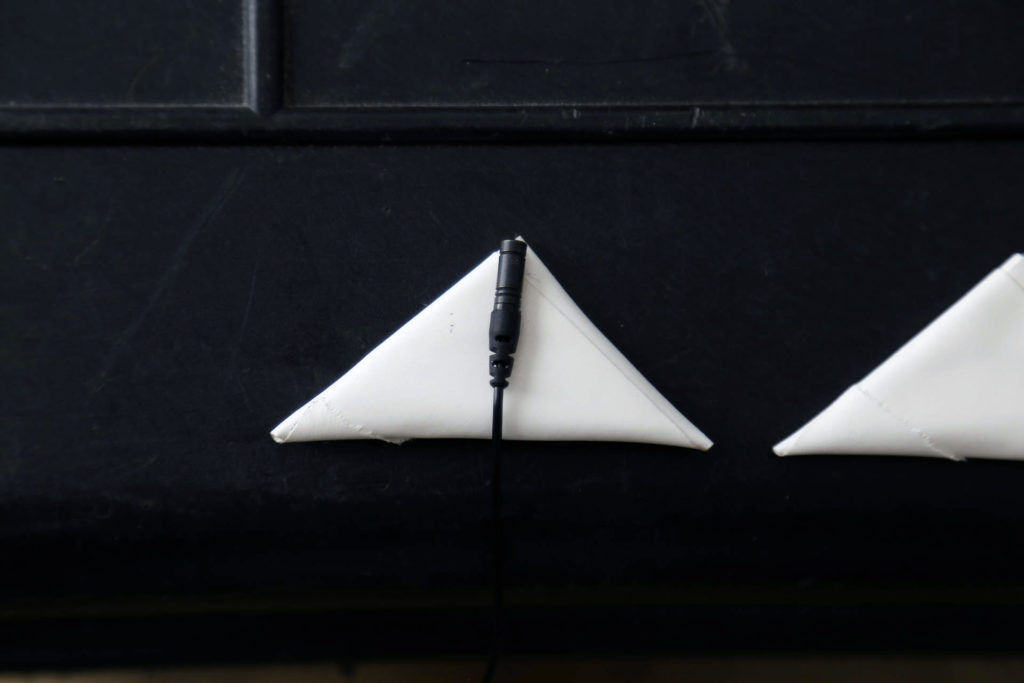
This involves folding gaff tape over itself (about 4 – 5 times) until a triangle is formed. You do this twice for each wireless mic.
One triangle sticks to the front of the mic, and the other to the back. So long as the mic capsule is just barely sticking out at the top, the sound quality isn’t negatively impacted.

By having tape on both sides, the mic can stick to both skin and fabric. This holds it securely in place and all but eliminates rustling from clothing or body hair.
The tape can get a bit bulky though, so you have to make sure the wardrobe you choose can hide it well. So long as you do though, it’s pretty foolproof.
On Set Audio Workflow
The workflow on set has been kept just as simple as the gear:
Each actor is given a wireless lav, and the receivers run straight into my zoom H6 recorder.
At the beginning of every take, I hit record on the zoom first, then on the camera, and finally I call out a quick audio slate. I don’t need to use an actual slate, since I am editing the film myself and plan to auto-sync all of the audio later in Final Cut Pro.
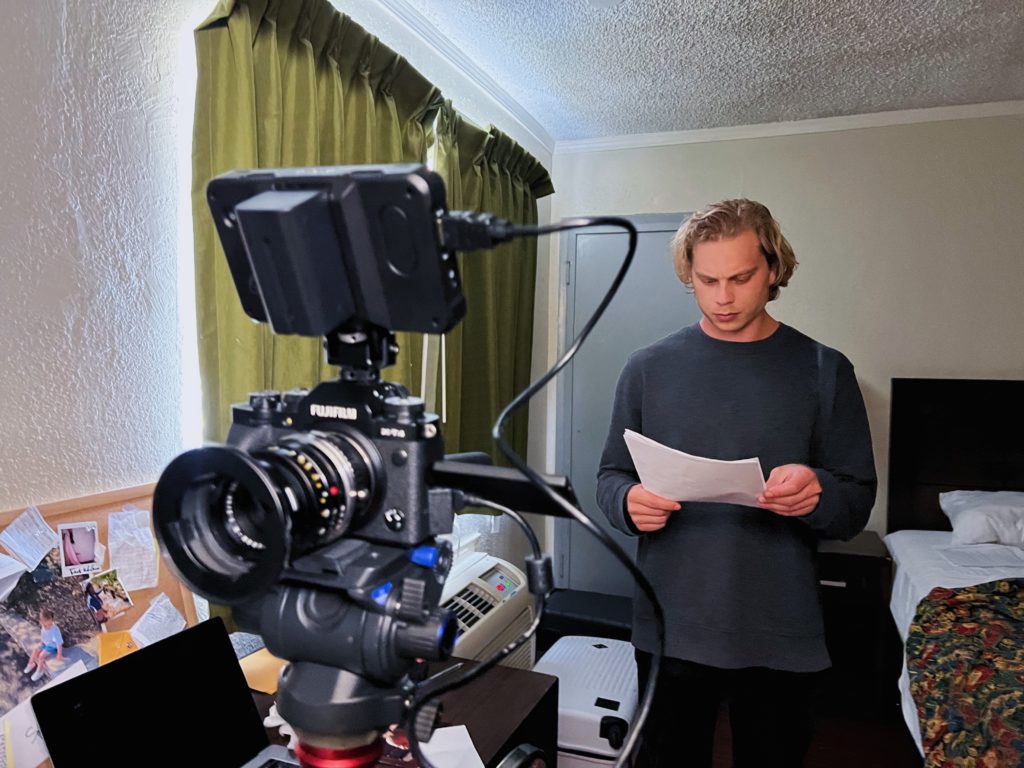
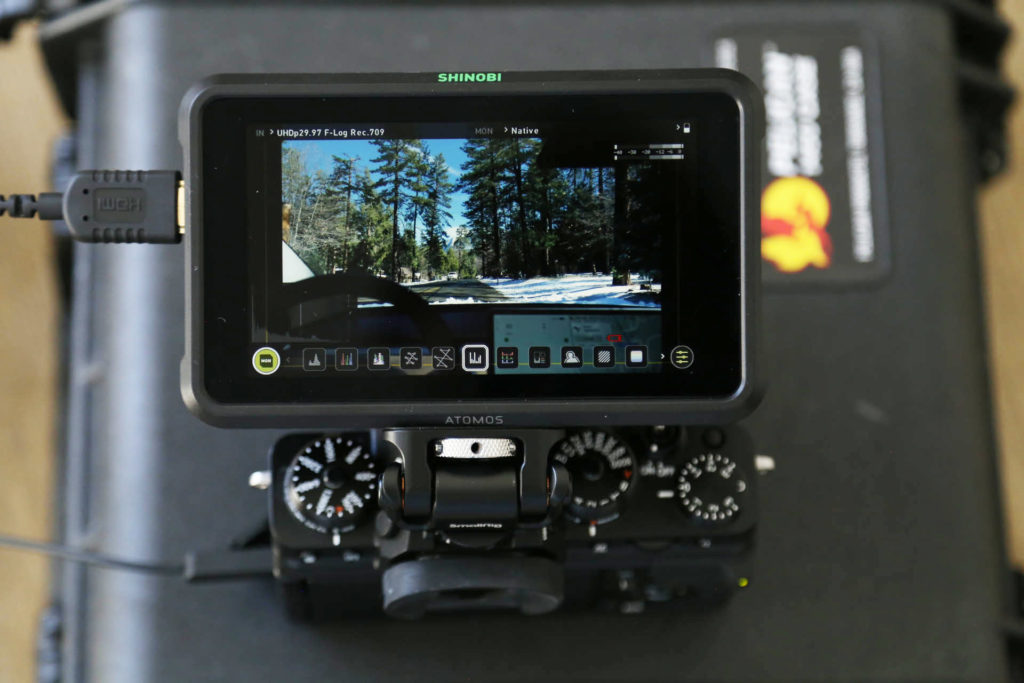
This means I also have to record a scratch track on my Fuji X-T4. I considered running a feed from the Zoom H6 into the camera, but figured that might limit my mobility when shooting – especially for handheld scenes.
So I just leave the internal mic on the Fuji-XT4 on, which is more than good enough for syncing purposes.
If you want to check out my minimalist Fuji X-T4 rig for this feature, click here.
During the main dialogue scenes I’m not using the shotgun mic at all, since I can’t swing it around while also operating camera. But I am still using the Rode NTG2 shotgun mic for wild lines.
After every scene is complete, the actors run the scene 2 – 3 more times while I hold the shotgun/boom and monitor audio.
I won’t necessarily have to use this audio in post, but it’s important to have as a backup.
Shotgun mics can capture much richer sound than lavs, so I always want the option to replace dialogue with the shotgun recording if it is warranted. Plus, it never hurts to have an extra couple takes of performance, even if it’s just audio.
Final Thoughts: Recording Location Sound
While I anticipated recording my own location sound being a massive challenge, it’s actually been surprisingly easy. Once the wireless mics are set up and mounted, I really don’t have to worry about them.
If I catch any issues when monitoring on my headphones, I can fix the placement of a mic or tweak the audio levels on the recorder. These are always easy changes, and so far have been few and far between.
And having the shotgun to record wild lines (as well as sound effects) gives me peace of mind too. No matter what, I’ll always have great workable audio for each dialogue scene, even if there was an issue with the wireless signal.
When the film is eventually released, I hope it goes to show that recording your own sound is a viable option. That you don’t need to sacrifice quality just because you’re doing it yourself.
It’s all about knowing your limitations, and creating safeguards to cover your bases under every possible scenario.
If you’re on the fence about it, try what I did – run some tests. Rent a couple of mics and try some different mounting techniques. You might just find yourself taking this approach on your film too.
What are your thoughts on recording your own sound? Leave a comment below…
For more exclusive content like this, click here to sign up for my newsletter.


11 Comments
Larry Martin
atWow, directing a one-man-band feature film and handling both camera and sound on your own sounds incredibly challenging! Your dedication to keeping things simple and using the gear you already have while finding creative solutions is truly impressive.
tree removal services in Denver CO
Scott Bell
atI love the gaff triangle method. We used the triangle with Sony lavs and a Zoom H5 on an entire indie feature. Recording outside in often windy conditions, the lavs and triangle were indispensable. Thanks for posting, you have me checking out the Fuji camera now : )
JD henning
atHaving done basically this myself, it’s workable but a bit risky, and knowing that you may have a hairy mess in post, syncing everything up, must be taken into consideration. I’ve realized that shooting w/out monitoring sound can be made to work, but as others have said, it’s always a gamble. One person can do a good job at three jobs, but it tends to take three times as long one way or another. If you are that one person, it may be worth it! But it is certainly an open consideration as to whether it’s right in a specific situation for a specific project.
Noam Kroll
atAbsolutely. It’s not for everyone, and there are definitely drawbacks! I am monitoring sound in my case, and so far have had great results. But I’ve also spent enough time behind the camera that it is somewhat second nature. Really depends on one’s level of comfort with the technical side I suppose. Thanks so much for your input.
Sai Ashwin
atIf it isn’t too much trouble. Can you post sample clip which shows how it sounds more or less with this setup?
JD henning
at+1
Noam Kroll
atYes, I will aim to do that soon in an upcoming blog post.
Jeremy Evan Taylor (JET)
atThanks, Noam. I’m going to shoot a one-man-crew short film soon on the O.G. Bmpcc and I realized my friend who normally runs sound is just too busy to help with this one. I’ve found that although the Rode Links can be a little muddy, they are so much better than any lav I’ve tried as far as having less cable noise. As far as alternatives to the triangle method (which I’ve noticed all the pro’s use the times I’ve been an actor on bigger sets), the Invisilavs can work pretty well, except the adhesive isn’t great and you end up using gaff tape after all.
I’ve also found that it can be helpful to run wild lines through the lav’s as well as the boom. That way you have alternate, clean takes that sound the same as the main audio source instead of having all your wild lines only having the different sound from the boom.
Looking forward to more articles about your project!
Noam Kroll
atGreat points, Jeremy! Thanks so much for sharing this.
Jim McQuaid
atNice article and basically good advice. My experience is that this approach can work but there is likely to be ONE time where you [the sound person] don’t hear a piece of ambient noise or other sound defect because at that moment you [the DP-director] were busy. Multiple takes are your friend, for sure.
If I could have ONE more crew member, I would lean toward a camera operator so that my eyes can take in the performance directly. But that’s a “bigger budget” project…
Noam Kroll
atAbsolutely. There are always sacrifices, but to me the tradeoffs can be worth it… For the right project, at least!