With the right approach, natural light can deliver unparalleled visual results with gorgeous color tones and striking contrast.
With poor technique however, frustration and lackluster results are almost inevitable.
Many people mistakenly believe that natural light offers an easier shooting experience, but that couldn’t be further from the truth. While shooting in natural light may have some tactical advantages – namely less gear and a faster setup time – with it come more complications.
Controlled lighting allows you to dial in your contrast ratios and color balance with scientific precision, and capture exactly what’s in your mind… Or at least something very close to it.
In natural light, things get a lot trickier. The elements are out of your hands, and everything is in a constant state of flux. Changes in the angle of the sun, cloud coverage, environmental lighting (causing temperature shifts), and more can all complicate your process dramatically.
My rule of thumb is always as follows –
Whatever time natural light saves you in production will be made up for in pre-production and post.
In other words, shooting in natural light may make for a less cumbersome experience on set, but that doesn’t make the overall process any easier. You still need to pick up the slack in pre-production to ensure you’re planning for every possible situation, and in post-production to fix any potential errors.
But today, we’re not here to talk about prepping your shoot or coloring your images in post – despite those being key factors to a successful natural light production.
Rather, we’ll be exploring what an optimal on-set workflow looks like under these conditions.
Below, I’ll share the exact strategy I use to assess natural environments, and visualize shots that will make the most out of the available light.
Everything I’m sharing here can be applied to the most basic of setups – even for those shooting solo without any lighting equipment, bounce boards, or assistance on set.
If you know how to make natural light work for you, any shooting scenario is manageable, and environmental challenges can often lead to creative opportunities.
So here goes, a step by step breakdown on my natural light workflow on set –
Step 1: Assess the environment
The very first thing most people do once on set is turn on the camera to look through the viewfinder and take some test shots. Almost always though, that should come last.
The first step should simply be an assessment of the environment with your naked eye, which will give you an idea of how the natural light can work for your needs.
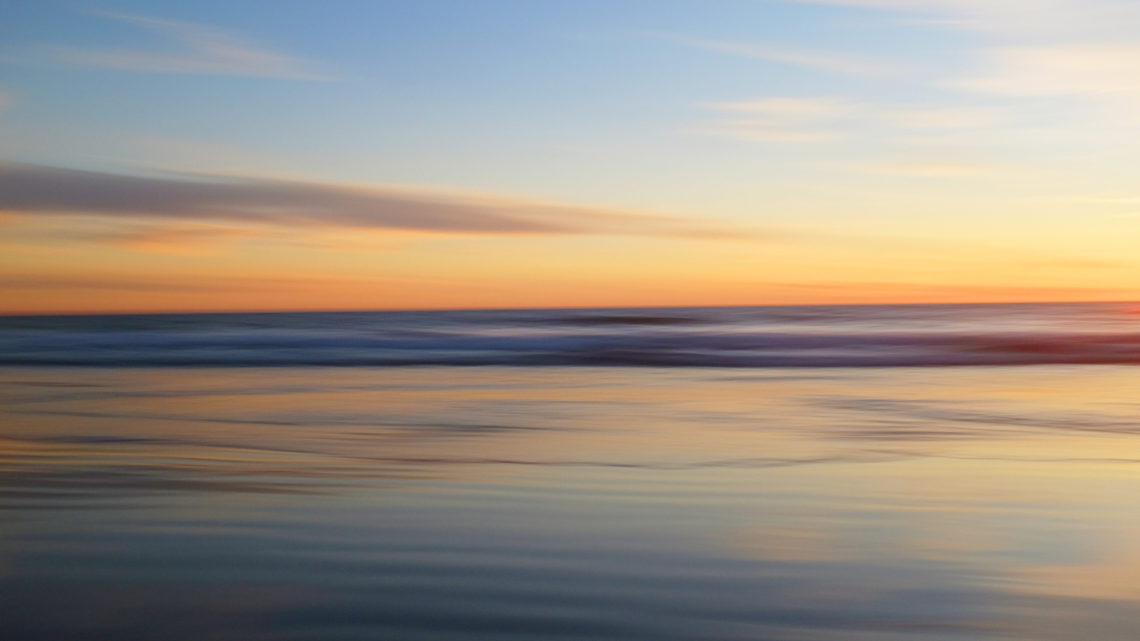
Let’s use a hypothetical example, and assume we’re shooting on a bright sunny beach that is partially shaded thanks to a large cliff on one side.
Upon arrival, we would start by identifying the brightest areas in our surroundings (likely the sky) and the darkest areas (perhaps the cliffside or some shrubs nearby).
We would then ask key questions about the quality, source, and intensity of the environmental light to assess which areas might work best for our needs –
How much range is there between the darkest part of the beach and the brightest? How much natural contrast am I seeing? Are there any other unique ways in which the light is bouncing around?
Taking a quick mental note of these things is always the best starting point. It gives you a global overview of your working environment, with all its challenges and opportunities, and leads right into to the next step –
Step 2 : Identify the point of optimal contrast
This is probably the most important step of all, and the skill that is most challenging to master. But once you have it, it’s like a secret weapon.
You want to develop an ability to look at your environment and instantly know where to shoot based on the natural contrast ratios that you identified in the previous step.
A key factor here is having a strong vision for your shot beforehand. You have to know what you’re looking for, otherwise you’ll waste time with trial and error when you could be capturing the best light of the day.
Do you want to go for a soft, low contrast look? Or something more intense and high contrast? Do you want to silhouette your subject? Or is a glamor look more your taste?
You may have less control over your images in natural light than you would with proper film or studio lighting gear, but that doesn’t mean you don’t still have creative authorship. You just have to know what you want.
The stronger your vision, the easier it is to identify what I call the point of optimal contrast for your image.
This is the specific and exact spot within your location that (through natural forces) is creating a lighting dynamic that can serve your creative intent.
Let’s continue on with our beach scenario so I can give you a more concrete example.
We’ll assume it’s broad daylight with little to no cloud cover, and you’re trying to shoot an actor or model (not just a landscape). You’ve just arrived to location and quickly assessed the environmental natural light. Where do you go next?
It all depends on the creative intent.
If you’re going for a silhouette look, you’ll need to find the point of maximum contrast. Somewhere your subject can stand in a dark area that backs onto a very bright background. Perhaps the cliff at the beach is casting a heavy shadow, and that will allow you to expose for the sky/background and underexpose the subject.
Or maybe you’re going for a softer, dreamier aesthetic. This can be a challenge mid-day with no gear, but is certainly possible. Ideally you would find an area with moderate contrast, like a spot on the sand that is partially shaded by a tree. The soft shadow may be able to act like an overhead silk, taking the harsh edge off the sunlight, and still allowing you to backlight your subject. Or alternatively you might find a corner of the beach with cliff walls that are bouncing light all over the place, acting like a natural soft box.
As a third example, imagine you want to capture a half-light aesthetic, where your subject’s face is exposed on one side and in shadow on the other. If the sun is directly overhead, this could be a big challenge. But if you can identify something in the environment that can act as a natural bounce (or negative fill), you are in luck. Perhaps you place your talent next to a structure that’s painted white, and have them stand at a 90 degree angle facing camera. Or do the same, but next to a dark bushy area that provides negative fill. In both cases, strong contrast can be achieved, even with the glaring sun overhead.
These are just a few examples of course, and not mean to be an exhaustive list. No two productions in natural light will ever be exactly the same, so you’re always going to be at the mercy of the environment you’re in… Another reason why planning/pre-production is so crucial.
Step 3: Place your talent without using the camera
After the previous step, you’ll be nearly ready to start shooting. But before actually pulling out the camera and getting lost in the technicalities, I highly recommend placing your subject in the environment and seeing how they look to your eye first.
If you land at your spot and just whip out the camera for test shots, you will inevitably slow yourself down.
It’s easy to tell yourself you’re just going to take one test shot, and then before you know it you’ve spent 10 minutes tweaking settings and troubleshooting camera issues. Then you finally sort it out, but the lighting has changed and you need to start from scratch.
Don’t get bogged down by your camera until it’s actually time to shoot.
The goal should be to do 90% of the heavy lifting/decision making before you even look through your lens. This not only involves finding the best place to shoot (as discussed in the previous step), but also finding the best placement for your subject.
So really, this part is very simple –
Just place your talent and look at them. What are you seeing?
Is there too much contrast? Maybe split the difference between where you’re standing now, and a brighter (or darker) area.
Not enough contrast? Perhaps you have to rotate your subject a bit to really offset the light to one side.
You may be able to dial in your “lighting” in just a minute or two by making minor adjustments to the placement of your talent. If you were to attempt this while also wrangling your camera/monitor/rig, tweaking settings, and so on, you might never get the shot before the light changes.
You’ll still need to adjust camera settings before you actually start shooting, but at least now you have an ideal starting point to work from.
Step 4: Frame it up with your camera and make technical adjustments
With the other steps complete, now you can actually fire up the camera and take a look at your frame. And just as soon as you do, the limitations of your camera will reveal themselves.
Your eye will always see more dynamic range than your camera, and the same goes for color contrast and other key variables too. So as you look through the viewfinder, you’ll start to see some issues you want adjusted – perhaps the shadows are too crushed or the image is still a touch too contrasty.
This is when you can start dialing in your camera settings, exposure, and picture profiles to get it just right. And if you nailed Step 3 (and are comfortable enough with your camera) this part should come together very fast.
This is also the time to make any final framing tweaks before you begin shooting.
As a quick side note, I highly recommend shooting with zoom lenses in natural light. Unless you’re shooting at night and need the fastest prime you can get your hands on, or you plan to shoot everything on single prime lens (so you don’t have to stop to switch), zooms will always keep you moving faster.
Step 5: Shoot quickly, move to your next location, repeat
Just as soon as you’ve captured your first shot (or perhaps before you’ve finished), the lighting will change. Maybe a cloud shifts or the sun drops a little bit. Or the beach sign you were using as a makeshift reflector isn’t at the perfect angle anymore and now you’ve lost your light.
This will happen roughly every 20 – 30 minutes when you’re shooting in daylight, and it only gets more extreme during sunrise/sunset hours.
This is another reason why speed is your friend on set. The faster you can get what you need, the better.
Assume that by the time you’ve set up your shot, you’ll have just a few minutes to actually capture what you need. Always avoid unnecessary extra takes when shooting film/video, or if you’re shooting stills, limit yourself to a set amount of shots so you don’t run on unnecessarily.
The second you’ve shot out a specific area in your environment, move on quickly to the next area and start the process from scratch: Scan the environment, find the optimal point of contrast, place your subject, adjust framing, shoot, repeat.
The great thing about working at a rapid pace like this, is that it will create a sense of urgency that drives new creative ideas, despite the limitations that it imposes. You won’t always capture exactly what’s in your mind, but sometimes what you discover is even better.
And that’s all part of the fun of shooting in natural light. If you need everything to be 100% planned and controlled, you could shoot in a light controlled studio with all the gear you need right at your finger tips.
But personally, I have a lot more fun working like this…
How about you? Leave a comment below.
For more articles like this emailed to you every Sunday, sign up for my newsletter here.
For exclusive filmmaking articles every Sunday, sign up for my newsletter here!
12 Comments
Tempo Garments
atDont pass up Tempo Garments incredible mens shirt sale! View our carefully chosen collection of premium shirts at incredible savings. Choose from classic pieces that never go out of style or trendy looks to upgrade your wardrobe without going over budget.
Shalamar Hospital
atShalamar Hospital’s dental clinic in Lahore is committed to providing top-notch dental services, combining expertise with a patient-focused approach for your complete satisfaction.
OSH UNIVERSITY
atOsh University consistently ranks among the best medical universities . With a focus on academic excellence and global recognition, it’s a top choice for aspiring healthcare professionals.
Ronald Johnson
atThanks for writing this article. I’m curious, would you say that natural light is more aesthetically appealing or more beautiful? What “feeling” or “mood” does it give in your opinion?
Do filmmakers avoid natural light because they prefer to not work with such limitations, but if they had a choice they would choose natural lighting?
Would you say that studio light is akin to autotune? In the sense that it is “cheating” how do filmmakers of natural view filmmakers who use artificial light? Do they view it negatively or have strong opinions against it or view it more as an aesthetic preference?
I am new to this so I do not have much knowledge but I desire to learn. Thanks!
Noam Kroll
atGreat questions. It’s all subjective, but I prefer natural light. It is more organic looking, and creates a more improvisational style on set, which I like.
Other filmmakers are different. Some don’t like the limitations, and others just want more control on set. But I wouldn’t say studio lighting is like auto tune, since it takes a lot of manual control to get it right. There are no right or wrong ways to approach lighting, it just comes down to your personal taste!
Amaan
atThank you very much for the article very important in learning to deal with the hands your dealt with and to improvise on the spot
Noam Kroll
atGlad it was helpful, Amaan!
Thuryn Mitchell
atYou might no get a lot of input, but all you do is extremely helpfull
for so many of us. Many many thanks Noam, and cheers from Madagascar!
Noam Kroll
atThank you so much, Thuryn. Really appreciate the kind words.
Justin Woo
atDig this very much. I appreciate the breadth and depth of your experience, Noam!
Noam Kroll
atMuch appreciated, Justin!