I recently published a detailed article all about the process of producing my feature film PSYCHOSYNTHESIS for just $25K. As a follow up, today I want to share a written account of my entire post-production workflow from end to end.
What I believe was unique about my process, was that I used FCP X almost exclusively throughout the entirety of post.
I’ve already outlined my thoughts on FCP X and WHY I decided to use it on this project in this blog post. For the purpose of this article though, I want to outline the HOW, and explore each phase of the pipeline in some detail.
So let’s jump in and start at the beginning:
INGEST, PREP & SYNC
Way back on December 15th, 2018 – roughly two weeks after we wrapped production – I stepped into FCP X for the first time to ingest all the material and set up the project.
Knowing that I would edit the film myself (without an assistant editor) I made some choices in production that would save me a lot of time. Notably, I chose to shoot the film in ProRes 422HQ in 2K resolution on my Arri Alexa Classic 4:3.
While my system is capable of cutting RAW footage shot in much higher resolution (6K, 8K, etc.), it’s never as fast as ProRes, especially in 2K. And from a creative perspective, anything that speeds me up in post is a good thing. I like to work quickly and off of instinct, and working with small, manageable files (without having to deal with a proxy workflow) does that for me.
In FCP X, I simply imported all of the raw video clips and audio clips into an event called “FOOTAGE & SOUND”.
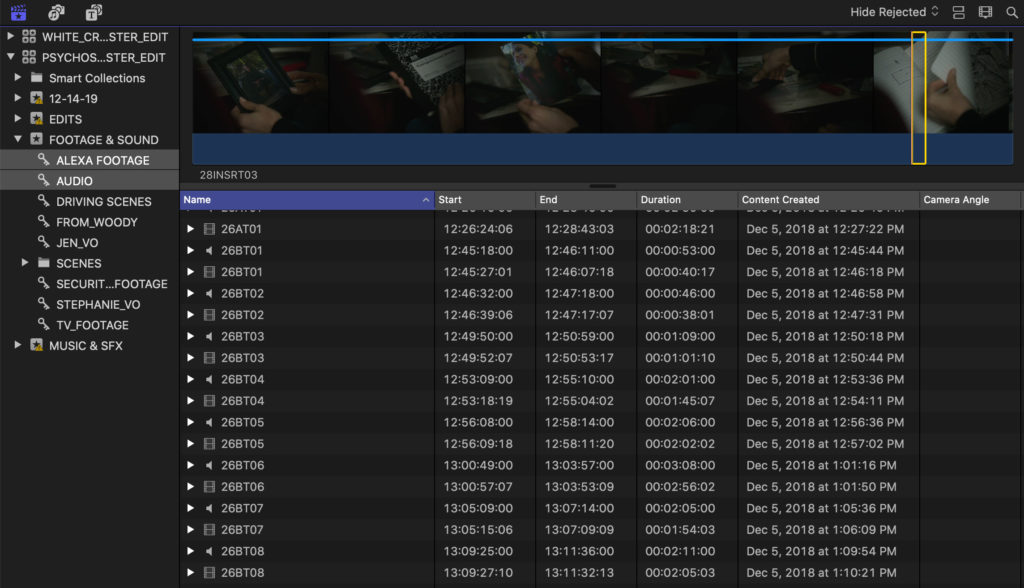
To sync the clips, all I had to do was select my two keyword collections (sound & footage), organize the browser by timecode, and select each pair of clips to automatically be sync’d.
We used an Ambient Lockit device on set to sync the timecode of the Alexa camera with the Sound Devices mixer. So again, this made things really easy in post. This is how the clips looked when organized (automatically by timecode) in the browser –
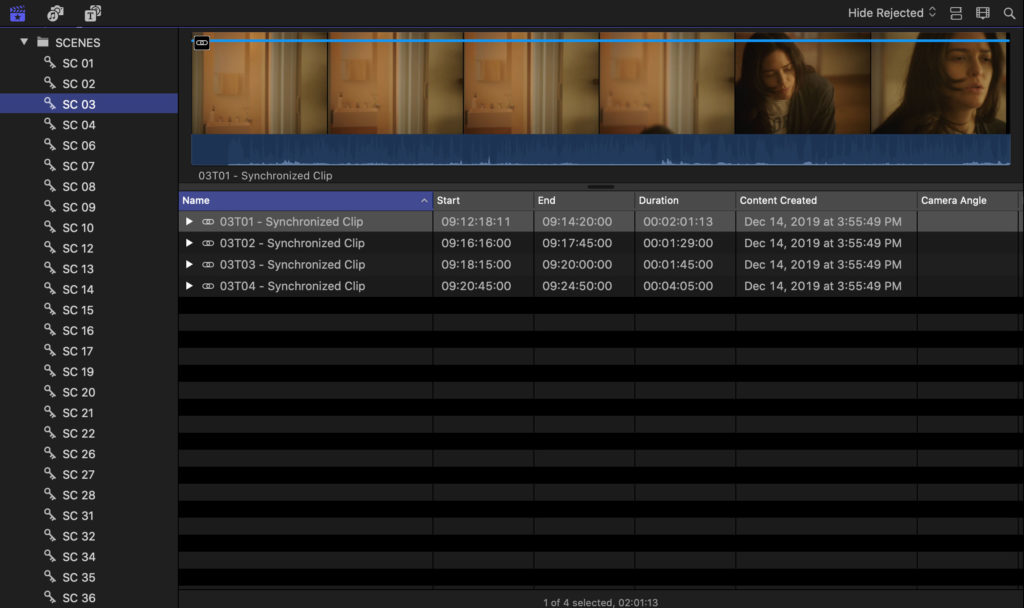
It took no time to get all the clips sync’d up. Once that process was done I moved all the synchronized files into a folder labelled “SCENES” and was effectively ready to start editing.
Before starting though, I took some time to import a bunch of temp music, sound effects, and sound design elements into the project as well.
Once I get rolling with an edit, I want to work in an environment that allows me to work at full speed. If I need to stop every five minutes to search for a music track or download a sound effect, I’ll never get anything done. Granted, much of this work has to be done AFTER the picture is locked, but I try to do as much as I can even in the early stages.
All in, it only took 2 – 3 hours to set up this master project file (library), which really is nothing for a feature film. The rest of the process however, took much longer 🙂
THE ASSEMBLY CUT
Like most filmmakers, I like to start with a traditional assembly that includes every line of dialogue in every scene in the movie. The goal with this pass is simply to see the shape of the material before you really add any artistry to it.
Again, at this stage speed is very much my friend. I’m not aiming for perfection, simply a literal and technical representation of what I’ve captured – All the footage laid out on the timeline in order. Simple as that.
I tend to shoot very little coverage on set, so there’s not a massive amount of raw footage to sift through as I build out the edit.
An average scene I shoot might have 3 – 4 takes from two angles, meaning I may only need to review 8 takes total while cutting any given scene. This equated to roughly 30 – 45 minutes of footage review for each scene.
After reviewing each clip for a given scene, I would drop my selects straight into the timeline and start building out my edit – one scene at a time until the very end.
While in this phase, I gave myself a target of 5 minutes to be edited per day, which typically yielded 2 completed scenes. I figured the assembly cut would be roughly 90 minutes, and at that pace I’d have a cut in 3 weeks or so, even factoring in a few days off.
Ultimately, that’s almost exactly how it played out. Some days I was able to cut 10 or even 15 minutes of the film, other days I didn’t get through much at all. But on average, I was hitting at least 5 minutes per day, which brought me to the finish line pretty quickly.
I’ll also mention that I did all of this in one big timeline in FCP X. Some editors like to create a new project/timeline for each scene, others like to work in 10 minute “reels” to keep the project manageable. Personally, I like throwing everything in one big timeline and seeing what it looks like globally. It helps me visualize the story, in the same way a treatment helps you see the broader perspective of a screenplay.
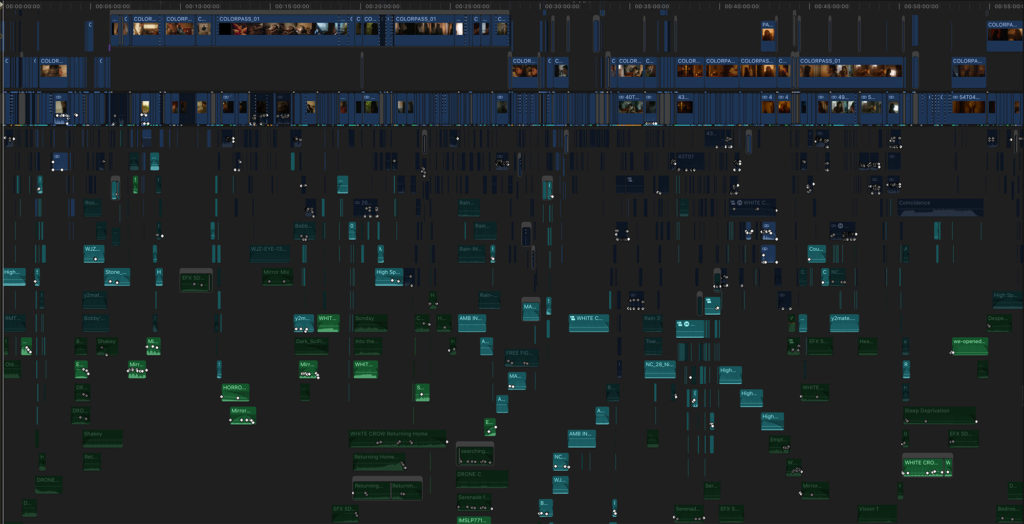
At the end of the 3 week-ish period, this is what my timeline looked like –
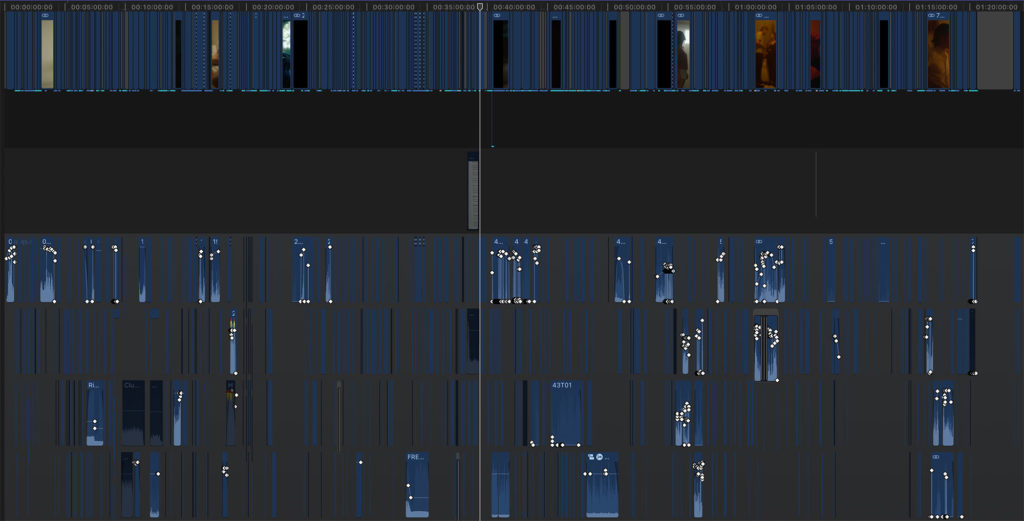
And with that, the first assembly cut was done!
I should also mention that I ran this entire project off of an OWC 16TB raid, plugged into my aging 2013 mac pro trashcan via thunderbolt. This setup was more than fast enough to run virtually everything the project required.
FROM ROUGH CUT TO PICTURE LOCK
After I finished the first assembly, I took a few days away from the film before watching it from front to back with fresh eyes. Prior to that point, I had only watched individual scenes as I cut them, never the whole film in sequence.
As expected, there was a lot of work to be done, and most of it was obvious. Some scenes needed to breathe more, others needed to be tightened. Changes had to be made to temp music, performance, pacing, and virtually every other element.
At the same time, I knew I wouldn’t have to reinvent the wheel. A lot of the material was working really well, even in this extremely raw form, so that was a great sign.
With that, my goal for the next cut was simply to enhance everything that was working, and fix the most glaring issues. This next pass was all about the broad strokes, and as you might imagine the process went much faster than the assembly cut.
On the very first cut, you’re still getting a sense of the footage, your project, workflow, etc… It takes time to get your project up and running and figure out how to work efficiently. By the next cut though, things usually move quicker. Everything is already laid out for you, it’s just a matter of cutting, replacing, lengthening, swapping, and timing the foundation that’s already been built.
In under 2 weeks, I was able to pull together my next cut applying my own set of notes from the assembly. Then again, I took a few days away from the film, re-watched it, and made another set of notes before immediately jumping into the third cut.
I knew at some point soon I would be sharing it with people on my team for feedback, but I wasn’t quite there. I always want to take the film as far as I can on my own first, and then show it. At least then it’s a better representation of what I’m trying to do, and the notes can be that much more useful.
Over the first 4 of 5 months of editing, I created 7 cuts of the film (including the first assembly), simply by following the basic workflow outlined above: Edit a pass for a week or two, take a few days away, watch front to back, make notes, repeat.
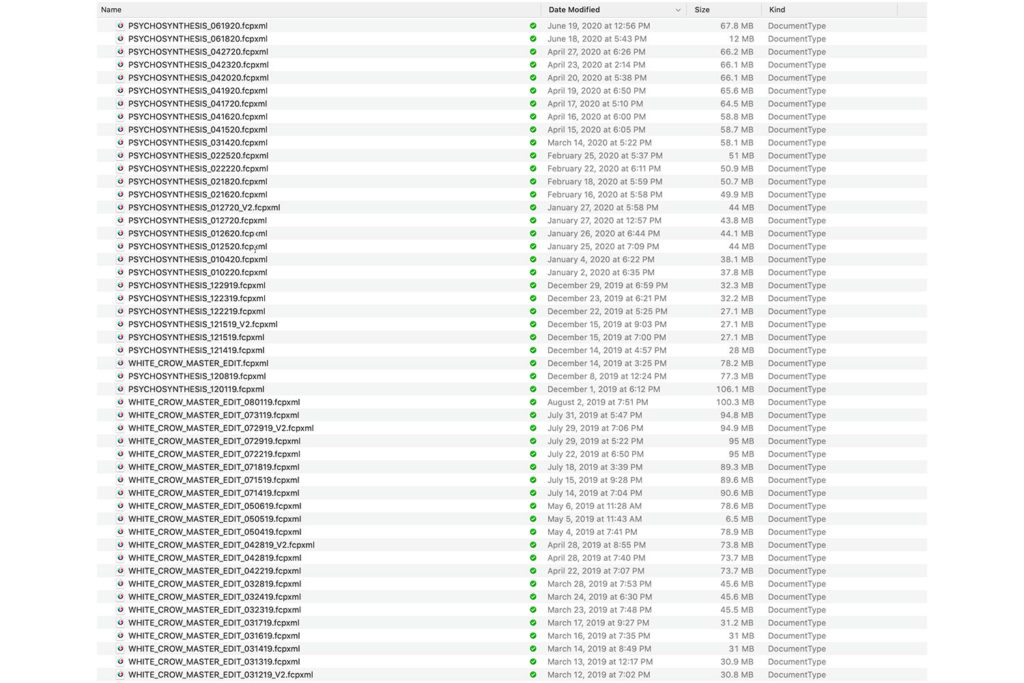
With each cut, I would simply duplicate my project (my timeline, for any non-FCP X people), and rename the new cut V2, V3, etc. I would often jump back into an old cut to pick out a shot or scene that I decided to revert to, so this naming convention made it easy to find whatever I might need.
Whenever working on a new cut, I would also export an .fcpxml file out of FCP X into my dropbox. This was my failsafe – if my whole system crashed and I lost all my files, I would still have the .fcpxml file on dropbox, which I could use to rebuild the library along with my backup copies of the raw footage. This is what the folder looks like today –
6 months or so into the edit, I began to get some feedback on the cut, mainly from people who had worked on the film. Ultimately this input prompted me to take a new approach to the next set of edits, one that abandoned the original script.
It’s not that the film needed to fundamentally change, but I needed to find its driving force. I wanted to find the movie’s “thing” and bring it front and center while minimizing everything else.
After a lot of reflection and discussions with my team, especially my wife Jen who worked through many edits with me, we identified two big things that needed to happen:
- Some of the backstory in the film needed to be trimmed away to keep us focused more on the present moment
- The stylized parts of the film (which were working really well), should be highlighted even more, and inform the tone/pace for the rest of the film
These two big shifts really took the film in a different, and better direction.
Editing is just as much about what you leave out as it is what you keep in. It was amazing to see how the story could be more full when we pulled away certain elements in the story and left more room for the viewer to play a part in the experience.
At the same time, these type of changes can take a lot of trial and error to implement. It’s one thing to say you want to make a scene feel moodier or create a deeper atmosphere, but how do you actually achieve that? The same goes for cutting exposition or dialogue – you may have a hunch about what will work, but you never really know until you try.
This is an area where FCP X really came through.
The magnetic timeline allows you to very easily try new ideas. You can grab a whole scene or sequence and move it somewhere else in the timeline in literally seconds. You can freely swap shots, re-arrange scenes, audition takes, and reverse course – all thanks to the basic functionality of the program. I’ve always said this feature (the magnetic timeline) is the most under appreciated asset of FCP X! People are scared to use it, but it makes creating and trying out new ideas so easy.
There was one scenario where I was trying to decide what to do with a key scene in the story that revealed an important detail. My choices were: A) cut the scene, B) keep the scene, C) move the scene later, or D) move the scene earlier.
On another editing platform I might be inclined to try just a single option, but knowing how easy it is to make changes and revert them, I just tried all four versions. The answer was D – not what I expected, and not what I would have tried first, instinctually.
Within a month of trying this new approach, I had created an entirely new cut that was working much better. At this point, I had already been editing for 7 – 8 months, but at least the narrative was almost where it needed to be.
That said, I still didn’t lock the picture at that point. This was right around summer of 2019 – when my wife just had our baby – and naturally I had to take some time away from the film.
I planned to do this from the get-go, as I thought having a fresh set of eyes (after a couple months away) would be really helpful in getting the cut into it’s best form.
And that definitely was the case. Prior to taking that break, I was really close to locking the picture… But having some time away from it gave me even more ideas, and I spent the next several months continuing to tinker with the edit.
In these final few months, I didn’t make monumental changes, but smaller refinements to the edit that made it feel more polished and complete. Had I been able to work at full speed during this period, I probably could have gotten through everything in a couple of weeks. But I was also juggling some commercial projects and family obligations that pulled me in different directions at times.
Finally, roughly 1 year (almost to the day) after wrapping production on the film, the edit was locked –
Months later, while completing the finishing work (sound & color) I would re-open the edit to make some minor adjustments. But for all intents and purposes at this stage I began to to enter the next phase: Finishing.
THE FINISHING STAGE
This project was highly unusual in that I did much of the finishing work as I went along, particularly regarding color and sound.
On most films of course, you lock the picture and then handle color/sound as separate processes. That’s what I’ve done in ordinary circumstances too – but given the budgetary constraints of this project, and the fact I would be doing nearly all the post production myself, I saw no harm in doing some of the finishing work along the way.
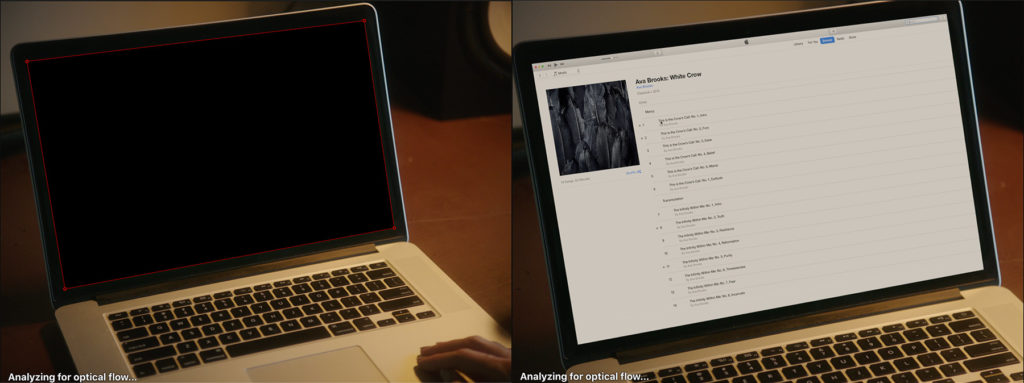
For example, there were a lot of screen replacement shots that had to be done – TV’s, phones, computers, etc. and I took care of those myself during the rough cut phase.
This was a lot of work, as I had to design fake Wikipedia pages, Google searches, security camera dashboards, and other assets that were then composited right in FCP X.
This was super easy to do, and at no point did I need to step into After Effects. I simply used a distortion setting to match the designs/screen captures to the size of the screen, and drew a mask around the foreground to create clean lines. From there, I would turn the opacity down to 80% on the screens to get some of the shine/glare back on the TV or device. Here’s an example –
So by the time I entered the “finishing” stage for this film, much of the actual finishing work had already been done. Not only in terms of screen replacements, but color and sound too, which were also worked on in the same manner.
Below I’ll dive into sound and color individually to break down how I navigated those processes more specifically.
SOUND EDITING & MIXING
As I alluded to earlier, I find it incredibly difficult to cut picture without addressing sound issues. Often times a background noise or inconsistent room tone can completely throw off my judgement of a scene… So from day one I was focused on sound while working through the edit.
This started as early as the first assembly cut. On each scene I selected which mic to use for each dialogue track, added crossfades, dropped in room tone, and even added some basic sound design and background textures.
I was also organizing all my audio files using “audio roles” at this point, identifying them either as music, dialogue or fx. This would make it really easy for me to create deliverables later on.
My process for editing the sound was completely unconventional as it happened simultaneously with the main edit. I might be in the middle of cutting picture for a scene, and I would notice there’s no sound effect for a car that drives by. Right then, I’d make the audio fix, rather than waiting until I was working in a dedicated sound session.
So with each picture pass that I edited, the sound got a little bit better too. I would make adjustments to levels, drop in new sound effects, and even step away from the edit occasionally to record my own original sound effects using a Zoom H6 recorder at home.
Once I took the audio as far as I could on my own, I sent out the dialogue track to be cleaned up and mixed by Woody Woodhall of Allied Post/LAPPG.
I would have sent him the entire project to mix, but in the interest of keeping my post-budget in check I thought it would be most efficient to have him focus just on the dialogue track. Especially considering the music and effects were already sounding really great.
As far as workflow was concerned (for the dialogue track), I used X2Pro to convert my .fcpxml file into an AAF, which imported into ProTools seamlessly.
During the picture edit phase, I had also been updating all the music cues on a nearly weekly basis, whenever my composer (Craig Saltz) would send new cues my way. This meant there was almost no work to do on the music once the picture was locked, since all the cues were up to date.
The same went for the sound effects. Whether they were original sounds I recorded, or ones sourced from a library (I used soundsnap.com), almost everything was already in dropped in place and mixed even BEFORE picture lock.
The only real audio work I had to handle after picture lock was dropping in dialogue track from ProTools, and making some minor mixing adjustments to ensure everything felt consistent.
COLOR GRADING
Similar to my sound editing workflow, the color grade was an ongoing process that began as early as the rough cut stage.
I always like to ensure my films are in good shape color-wise before sending them out for any feedback. So even while I was still cutting picture (way back in the first 3 or 4 months of the edit), I did my first color pass right inside of FCP X.
I was able to knock off this initial color pass in just a single day, which made the film look so much better. I just used the built in color panel on FCP X and went clip by clip, adjusting color balance, contrast and saturation as needed. It certainly wasn’t 100% there after this first pass, but it was far more presentable than the original.
Many months later when I eventually locked picture, I did bring the entire project into DaVinci Resolve to re-color it more carefully. Resolve gives you so much more control over your images and makes it easier to perform critical tasks, like matching shots to each other using reference frames, so much of that work was left until this stage.
Bringing the project into Resolve was incredibly easy. I simply imported the .fcpxml file for my locked timeline and DaVinci Resolve did the rest. No need to conform any footage, since I was already editing with the native files right inside FCP X.
I spent roughly a week coloring the entire film from front to back. This process could have taken much longer, but since the footage was already in great shape things moved really fast.
Not to mention, I tend to work very sparingly with power windows and color keys – which saved a lot of time as well, since those elements typically take a while to dial in perfectly.
After this one-week period, I outputted what I call a “Working Color Master” of the film. This is essentially the entire movie with color correction applied, exported as a single full-res video file. For all intents and purposes it could be a final color output, but I call it a “working” master because I anticipate going back in at some point to make some minor tweaks.
Back in FCP X, I dropped this newly exported color file into my project, as the top layer in the timeline. This would easily allow me to toggle it on and off to see the before/after split of what I had done with color.
As I continued to work through the edit, I would occasionally come across a shot or scene that needed to be re-colored. Perhaps something didn’t match 100%, or I wanted to go a different direction with the color palette in a given scene.
In those situations, I would jump back over to DaVinci Resolve, re-color the shot(s) as needed, and then export a “patch file”. Instead of re-exporting the entire movie again, I would just output the scene or shot or sequence that had been adjusted. That way the render would run much faster and I could just replace that single chunk in my main project back in FCP X.
After a few rounds of this, the color was 99% of the way there. That said, I did make a few final color tweaks right inside of FCP X, even once the color master and patch files were all dropped into place.
For instance, on one scene I felt the grade was just a touch too strong – so I dropped the opacity of my color layer down to 70%, which brought back some of the original color from the camera file.
In others instances I would warm up an entire scene by 5%, or desaturate a scene by 10%. These type of little tweaks could have been done in Resolve as well of course, but they were so small that it was faster and easier to take care of them right inside FCP X.
In the end, I was really happy with the color palette that was achieved in post.
The grade oscillates between a warm hazy look and a cool muted look as we explore different areas of the story. Both looks were created using minimal adjustments and without power windows/keys, to give the movie a more analog aesthetic. I never wanted to over-stylize the footage and make it look gimmicky in any way… But I did want a realistic 35mm film-style look with some added flare to it, and I think that’s where we landed!
Throughout the color process I also created a ton of color grading LUTs, which have now been released in various packs on my www.cinecolor.io platform for those interested. I even have a free Arri Alexa Classic LUT on the site which I developed during the color phase too.
MASTERING & DELIVERY
A month or two after making my final tweaks to picture and sound, I was engaging with distributors and getting a sense that this film would be out in the world before I knew it.
That prompted me (after some time away from the edit) to re-watch the cut a couple more times and see how I felt. Overall – I was feeling really good. The cut had come such a long way, and was looking awesome.
But there were still a couple of elements that I wanted to dial in. A scene that needed to be trimmed – a shot that had to be lengthened. Nothing major, but substantial enough that I would need to unlock picture in order to make those changes… Which is what I did.
So for the last time I duplicated my master project in FCP X to archive what had been done already, and jumped into a new session to make final adjustments.
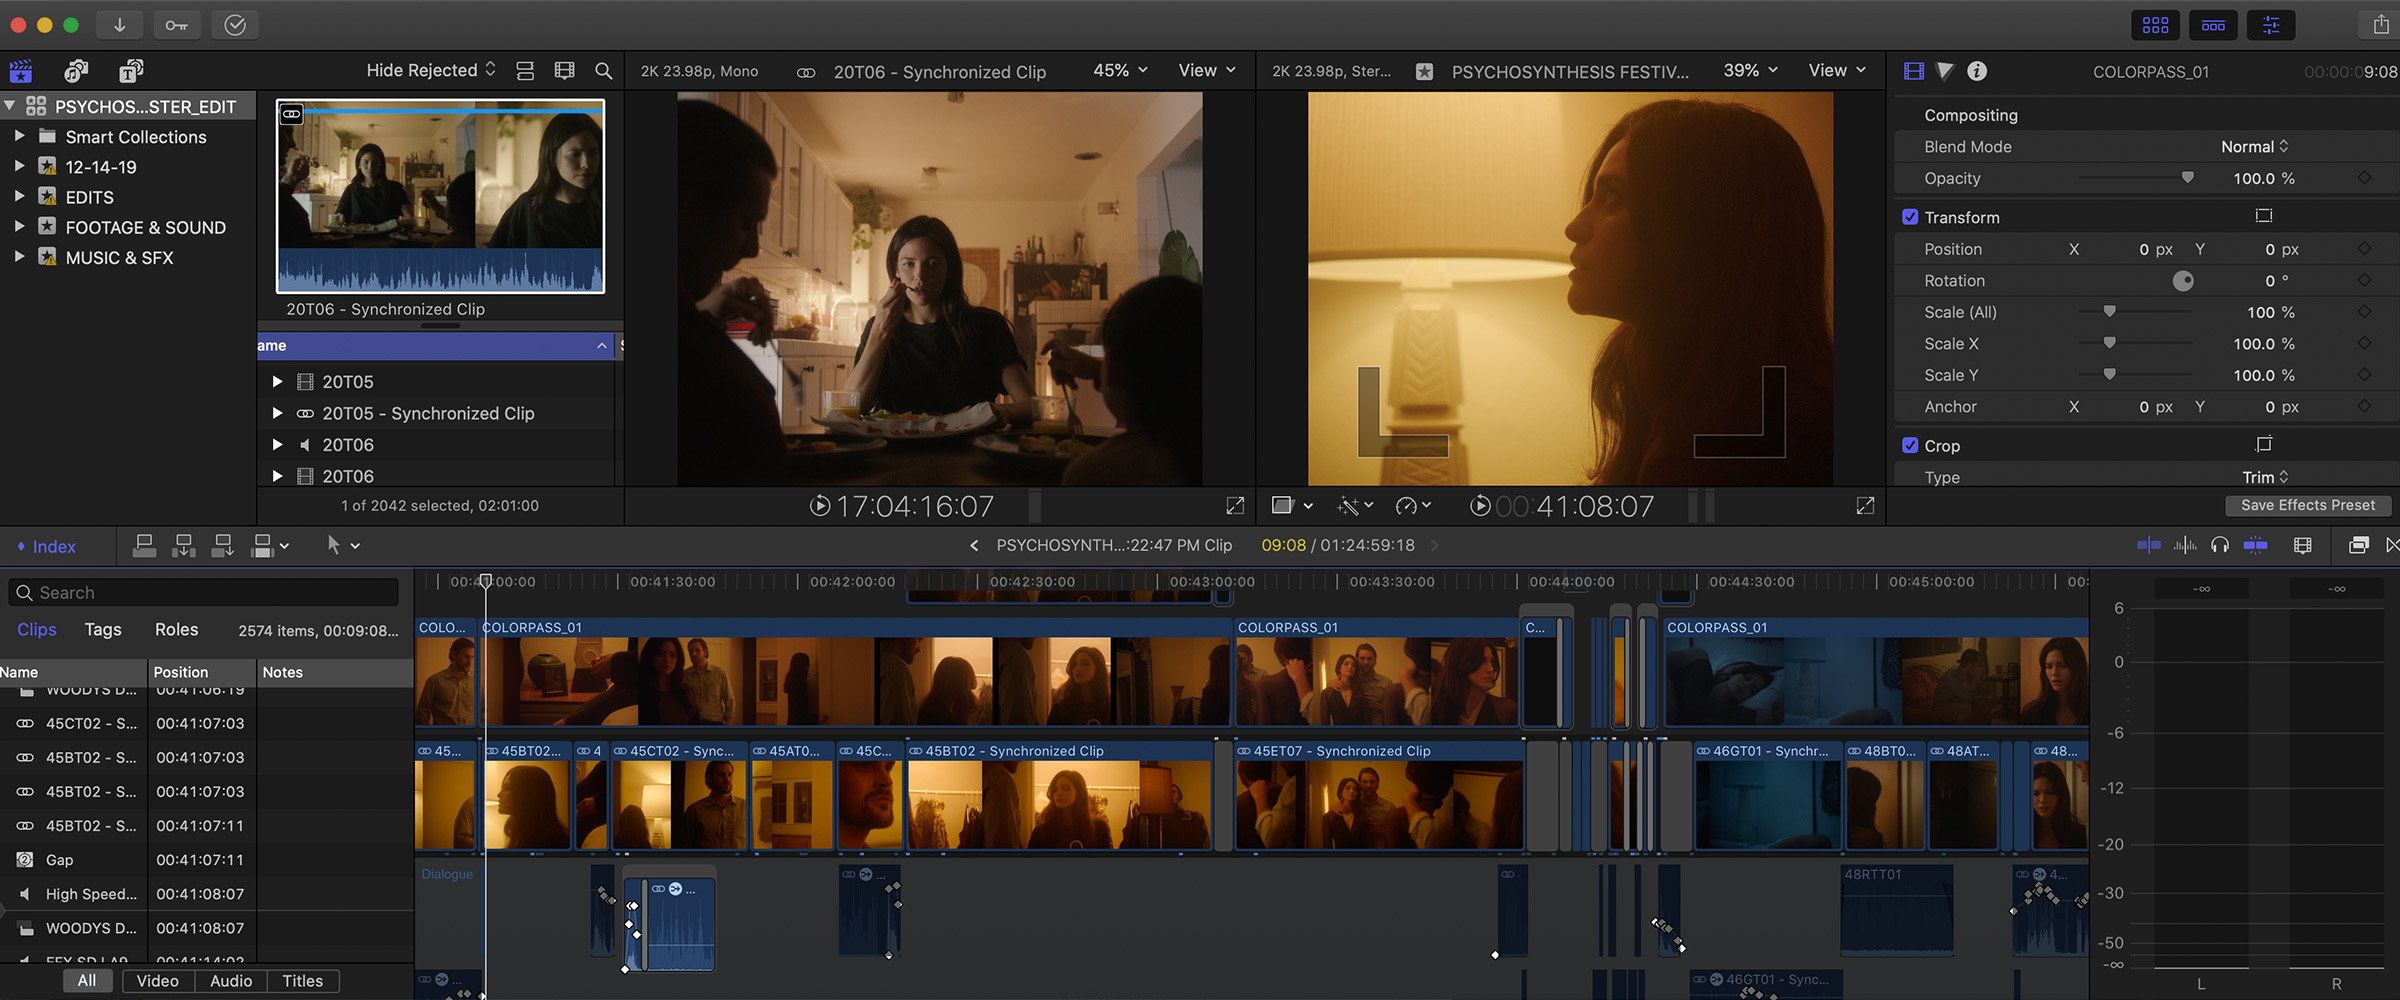
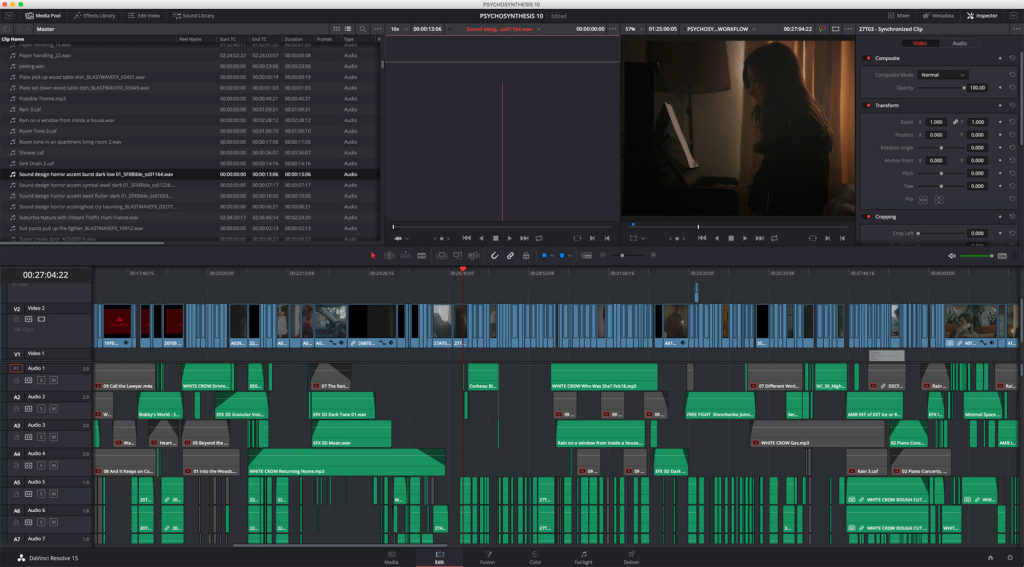
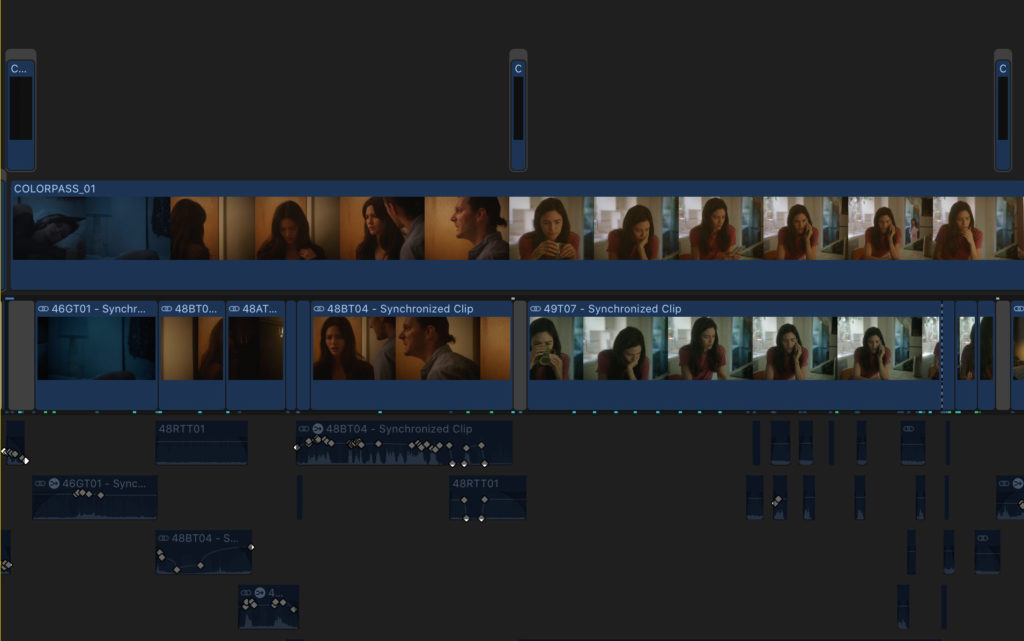
At this point, my timeline was getting a bit unwieldy. As you can see in the screenshots below, I had a ton of clips in the session, including the color master, patch files, and dialogue track all laid on top of the main edits –
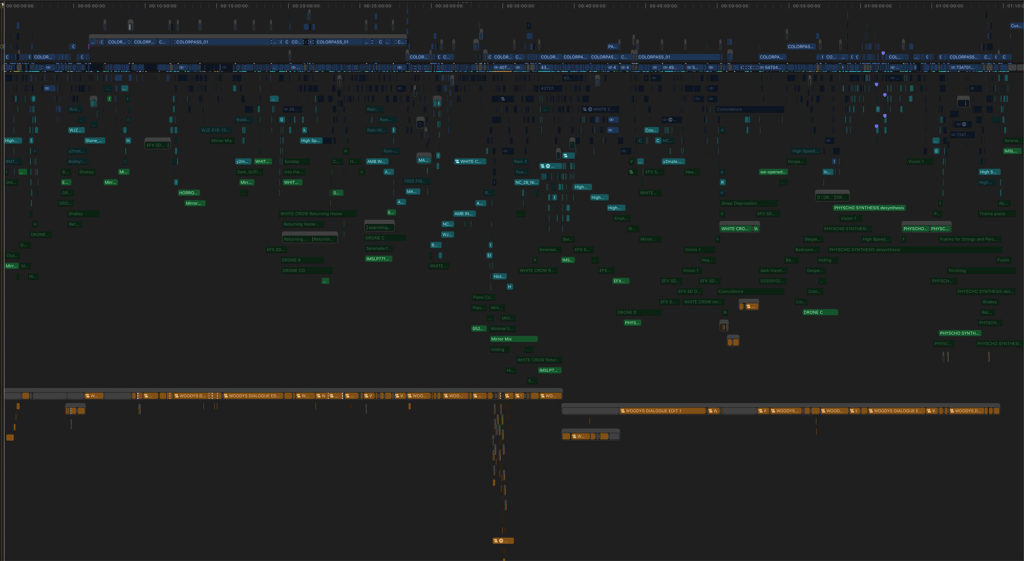
This meant that every time I wanted to cut a scene, I would have to individually make edits to the color/audio files in addition to the raw footage. Otherwise, everything would fall out of sync when adjustments were made.
Naturally, this slowed me down fairly substantially, as each edit took 3 times longer than normal. Luckily though, at this point there weren’t all that many edits to complete, so within another week or two all of these little tweaks were dialed in. And because I was primarily removing footage (not adding) it didn’t create issues with needing to mix new audio files or color new video files.
And with that, the movie was done!
Once we signed the deal with our distributor (which I’ll be sharing more about soon), then it was time to deliver the film.
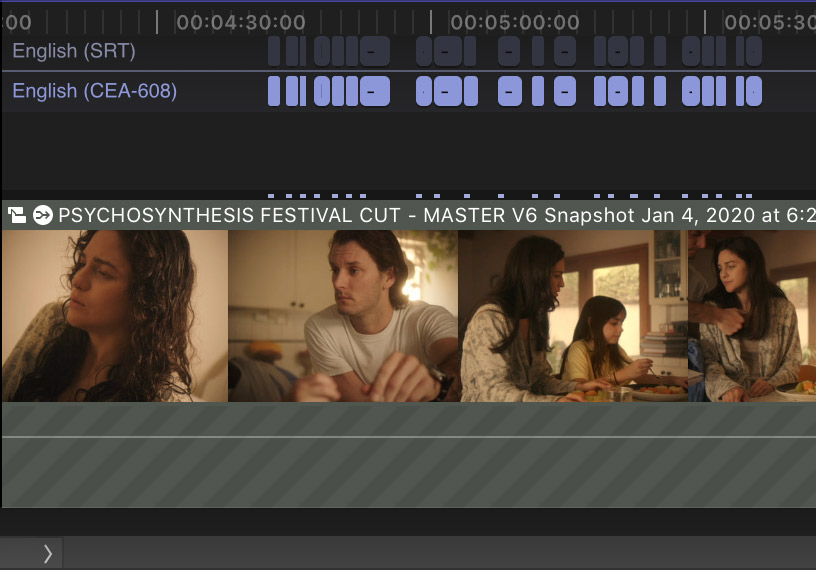
One of the key deliverables at this stage was the subtitle file, which I had generated using rev.com way back in the original picture lock phase. Since I had unlocked picture though, I had to re-time all of the subtitles manually in FCP X. It sounds like a lot of work, but I think I did the whole movie in under 30 minutes – it was actually lightning fast.
In FCP X, the subtitles appear almost like clips in the timeline, right at the top of your project session. You simply need to drag them like you would any other clip to time them out properly, and then can export the captions in a variety of formats straight from FCP X –
Once the captions were done, it was time to export a master file of the entire film.
To do this, I first selected every clip in my timeline/project in FCP X, and created a compound clip – which is essentially just a nested clip for the non-FCP X editors out there. That simplified my timeline dramatically, and made it look more like this –
Working with a compound clip allowed me to make some global tweaks to the entire movie before mastering it. I added a Finishing LUT to the entire film to make all the colors look more uniform, and then key framed the audio levels (up/down by roughly 3 – 6 db as needed) to help smooth out the audio.
While the mix was already done in the main session, the audio in some scenes was a touch low, while others were a little hot. So throughout this process I manually keyframed the audio levels scene by scene while carefully keeping an eye on the audio meter to ensure the levels were all in the same ballpark.
I also dropped the “AU Peak Limiter” effect from FCP X onto the entire audio track. I don’t think any of the audio was actually clipping/peaking at this point. But I wanted to apply the peak limiter just to be safe – it would ensure any levels that exceed 0db would be brought down so as not to degrade the final audio quality.
The project file that I was working with had a native resolution setting of 2048 x 1536 (4:3 @ 2K resolution). Upon mastering, I first exported this file to ensure I had the highest quality possible master in my archive.
My distributor also required an HD version of the film, so I created a new 1920 x 1080 project and copied/pasted by existing edit into that session. FCP X automatically resized the video for me to fit the frame, creating a pillar box on the left and right to suit the 4:3 aspect ratio of the movie.
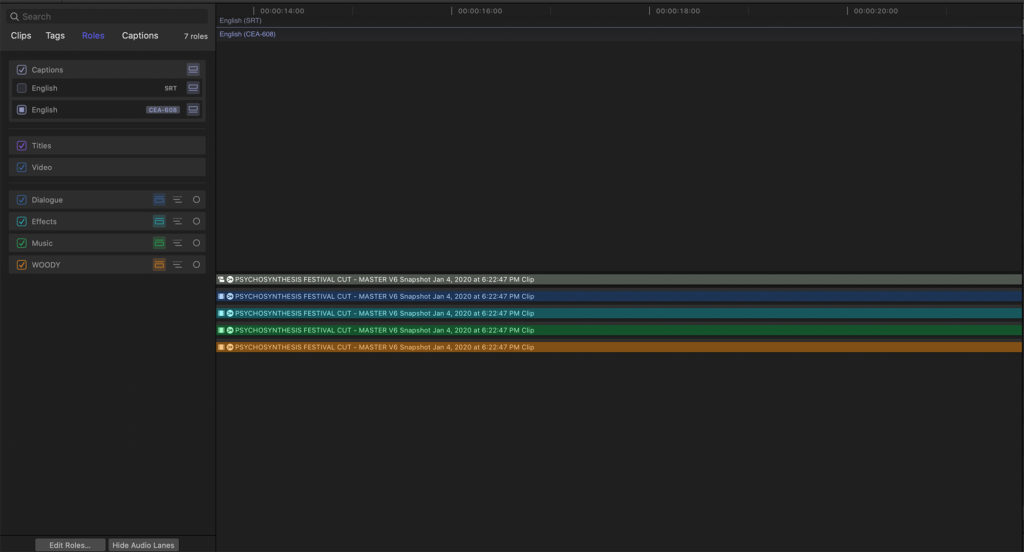
From there, I also exported audio stems from my original project by toggling on and off each of the audio roles I had set at the beginning of the project – dialogue, music, effects. This is another amazing benefit of working with a compound clip in FCP X, as you can still individually adjust or export your specific audio roles.
This is something that’s always required upon delivery, as buyers/foreign distributors typically require the dialogue track to be separated from the music and effects. That gives them the ability to overdub it in another language without losing the rest of the sound bed.
Once those tracks were exported, I backed up my FCP X project file for the last time – roughly a year and a half after I started cutting – and I was done!
It was a strange feeling being finished, as no project I’ve directing/edited has ever spanned this amount of time… I got so used to working on it, that I almost didn’t know what to do when it was over! But I’m glad to be at the finish line, and am very excited to get it out into the world.
In the coming weeks, I’ll be announcing my distribution and release plan for the film, which is coming very soon. So definitely stay tuned for that.
In the meantime, if you have any questions about my workflow or process, please leave a comment below.
12 Comments
Bryant Boon
atExcellent and thorough post on your process Noam, appreciate you sharing. I’m a newbie to FCPX (jumping in it for the VR/360 editing features, heads above Premiere) and in the process of editing a 360 immersive short film, this will help for reference immensely.
Noam Kroll
atThanks so much, Bryant. And best of luck with your short!
Heather LeRoy
atWow. Thank you for sharing this. I’m finishing my first feature. I did the initial rough cut in FCPX then had to transfer to Premiere for an editor (who didn’t work out). I got my project back and said F@#$ it! I’m going back to FCPX. I was concerned about exporting my final audio files for editing and mix until reading this. Thanks so much! Can’t wait to watch your film.
Noam Kroll
atAwesome! So glad you got something from this. Best of luck with your film.
Frank
atHi Noam! Can you say a little more about what the finishing LUT does by making the colors more uniform?
Noam Kroll
atAbsolutely. It adds a subtle color palette to all of your shots, making them feel more consistent. Let’s say one of your shots has a color key on it that is making the shadows really blue. Perhaps your finishing LUT has some warmth to it, which not only takes the harsh edge off of those blue shadows (by warming them slightly), but also warms up other shots in your project by an equal amount, making the colors blend together more seamlessly. It’s subtle, but can make for a noticeable effect.
Oyakhire Russel
atThank you for being so open about your process.
Noam Kroll
atAnytime!
Jim McQuaid
atVery interesting article. I’m a big fan of FCPX. I also tend to do color correction as I assemble and basic audio work as well.
In fact with the latest color curves in FCP, I find that Resolve is much less needed, in general, since I rarely do power windows.
Noam Kroll
atVery cool – would love to hear about your workflow sometime.