On my latest feature film, I decided to shoot all of our moving car shots on green screen as a means to save time and money, while also making for a safer experience. In this post, I’ll outline exactly what we did in production and post for those of you looking to do the same.
First though, I’ll briefly outline why I chose to shoot on green screen to begin with.
Why Green Screen?
This feature film was practically a no-budget production, and I knew going into it that the car scenes would be a challenge. We needed to shoot about 10 minutes of the movie in 2 separate cars, and one of those scenes was supposed to be a car chase.
Without the budget to shoot practically (using a process trailer), it ultimately made sense to go the green screen route. It was also safer than attempting to shoot it all in a moving car without proper gear or camera support, which would be pretty risky.
Not to mention, I shot this entire feature film on a 50mm lens. That’s a long focal length for the inside of a car (at least on a Super 35mm sensor). So even from a visual standpoint, it made more sense.
A slightly larger budget production might also consider going the LED wall route instead. Rather than shooting green screen, you could shoot a car on a small stage with moving backgrounds being projected/displayed behind.
That said, even if we had the budget, I likely wouldn’t have chosen that route. I’ve done several LED wall shoots now and find it kind of disorienting. Also, the technicalities often get in the way of the creative flow.
All in all, green screen is a great option for filmmakers in need of moving car scenes on a budget.
With that in mind, here’s how we pulled it off in production and post.
Green Screen Production: Driving Scenes
This feature was shot entirely with natural and available light. It was one of the rules I imposed on myself from the get-go, and made for a really unique aesthetic.
The one time I thought I might break this rule was during the green screen shoot. But ultimately, even that was able to be shot with natural light.
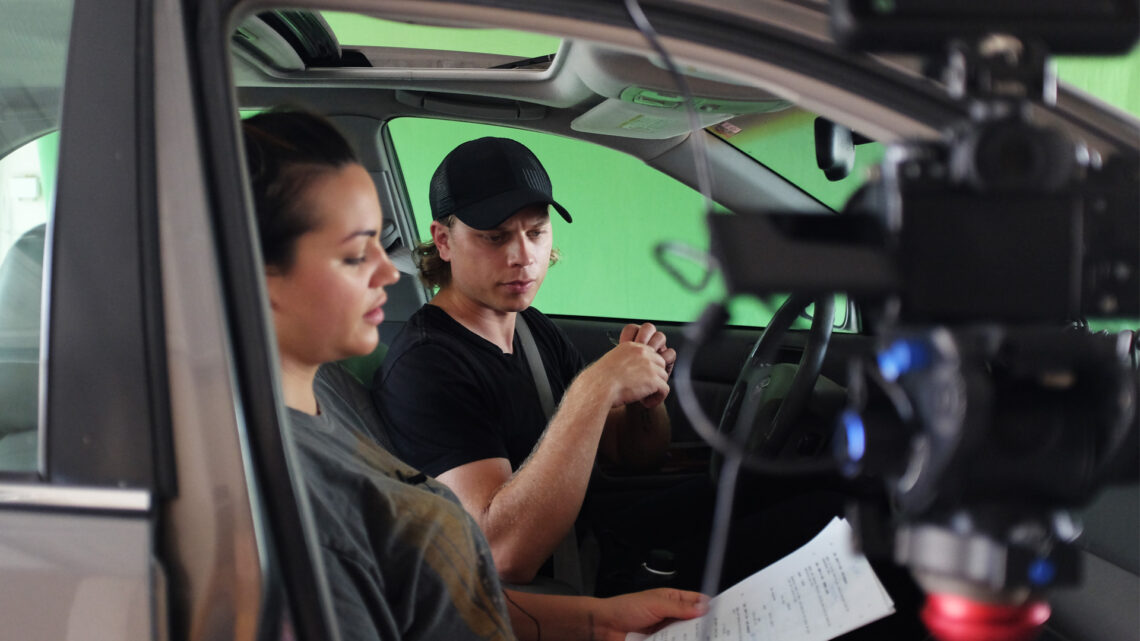
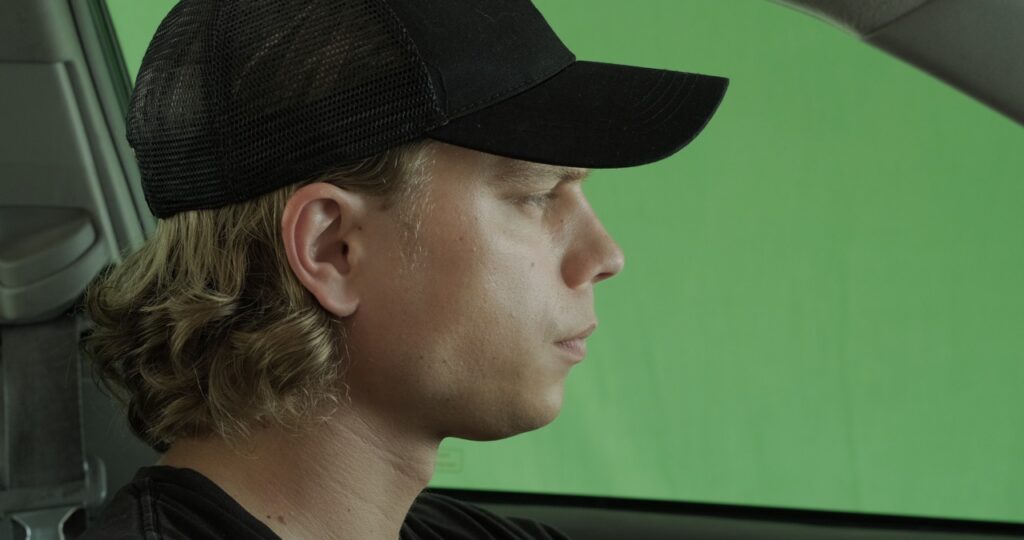
We drove the main vehicle into a friend’s garage, which had a basic fabric green green strung up, and pulled the front of the car out a little bit to let the natural daylight spill in. This was a perfect key light for the actors in the car.
The green screen itself was just lit with the ambient light bouncing around the garage.
For our setup, this was all we needed. That’s because all of our shots took place in the daytime, and none required any complex lighting or grip work to simulate movement.
For scenes that are supposed to take place at night (among other scenarios), you would also want to use additional lighting and / or rigs to sell the effect. The most obvious example being the passing of street lamps reflected on the windshield.
But for daytime scenes like ours, you can keep it really bare bones and still get great results.
On-Set Workflow
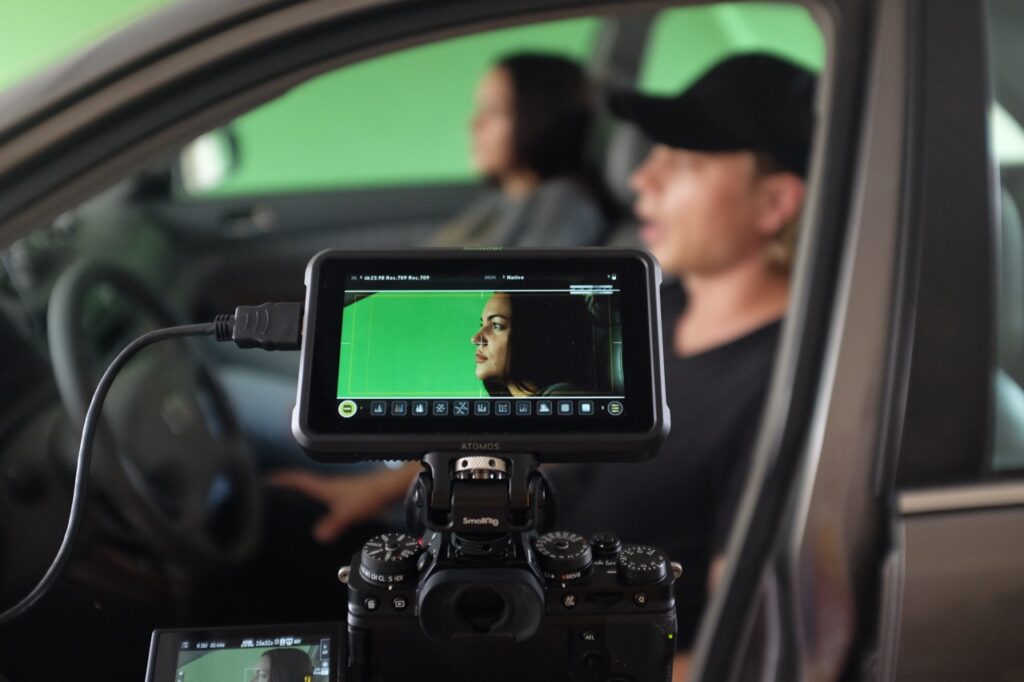
One another quick note about our workflow on set. We shot with a single camera, and only had one side of the car covered with green screen.
This meant that we couldn’t shoot full coverage of each scene all the way through without wasting a lot of time re-setting the camera.
Most of the scenes featured 2 actors – one in the driver’s seat and one in the passenger seat. Rather than flipping back and forth between coverage angles every time we finished a scene, we just shot out each angle in it’s entirety.
All of the driver’s side shots were taken first, which spanned 8 – 10 different scenes. Then we flipped the camera and green screen to the other side and re-shot all 8 – 10 scenes from the other angle.
This allowed us to shoot about 13 pages of material in only 5 – 6 hours.
At the end of the day, I took the camera into the car and shot a bunch of handheld inserts that we needed, like the car radio, hands on the wheel, and so on.
Post-Production For Green Screen Driving Scenes
The real magic with green screen of course happens in post.
There is no one size all approach either, as every scene has different technical challenges and creative needs. That said, I will outline my own process here as a guide.
BUILDING THE SOUND BED FIRST
I edited the entire movie using the raw green screen footage. If I wanted to, I could have done some temporary green screen work just to make it easier to look at.
But instead, I did the opposite. I kept the footage in it’s most rough form so that I would be forced to use sound design to make those scenes work (in the rough cuts).
I spent a lot of time picking the right background ambiences, EQ’ing and mixing them, and ultimately building a realistic soundscape for the driving scenes. That way, when I would eventually key out the background and drop in the plates, half of the work was already done.
There are so many things we can do visually to make our green screen shots look realistic – adding camera shake, blur, re-sizing, key framing exposure values, etc. – but we can’t forget that audio is a major part of selling the effect too.
TEMP GREEN SCREEN WORK IN FCP X
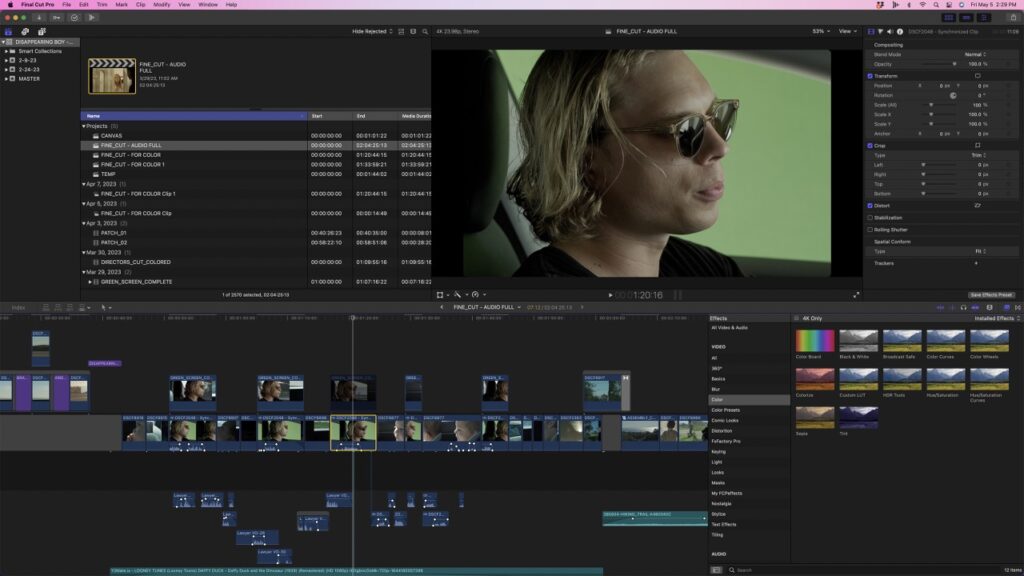
This entire feature was cut in FCP X, and at one point I actually wanted to do all the finishing work in it too.
Once I had a picture lock, I immediately began pulling color keys inside of Final Cut and trying to do some rough comps to see how it would look. If it looked good enough, I would have contained the work entirely in FCP X.
But even though I got some decent results, there was a lot of room for improvement. After a lot of trial and error, I ultimately knew I would have to bring the footage into Resolve to be keyed.
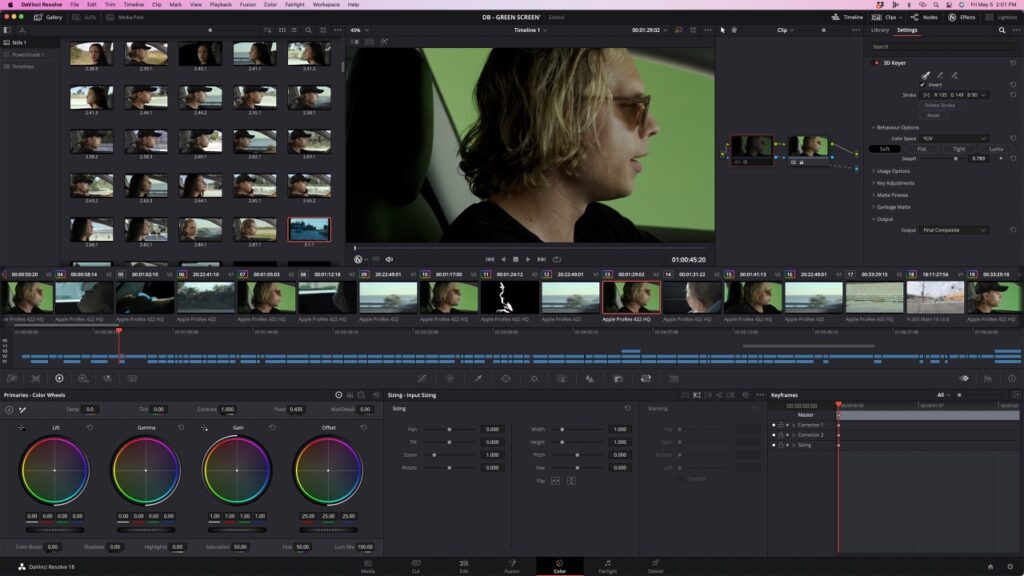
KEYING IN DAVINCI RESOLVE
Once I brought the footage into DaVinci Resolve, everything started to look way better. I was able to use the built in keying tools to easily key out the green background, and clean up the mask with way more precision than in FCP X.
Thankfully when we shot the footage, the ambient daylight levels remained mostly consistent. That meant I could copy and paste a finished look from one shot to another, and then just make small manual adjustments to refine the key if needed.
At this point I was still using some temporary background plates I downloaded from YouTube just to ensure it would comp together well. The next step would be to integrate some properly shot plates that were right for the context of these scenes.
FINDING BACKGROUND PLATES
Of the entire journey to complete these green screen shots, the background plates were the most challenging part of the process.
I began by attempting to shoot my own background plates on the Fuji X-T4, which is the camera I shot the movie on. I rigged the camera up to my car using a small suction mount, and kept the same 50mm lens on as I used for the main production work.
Unfortunately, the 50mm was just too long for the rig / setup I was using, and the footage was too shaky to use.
Then, I attempted to use two GoPros (one older one I had lying around, and later a new Hero 11) to shoot the background plates. I spent multiple days driving around LA with the camera mounted to my car, and got some pretty solid footage.
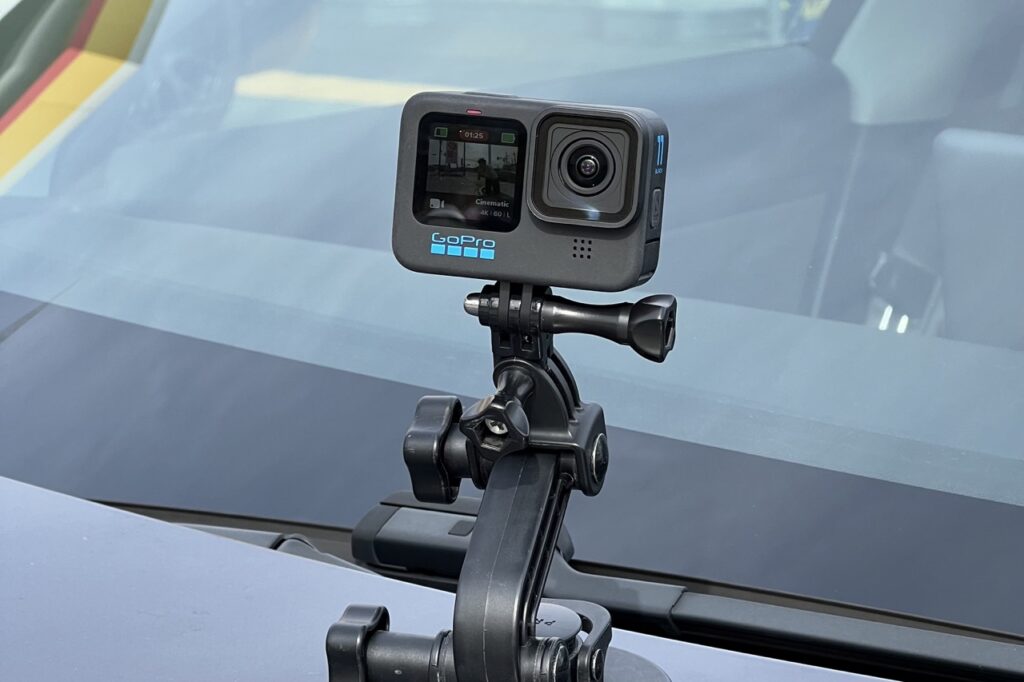
I had to add a significant amount of motion blur (in addition to simulating lens blurs) on the GoPro footage to make it work, and eventually it looked pretty good.
Interestingly though, there were several shots that did not work and I ended up re-shooting them with my iPhone. In general, I found the iPhone footage to be slightly better than the GoPro for this usage, both in terms of stabilization, motion cadence, and color matching.
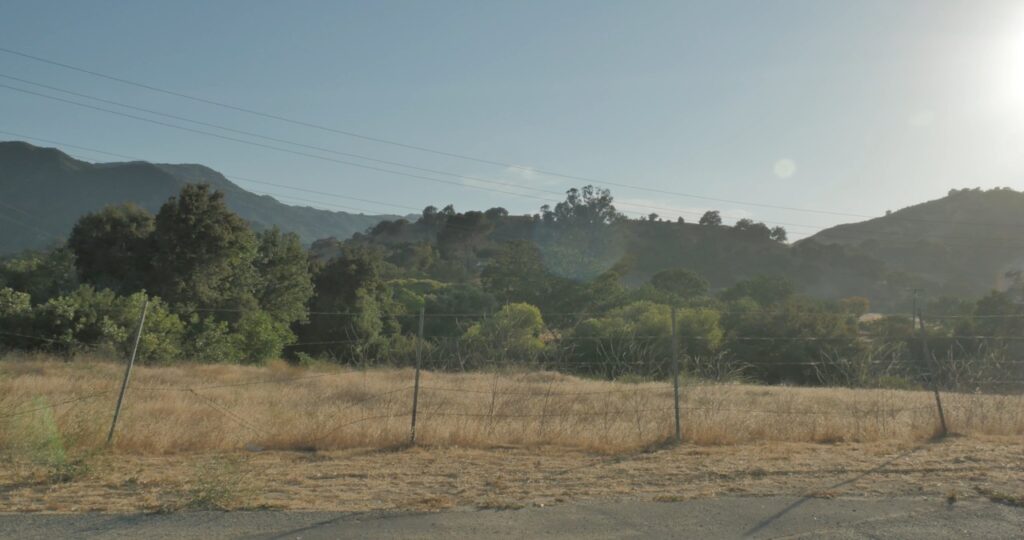
Ultimately I was able to complete a version of the film with the background plates I shot myself. It looked good, but still had room for improvement.
PARTNERING WITH DRIVINGFOOTAGE.COM
Luckily, during the finishing stage on Disappearing Boy, my company was able to strike a barter deal with DrivingFootage.com – who provided us with some incredible, professionally shot background plates to be used in the finished movie.
While I had already spent a lot of time and effort on the green screen shots (using my own plates), I knew the movie would look that much better if I went the extra mile and used the highest quality footage possible.
As I learned quickly, shooting background plates – especially moving plates for car scenes, is an art-form unto itself. To get it 100% right, you have to find the perfect balance between camera choice, placement, lens pairing, mounting, and many other variables. This can take extensive testing over a very long period, and can be quite expensive too.
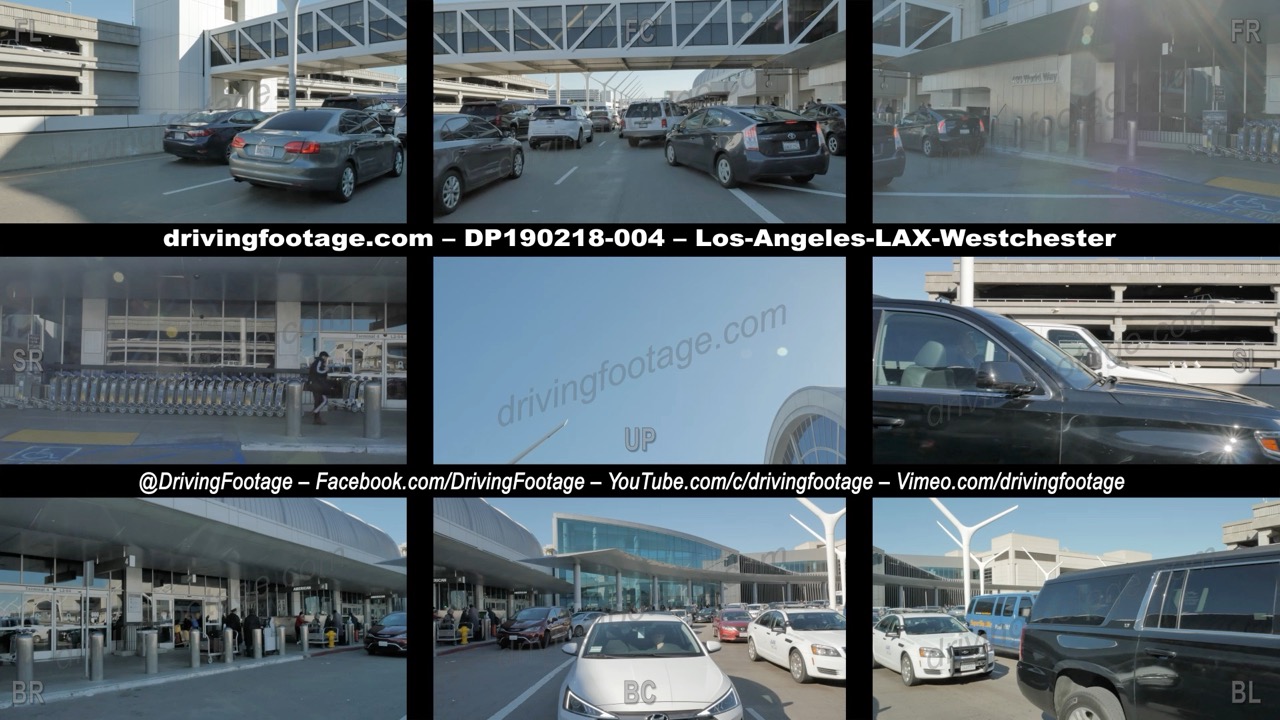
Ultimately it made way more sense with me to work with DrivingFootage.com. Not only in terms of visual quality, but selection too. Their plates are the best in the business in my opinion, and their growing library is extensive.
You can easily browse all of their footage on both Pond5 and YouTube.
I selected 22 shots I liked on Pond5, sent a request to owner Gray Jones, and he was able to send me a Dropbox folder with all the footage in less than an hour. Competitors would take 2 days to turn this around.
Right now DrivingFootage.com offers over 14,000 clips from all over Southern California. This was perfect for my movie, as it’s set in Los Angeles, so virtually every shot we needed was covered in their existing library.
DrivingFootage.com will also be adding New York, Washington DC, Atlanta, Chicago, Boston, Vancouver and 15 other cities by fall 2023, with 50 more planned for 2024. This month (until May 29th, 2023), you can also request additional cities to be added by contacting them directly.
Going forward all their plates will be shot with Netflix-approved cameras in 10-bit 4:2:2, for more flexibility in grading. Because they shoot in a nodal configuration, their plates can be used in rear projection and curved LED / virtual environments as well.
And their pricing is very affordable, especially next to competitors that charge upwards of $850 for a single shot. DrivingFootage.com sells their clips for as little as $179/shot, and provide discounts for students and low budget filmmakers.
Click here to learn more about DrivingFootage.com
BLUR, COLOR CORRECTION, AND CAMERA SHAKE
With the keying done, and the right background plates dropped in, now it was time to do the finishing touches.
This involved 3 main steps:
- Adding lens blur to the background plates in DaVinci Resolve
- Color correcting the backgrounds to match the foregrounds
- Adding a simulated camera shake to make it appear handheld
As for the lens blur, I simply used the built in ResolveFX setting that comes bundled with DaVinci Resolve, and customized it to match my reference footage.
Matching the backgrounds to the foregrounds was simply a matter of setting a look for the foregrounds first, and then adjusting color balance and exposure on the backgrounds to match. From there, I tried to overexpose the highlights slightly (to simulate a more realistic dynamic range) and lift the shadows a touch (to simulate reduced contrast from the car window).
Thankfully, I had shot some test footage while actually driving, so I had a good reference for camera shake. Again, I was able to use the built in ResolveFX camera shake setting and match it pretty closely to the test footage by adjusting the amplitude, speed and zoom settings.
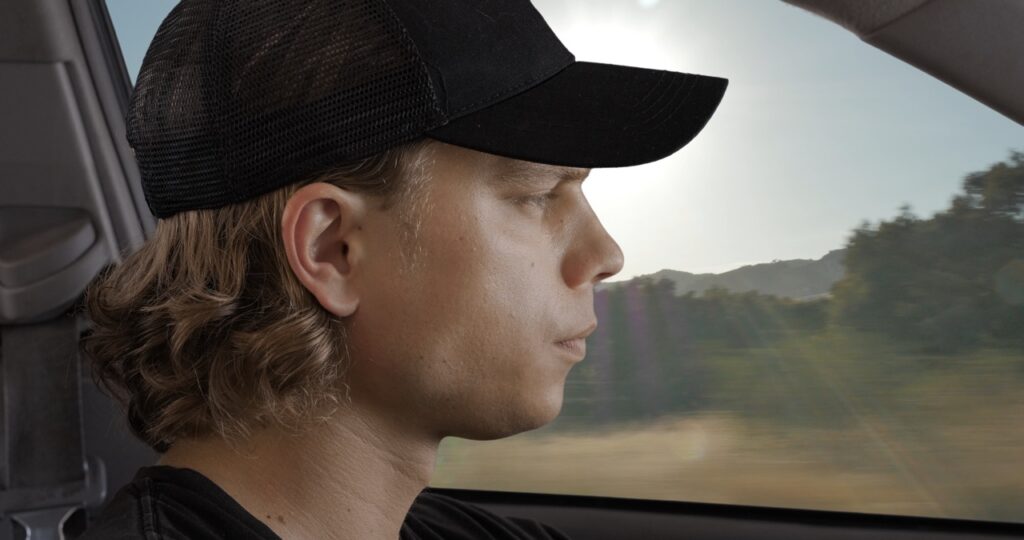
With that done, the shots were complete!
Final Thoughts
While it took a significant amount of heavy lifting to get these shots looking right, the effort was well worth it. It allowed us to shoot faster, achieve better quality visuals, and have more control over the final product.
In the future I plan to share an even more detailed post on the post-production / color grading / compositing aspect of the process, so stay tuned for that.
Otherwise if you have any questions about my workflow, just leave a comment below!
For exclusive filmmaking articles every Sunday, sign up for my newsletter here!


7 Comments
Robertzek
atCar leasing Sharjah
J P Riley
atAnother low-budget filmmaking trick I’ve used in shooting car stuff….take potted plants or just a few tree branches placed in cinderblocks with gravel and soil…put em on a $5 furniture dolly from Harbor Freight…and run the trees/branches/plants around the stationary vehicle in shallow dof. This worked great in a few major label music videos I shot out in a pole barn in Miami…also – worked on Die Hard 4 Stunt Unit….
J P Riley
atThe one thing I think that could have probably saved you a lot of time and effort in post was putting some kino mini flo’s inside the car and evenly lighting your subjects…you’ve got quite a bit of spill and green kick-back on the skin tones in that first shot…also, I’ve found a cheap box fan or just a desk fan carefully placed on the sides of the windows can help sell a windows-down driving experience and thusly, not having to deal with reflections in car windows. Overall…nicely done. a fill and back-light with a set of kino-mini-flos inside the car with a few daylight balanced globes….would’ve certainly helped make keying out your subjects far less time-consuming…hold-out-masks, b-spline masking tools, spill-suppression, etc. Overall, it looks pretty darn good and thanks for the info on carfootage.com good to know. Also – why shoot the entire flick with a single 50mm? If you ever need to borrow some glass…I’ve got tons of it here in silver lake. Zeiss superspeeds, standard speeds, vintage pentax sets, Zeiss tevidons, zeiss pentaflex, Lumix zooms, Zeiss 10-110 standard speed zoom….I have ALOT of glass…located in silverlake heights. Hit me up. at letterblue dot com.
messi
atSailing yachts provide a classic and elegant way to explore the open seas. With their sleek designs, billowing sails, and serene ambiance, sailing renta de yates yachts offer a truly immersive experience for those looking to reconnect with nature and embrace the art of sailing.
Anna
atI recently discovered the exciting new world of road trips, and my last trip was to New Jersey. I rented a car to travel around the state.
One of the most enjoyable features of this trip was the ease with which I was able to book a car on https://rental24h.com/usa/new-jersey-car-rental-nj Thanks to the site’s user-friendly and simple interface, the entire booking process took just a few minutes. I was able to choose the perfect car for my trip, taking into account all my needs and preferences
Henry Larry
atGreat insights! Choosing green screen for moving car scenes not only saves time and money but also enhances safety. Your detailed post provides valuable guidance for filmmakers seeking a streamlined production process. Thanks for sharing!
Roofing Services in Portland Oregon
Serge
atwell done, but i believe you can tweak/fix contrast a little better