Making digital footage look like film is entirely possible with the right tools and workflow. It’s all about finding the right balance in camera choice, lighting, color, and texture, so you can get the most authentic looking final product.
I have been through the digital to film conversion process many times on client projects, my own films, and to create post-production assets available on www.cinecolor.io. Naturally, I’ve had to do a lot of experimentation along the way.
In this article, I’ll share my findings and specific approach for giving digital footage a filmic look.
Keep in mind though, that there is no one perfect method. This is just what works for me – You could use any number of workflows, tools, and methods to get the job done.
Below is what I like to use, and it begins with finding the right creative aesthetic.
Filmic Aesthetics
If you’ve never shot on real motion picture film before, it’s easy to think there is such a thing as a singular filmic look. But there is no such thing.
The variances in film stock are far more obvious than the differences in digital acquisition.
A 720p image from an old Canon DSLR is not entirely different from a digital image from an 8K digital cinema sensor. Of course the 8K footage will look technically superior, but the gap is far less dramatic than its film equivalent.
Consider the massive visual difference between Super 8mm film stock and 65mm IMAX. One looks grainy and aged, the other hyper modern and clean.
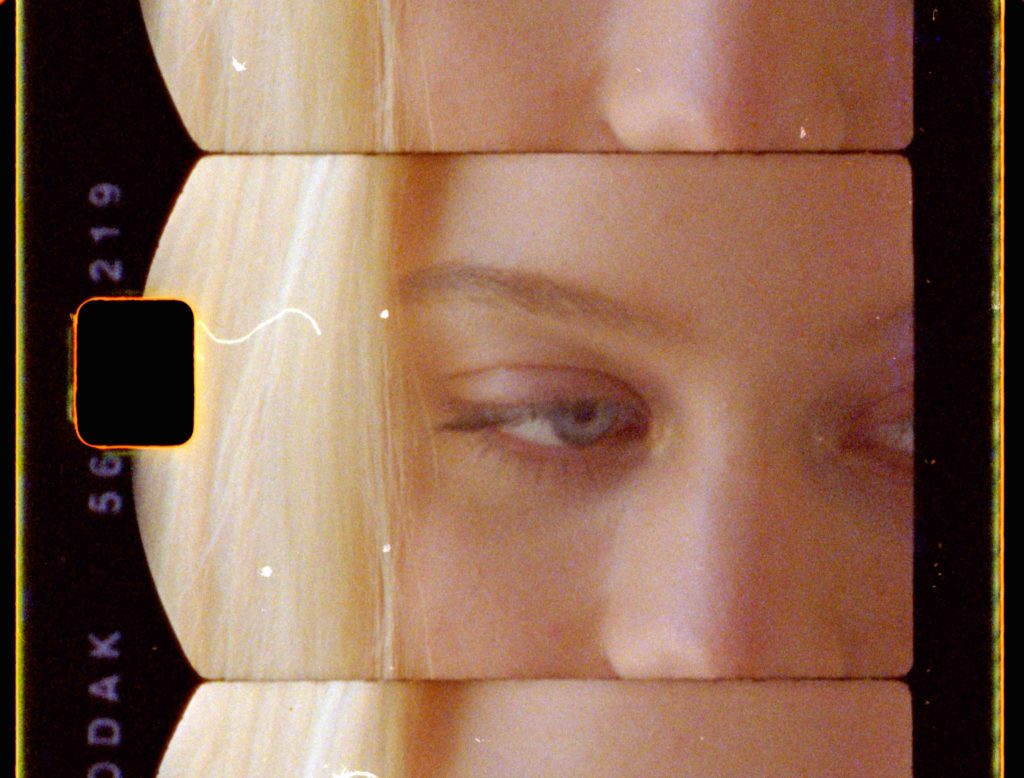
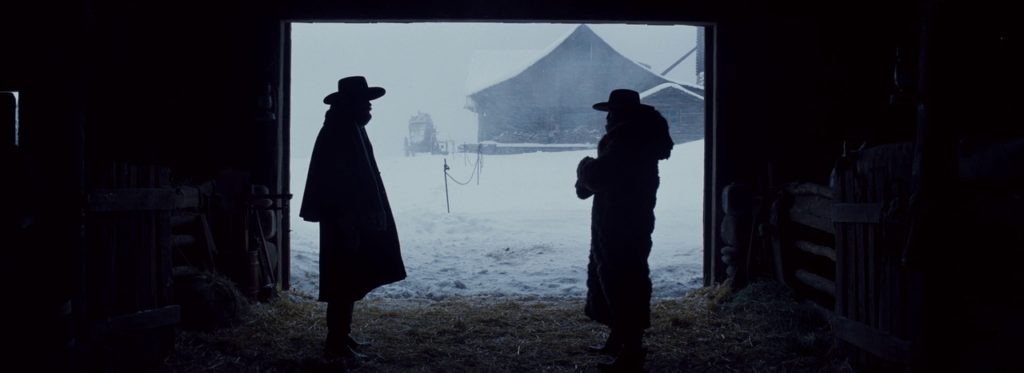
Even within the same gauge, there are countless film stocks you could choose from that each have their own properties. Some are high ASA (with lots of grain),while others have almost no grain at all. Some have warmer color palettes, others cooler.
Then there is color negative and reversal film. Black and white. And all the variables that come into play when processing and scanning the film.
Not to mention, film technology hasn’t stopped evolving for over a century. So the “film look” doesn’t really mean anything without the context of a historical time period. Just compare any present day movie shot on film to Casablanca or Vertigo. The differences will be stark.
The point is: you need to narrow down your creative intent first, and then take the right steps to execute it. Going for a vintage Super 16mm look will call for a different workflow than a modern 65mm look would, just as one example.
Camera Choice
Many filmmakers believe that camera choice is the single most important ingredient in a filmic look, but I would not even put it in the top 5.
It is true, that some digital cameras (namely the Arri Alexa) simply look more filmic than other cameras, even without post-processing. Sensor types and color science vary wildly from camera to camera.
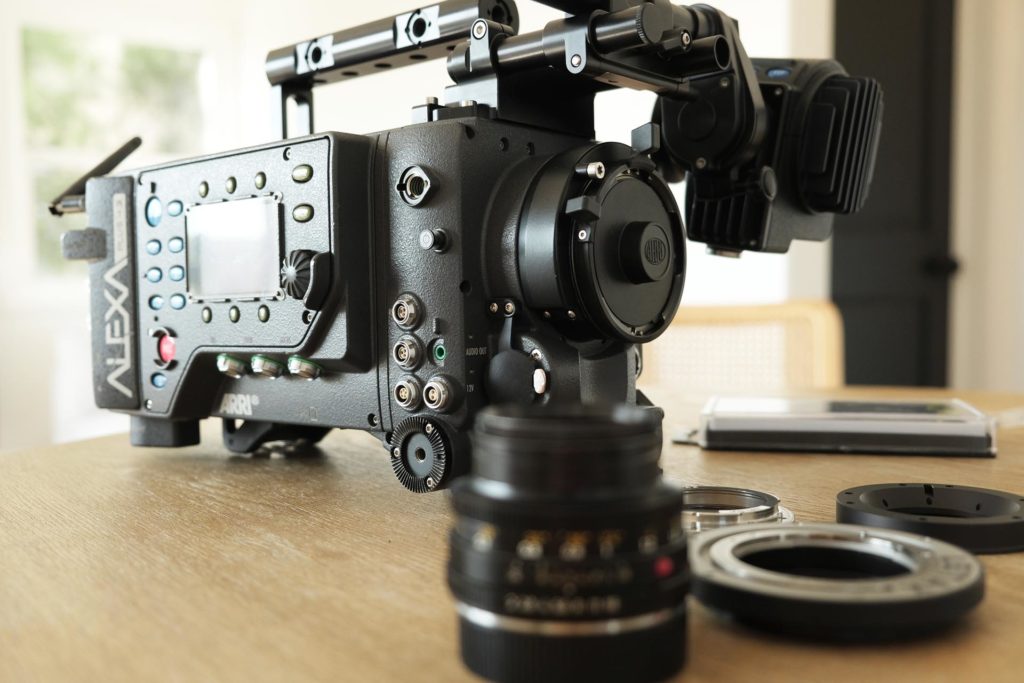
But with the right technical approach in the color suite, it’s possible to make nearly any modern digital camera look like it was shot on film.
The main benefit of working with a higher end digital cinema camera is they give you more creative flexibility.
For instance, an Arri Alexa or RED digital cinema camera could be post-processed to look like 35mm motion picture film. But they could just as easily pull off a 16mm or 8mm look, so long as they are paired with the right lenses and cropped a little bit in post.
On the other hand, an iPhone would be much less versatile. Innovations like Filmic Pro have made it incredibly easy to capture beautiful results on our iPhones, which is a great thing. But there are are still limitations to consider.
For instance, iPhones have a much harder time pulling off a 35mm look than many mirrorless cameras or digital cinema cameras, due to their sensor size. iPhone videos generally have a very deep depth of field, which can work well if you’re going for an 8mm look, but not so well if you’re going for a 65mm look.
While every digital camera is capable of looking filmic in the right hands, not every camera is going to be believable in every circumstance. It is crucial to know your camera’s limitations and either work around them or play into them.
Two budget friendly cameras that I would recommend looking into are:
- Original Blackmagic Pocket Cinema Camera. This little camera with its amazing 16mm sensor still creates one of the most authentic filmic looks from any digital camera. It’s HD resolution only, and is much better at achieving a 16mm look than 35mm, but if that’s what you’re going for it is hard to pass up.
- Fuji X-T4. I’ve written a lot about this camera, and why I love the color science so much. It’s much cleaner and more digital than the BMPCC (above), but can easily be textured to pull off a 35mm or 16mm look, and is incredibly versatile for other project types too.
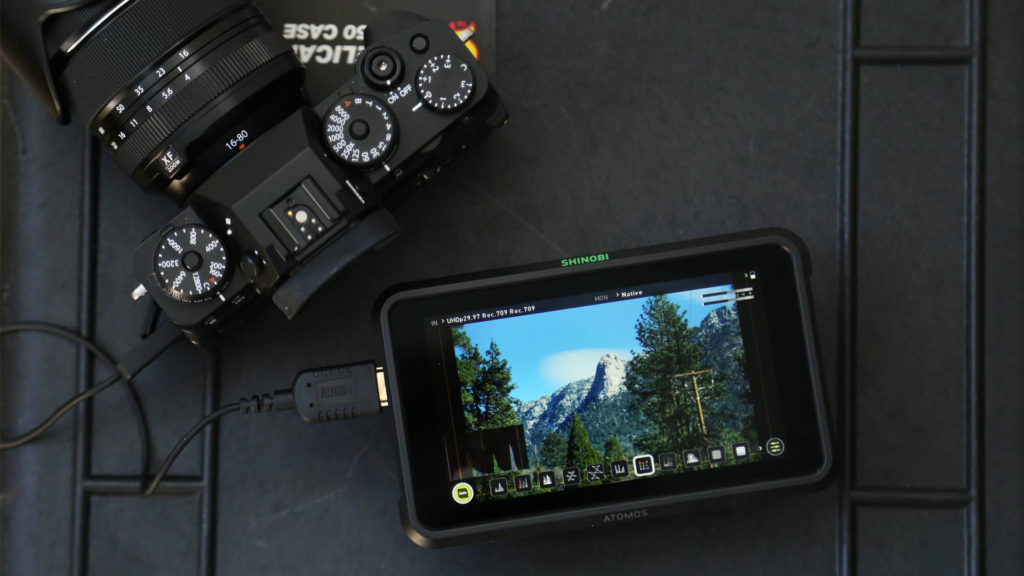
Chances are though, if you already own a camera it is probably more than up to the task.
Before running out to buy anything new, try what you already have available to you. The items we’ll explore next are far more important than camera choice in getting a filmic look.
Camera Settings
This section will be basic for some of you, but it’s critical to note for anyone who is just getting started.
The exact settings you’ll use for achieving a filmic look will vary from camera to camera, since each camera model has its own menu options and terminology.
But as a rule of thumb – always follow these protocols when shooting digital for film:
- Shoot at 24p (or 23.98p) frame rate with 180 degree shutter
- Record with Log color space when possible
- Use maximum resolution and bitrate
It’s critical that you shoot at 24p with a 180 degree shutter (1/48). This will ensure you capture the right amount of motion blur, so it is consistent with motion picture film. While you can play with shutter speed for stylistic effect, you won’t ever want to veer off from 24p, unless to shoot slow motion.
If you can’t shoot in Log because your camera doesn’t allow it, that’s ok. It’s not the end of the world, and you can still color your footage to look great in post. Log will just give you a little extra dynamic range, depending on the camera you’re shooting with.
On my Fuji X-T4, I always record at 24p in full 4K resolution. I then set the camera to Log (and monitor the image with a LUT), while recording the highest bitrate H.265 files internally. If using an external recorder, I could capture ProRes, which is even better. But even the H.265 is plenty for my needs.
Lens Choice
The impact of lens choice is far more critical than camera choice when it comes to your final image.
Even the most clinical looking digital camera can look filmic when paired with the right glass. Mounting a vintage 8mm lens to any digital camera will completely transform the look.
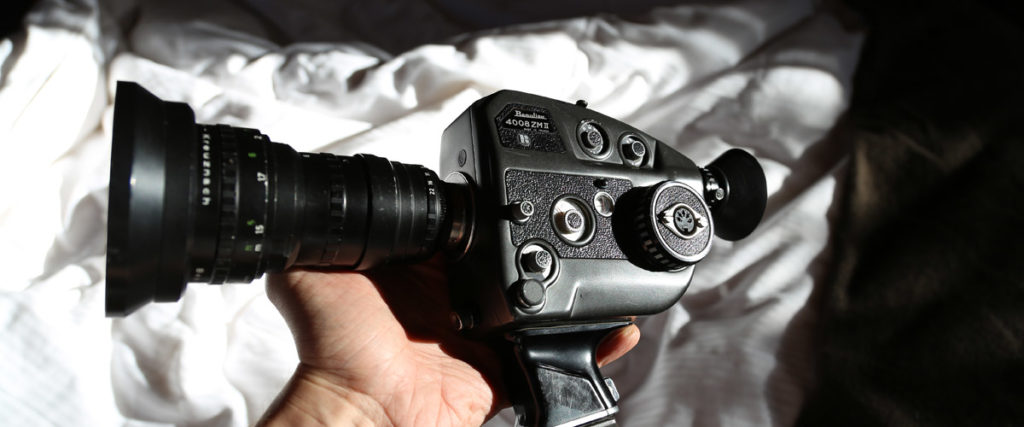
Like camera choice though, it’s all about picking the right tool for your chosen aesthetic.
If you’re trying to produce a modern cinema look, naturally you’ll be best served using modern cinema lenses, or affordable alternates. If you can’t afford to rent Master Primes, maybe rent the Zeiss Milvus lenses, which have a very similar look and are a fraction of the cost.
A huge variety of lenses (both modern and vintage), can work toward your goal of achieving a filmic look.
It’s not necessarily about the age of the lens, or the brand. It’s about character. Some lenses just have it, and others don’t.
Shooting lots of test footage with different lens types is the only real way to know what will work best for your needs.
The one thing you will want to stay away from are razor sharp modern lenses that don’t have any character. These lenses are typically associated with contemporary digital video. You can still use them, but it will be an uphill battle in the edit suite.
You might be tempted to use filters like Black Pro Mist or Glimmer Glass with a modern clinical lens, as a means to soften the edges. I would be careful about relying on this technique too much though, as it doesn’t authentically emulate a motion picture film look. It just kind of simulates it, but isn’t really believable.
There are of course many movies shot on motion picture film that use softening filters brilliantly. I’m not against them as a creative choice. You definitely should use them if you want a dreamier, hazier look overall. They just aren’t a substitute for a more classic cinema lens, which is worth noting.
The feature film I’m working on right now is being shot on a single 50mm lens. It is a used Leica R that can be found on eBay for a few hundred dollars. While not a cinema lens, it has a classic look and renders colors beautifully, and that works for my needs.
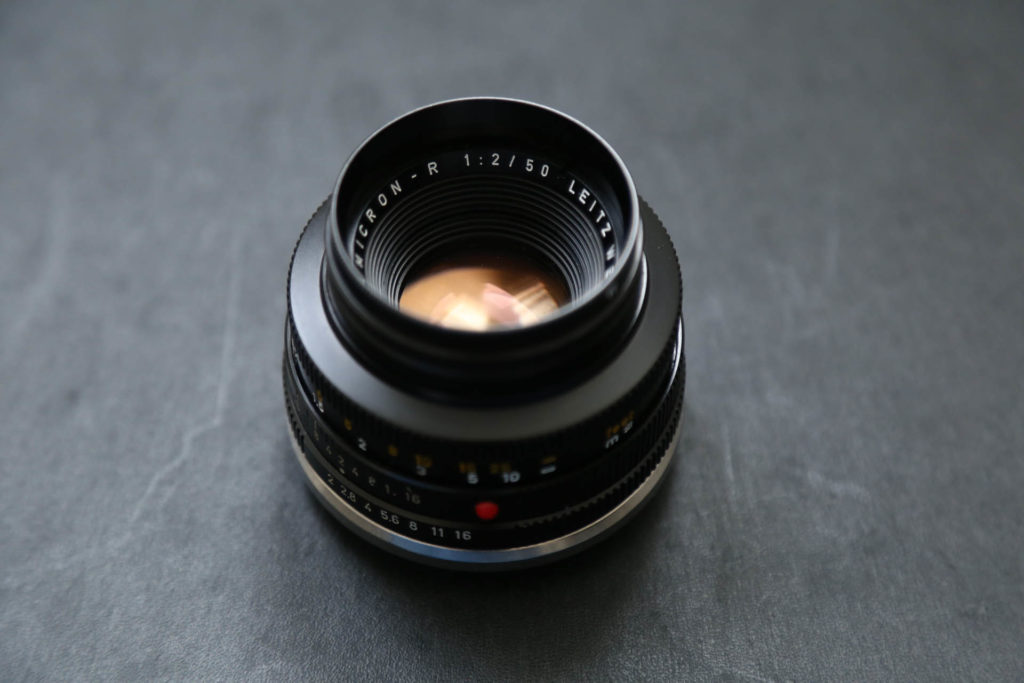
If you’re looking into used glass, definitely consider the Leica R’s and the Nikkor manual lenses. Both have a lot of character, but also produce loads of detail and resolution. To me, they offer the best of both worlds, and are really affordable on the used market.
Ultimately, there are thousands of lenses you could choose from that would all work. Try as many as many as possible and you’ll know when you’ve found the right one.
Lighting Styles
There is a common misconception that there is such thing as “filmic lighting”. Movies shot on film have used every type of lighting imaginable – from sunlight to practicals to strobes.
Clearly there is no one lighting aesthetic that defines a filmic look, just as there is no one film stock that does. But certain types of lighting lend themselves far better to the filmic look than others. Especially when you consider the implications of digital capture on your overall workflow.
Most digital cameras perform exceptionally well under bright sunlight. Even the smallest sensor cameras have enough exposure to render brilliant images with the full spectrum light of the sun.
This makes natural daylight an excellent option for a digital to film workflow. It gives you both the exposure and color quality needed to set you up for success in post.
On the other hand, low-light situations (without proper film lighting) can pose a challenge. You might be able to get away with shooting at ISO 12800 on a Sony mirrorless camera, but it will have a digital look baked in unless you are actively shaping the light.
In order to shoot a night time scene on film, you actually have to use real lights. It’s impossible to do a good digital to film conversion when the source footage wasn’t lit like film would be lit. That will always give it away.
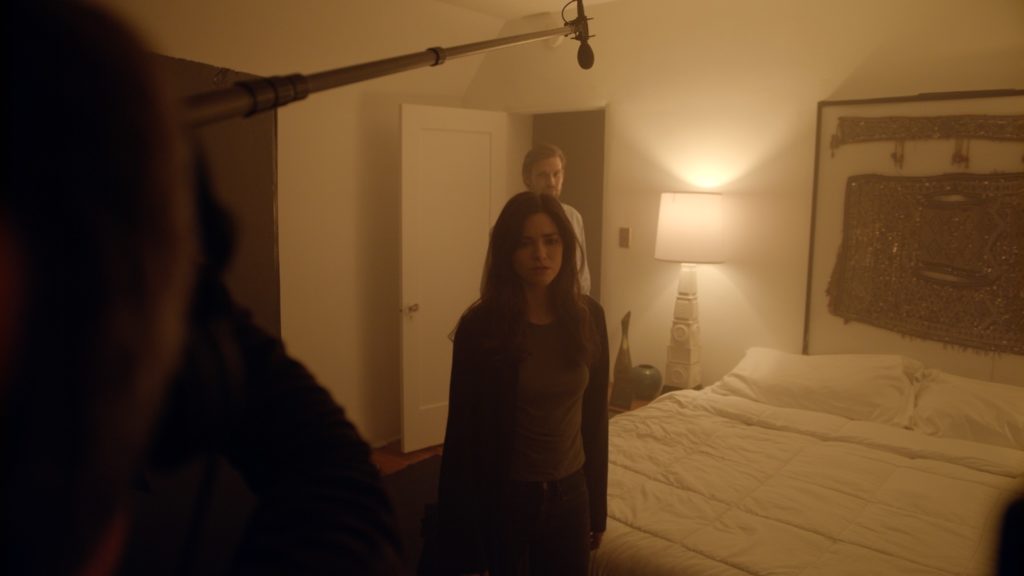
The good news is, a small lighting kit or a single practical lamp is all it might take to do the trick. You definitely don’t need full blown studio lighting, especially with a high sensitivity camera. It’s really about shaping the light so that it is consistent with motion picture lighting. This can be done even with the most minimal of setups.
With that one caveat aside, you can essentially take any stylistic approach to lighting and still get great results. As with everything else, it just comes down to personal preference.
Color Grading
I recommend returning to your original reference images as the first step in your color process. This is critical to do up front, before you start messing with your color palette too much.
Study the reference images from a creative standpoint, and they will inspire the right technical changes on your footage. Without these references, it’s too easy to waste time pushing the color wheels around endlessly, losing sight of your final goal.
Generally, film looks will fall into one of these three categories:
- Modern, high contrast
- Vintage, low contrast
- Reversal/cross-process/bleach bypass
As a first step, determine which bucket your reference images fall into. Some movies shot on film are so clean and contrasty that they almost look digital. Others are vintage, with lifted shadows and muted colors. And then some are more obviously stylized with techniques like bleach bypass –
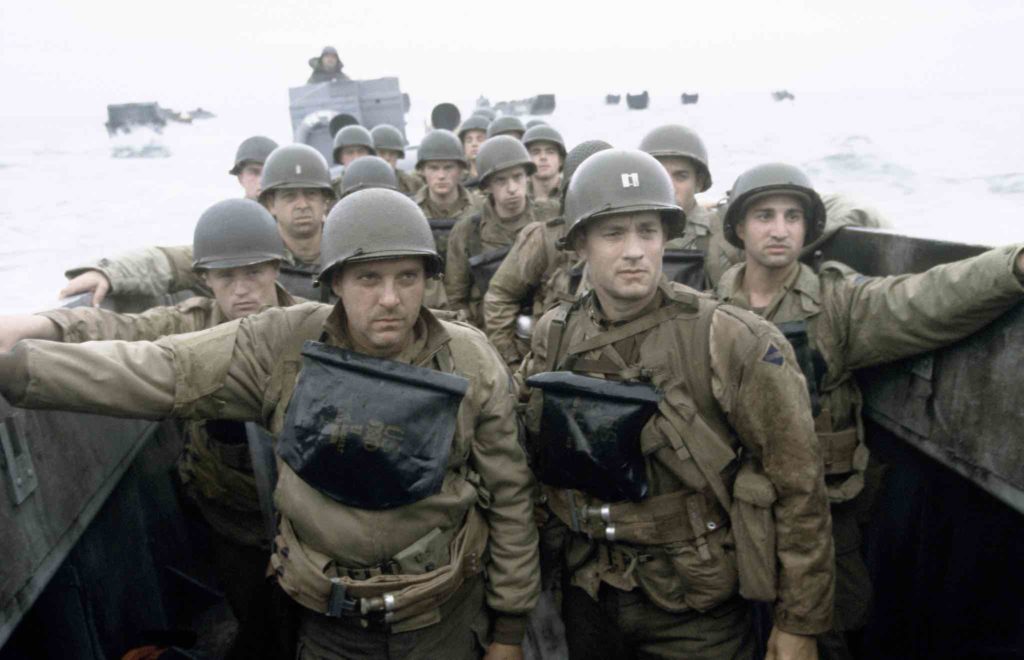
Each of the categories above will require a different technical approach. It’s beyond the scope of this article to break down tutorials on building each look, but I do have a lot of free lessons on color grading available at www.cinecolor.io, and an entire creative color grading course available here.
It’s worth noting that you shouldn’t have to push your colors too far in post, no matter how you stylize them.
Many first time colorists get really aggressive with their contrast settings, and throw their color balances off in very dramatic ways. This is often an overcompensation, and can look gimmicky – working against your goal of authenticity. Restraint is always key.
Half the battle when coloring for a filmic look is achieving a natural starting point.
Well shot film is known for its organic colors and lifelike tones. With the right camera, lens and lighting combo, you should be halfway there before you even start to grade your footage. And if you’ve gone the extra mile with wardrobe and production design, you’ll be even further along.
Stylizing your colors then just becomes about enhancing what is already there. Furthering the look that you built in pre-production, and then captured in camera on set.
It’s up to you if you choose to add or remove contrast, push or pull the situation, skew the colors warm or cool. All of these can look filmic in their own right, so long as there is a natural base, and the colors aren’t manipulated beyond a certain threshold.
Film Emulation
Manually color grading your shots is certainly one option when it comes to achieving a filmic look with your digital footage. The other option is to use film emulation presets.
Film emulation is an automated transformation of your color profile. It’s designed to re-map your digital colors to appear more like what they would have looked like if captured on motion picture film stock.
There are many film emulation options out there. Some color grading platforms come with film emulation built in, and there are tons of standalone apps and tools that offer different options for film emulation too.
I use my own custom film emulation, which I created from scratch by rigorously testing different looks on thousands of shots. This makes them universally compatible with footage from any camera, and super easy to use. You can learn more about them by visiting the Digital Film section on my cinecolor site.
You don’t have to use film emulation to get a filmic look, though. As stated above, it’s entirely possible to color grade your shots from scratch and create custom films looks every time.
But personally, I like using film emulation as part of my workflow. Even though I’ve spent countless hours building custom film looks and am very comfortable doing so, I often come back to the same recipes. The LUTs/presets are an easy way to achieve great results while also saving me time.
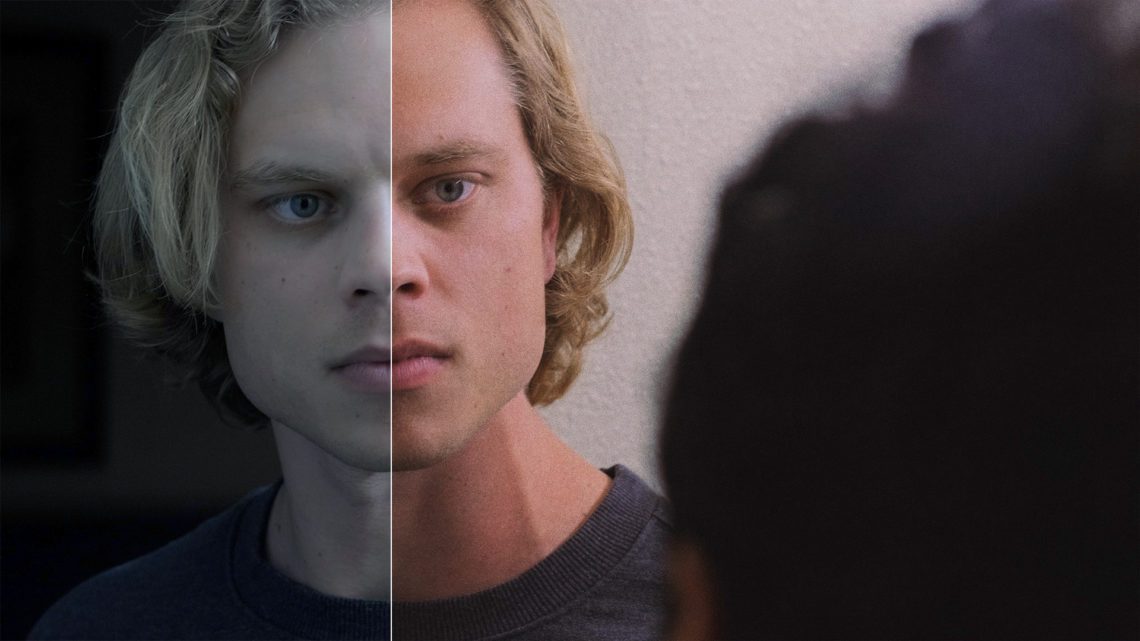
Below is a sample image, showing the transformation from raw to base grade to film emulation:
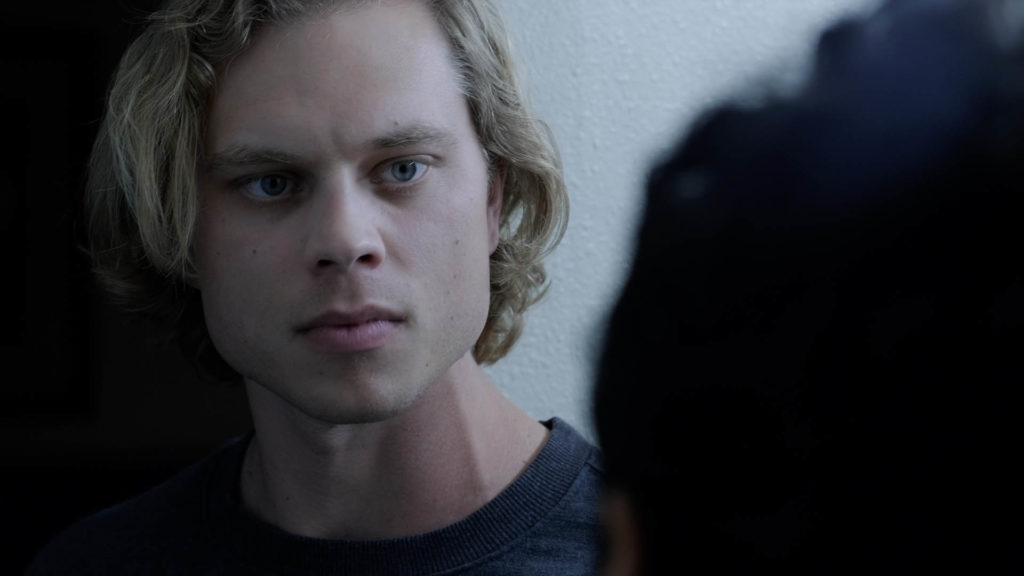
RAW shot + Rec 709 conversion


Applying Film Grain
Film grain is a critical step in achieving any filmic look. Whether you want to go ultra vintage with heavy grain, or super modern with very fine grain – your look isn’t complete without some degree of texture.
Like film emulation, you have many options for applying grain. You can download film grain scans, use off the shelf software, or built-in tools in finishing programs like DaVinci Resolve.
How you get there is up to you, but know that each method will yield very different results. For example, some post-production software will include “film grain” that is in fact entirely digital, and not derived from actual film stock. These type of tools can yield decent results, but will never be as realistic as real film grain scans.
I’ve tried many tools out there, but ultimately decided to create my own film grain from scratch to get the most realistic results possible. This was achieved by shooting and scanning real film, and then combining it with a proprietary post-process to render scans in 6K resolution.
I did this for every common film gauge, including 65mm motion picture film, which I had never been able to find through any other source.
You can learn more about my film grain and see a sample video here.
Applying film grain in post is very simple. Drop any film grain file (which is typically a standard .mov video file) on top of your footage in the timeline.
Set the film grain transfer mode to overlay, and the grain will instantly apply to the footage.
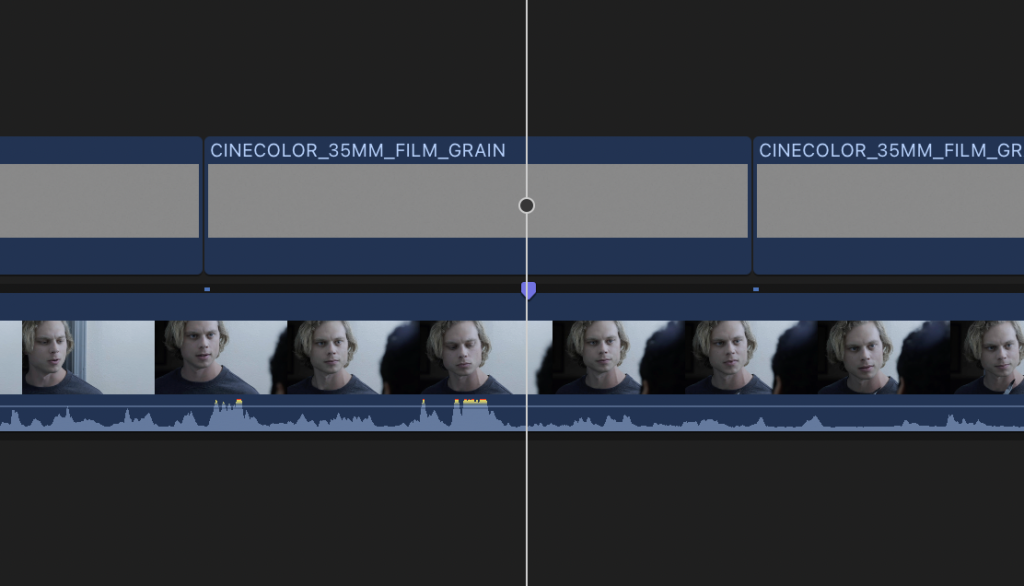
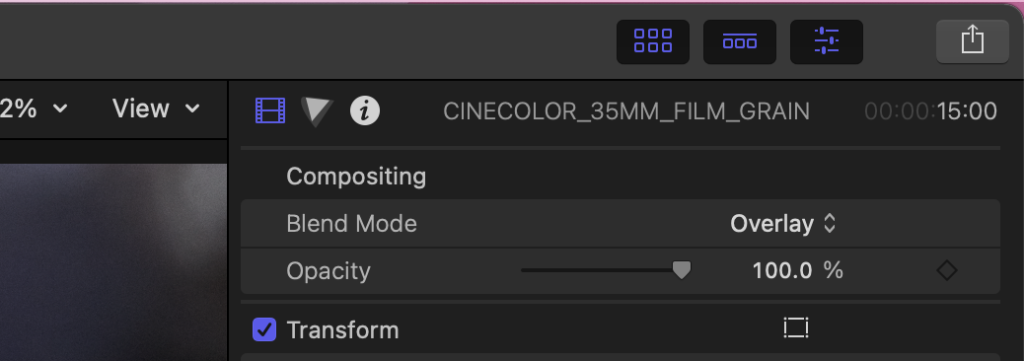
If you want to make the effect more (or less) obvious, you can adjust the contrast on the film grain file. You can also adjust the scaling settings to change the sizing of the grain.
If you’re using the film grain that I created, I don’t recommend changing the sizing however. I spent a lot of time finding the optimal grain size for each gauge (8mm, 16mm, 35mm, 65mm), so you don’t have to mess with it too much.
Here’s the sample image before with and without grain. This uses a 35mm stock, so the effect is still subtle –


Letterboxing
With the film grain applied, we’re almost at the very end of the pipeline. All that’s left is to do is add a letterbox, if you haven’t done so already.
The letterbox will adjust your aspect ratio by adding black bars to the top or sides of the frame. This is done to maintain a consistent aspect ratio with motion picture film.
Digital cinema has blown the door wide open for unconventional aspect ratios. And there are new digital standards, like 2:1, that are wildly popular today but were rarely used in the film days.
You can of course use any aspect ratio you like at this stage. But if you want the most authentic look, you’ll usually want to stick with one of these aspect ratios:
- 1.33:1
- 1.66:1
- 1.85:1
- 2.39:1
Each of these aspect ratios are rooted in traditional cinema. Audiences are accustomed to watching movies (shot on film) that were framed in these aspect ratios almost exclusively. When sticking to any of the above ratios, you really can’t go wrong.
1.33:1 works particularly well for an 8mm look, but can also work beautifully for a classic 35mm academy framing. 1.66:1 is more rooted in European cinema and 16mm indie film. Whereas 1.85:1 and 2.39:1 are modern cinematic widescreen standards that are great for a contemporary look.
Most editing software platforms include some type of letterbox preset. These can usually be accessed in the effects browser. But not all of these tools work well, or include non-standard letterboxes.
For this reason, I created my own letterboxes from scratch and made them available for free. You can download my free letterbox files here.
These are simply .png files with transparency. Drop them into your timeline above your video tracks and you are good to go.
Here’s our sample image before and after, including the final letterbox step –

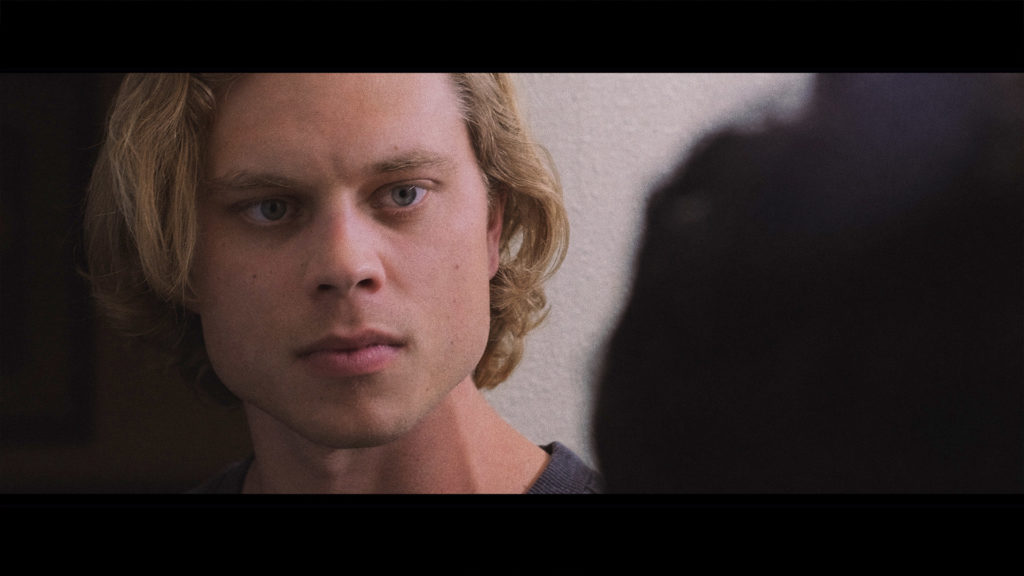
Making Digital Footage Look Like Film
There are so many creative options when it comes to making digital footage look like film. The hardest part is often picking the right aesthetic and sticking with it throughout the whole process.
Once you have a strong vision, it’s simply a matter of applying that vision at each stage. From choosing the right camera and lens package, to post-processing your footage in a suitable way.
Filmmakers sometimes believe there is one variable that matters above all else in this process, but there truly is not.
Achieving a filmic look isn’t about any one thing. It’s about everything. The intersection of the right framing, lighting, color, grain, and countless other intangibles along the way.
The less you rely on any one element to do all the heavy lifting, the better off you are.
For more exclusive content like this, click here to sign up for my newsletter.
For exclusive filmmaking articles every Sunday, sign up for my newsletter here!


2 Comments
Martin Treacy
atReally interesting and insightful article Noam, with a wealth of valuable tips conveyed with your usual clarity.
I was inspired to get hold of a Leica R 50mm Summicron lens mid-article! (Quite inexpensive on ebay UK). Looking forward to using it on my Fujifilm XT-3 (adaptor cost very little extra – I paid a little more to get a decent quality adaptor rather than a Chinese one).
From some guick Googling, I see Shane Hurlbut is also a big fan of using old Leica lenses. Should be interesting to use it for still photography also.
Noam Kroll
atDefinitely! Hope it works out well for you, Martin. It’s hard to go wrong with those lenses…