One of my current feature film projects is a micro-budget thriller titled The Canyon, which just began production this week. My approach with this movie is a complete paradigm shift from my previous films, and so far the experiment has been a success.
Rather than attempting to scale things up with this movie (as I have with each previous film), this time around I’m taking the exact opposite approach. I am taking “micro” to the extreme to reap the rewards of working on a smaller canvas.
Today I’m sharing my approach to making this film, from embracing improvisational elements to DP’ing the film myself.
Going Smaller
When embarking on any new project, I always have a dominant goal in mind. With this film, my aim was not only to make a great movie, but also to re-invent how I produce on this level.
With two completed micro-budget features under my belt (and another feature in the works), I’ve learned a lot about how I best operate, and what can make or break these kind of movies.
If there’s been one lesson, it’s this:
If you’re going small, go as small as possible.
Many of my best projects over the years have been tiny films shot with no crew. The intense limitations you face when shooting this way force you to use your creativity in new ways.
Not to mention – If you don’t look like a film crew, you can shoot just about anywhere, any time, and over as long a duration as you need. This can up your production value dramatically, and it’s why some $10K movies look better than many $100K movies.
The benefits of going (really) micro are obvious. But despite knowing this, I’ve never scaled things down to an extreme for a feature film.
Most of my feature productions have had at least a skeleton crew of 8-10. That setup has its own advantages, but it’s just a different experience. More like any other big set.
At the same time, having a more traditional crew (without enough budget to function like a larger set) can have clear drawbacks. Fewer days, less coverage, more expenses… And all of this negatively impacts your production value, which is very counter-intuitive.
With all that in mind, I wanted to push my limits and make this film in the most minimalistic way possible. It’s an experiment I’ve been wanting to try forever. And with larger budget projects on the horizon, the time to do it is now.
But to make it work, I had to completely re-think how the movie would be made at every step.
The Writing Process
Normally, I like to workshop my screenplays over many months, and only move into production when things are really fine tuned. This of course is the standard workflow for most features at all levels.
But again, the point was to experiment with a new workflow.
I’ve always been inspired by filmmakers who have made brilliant movies without a traditional script, often using treatments or “scriptments” to allow for more story flexibility. Done right, these films are unpredictable and uniquely creative, born out of a constant state of evolution.
I wanted to tap into this type of spontaneity for my new film, while adding my own twist to it.
The writing process began with a long treatment that covered every major story beat. I was tempted to just take this treatment and go to camera, but decided to first write out Act 1 in screenplay format.
By fully writing out Act 1 (and only Act 1), I had enough solid material to schedule an initial round of production. But without having the other acts written as a screenplay, I would have to stop shooting after Act 1, and then revisit the story. This was very much done by design.
My plan was to edit the material from each act before writing/shooting the next.
Doing so creates a best of both worlds scenario. It gives me as much (or more) flexibility to change the story as a completely improvised film, without sacrificing the benefits of working with a traditional screenplay.
But in order to make this all work, it all came down to the schedule.
Scheduling
My schedule was based around multiple shooting blocks – one for each act of the movie (Act 1, 2A, 2B, 3).
In total, I estimated needing 3 – 4 days to shoot each act, and a 3 week break in between shooting blocks.
Weeks off would be used to create rough cuts of all previously shot material. During this period I would also write/workshop the following act, and handle any necessary pre-production work for the next shoot date.
So far it’s made the producing process so much easier. It almost feels like I’m just planning a bunch of short films over the course of 4 months, as opposed to one massive feature crammed into a couple of weeks.
Not to mention, post-production is a lot less daunting too. I only need to edit a couple scenes at a time, as opposed to an entire feature film. A world of difference.
And best of all, when the final shooting block is completed, the rough edit will be almost done. I’ll just need to cut the final act and lock picture.
This type of scheduling approach can’t work for every film. But if you write a movie with this design in mind, it can be liberating in so many ways.
Directing, DP’ing & Sound
Another critical choice that I made on this film was to direct, DP, and record sound myself. I will be the entirety of the crew on many days.
For years I’ve wanted to direct/DP simultaneously, but have often been advised against it. Some filmmakers think it’s too much to take on, and that you’ll spread yourself too thin.
It’s a valid argument, but it really depends on your strengths/comfort zone as a filmmaker.
My background is in camera and color, and I am very comfortable shooting my own film while also directing talent. I get why many people would not want to work this way, but on this scale of production I actually prefer it.
I’m comfortable recording audio myself too, but mainly chose to go this route for more flexibility with locations. As a “one-man-band”, the possibilities for where and how we shoot are endless.
If needed, on some days I may bring in additional crew for more complex sequences. But those days will be the exception.
So far, recording audio myself has been a breeze. I’m using Rode wireless lav mics straight into my camera or Zoom recorder, depending on the situation. With the right mic placement, I’ve been getting some really good results – even without the boom.
To be safe, I also record wild lines for every scene after we shoot. I’ll use my boom mic (typically in the car) to record any and all dialogue. This ensures I’m 100% covered for sound, even if there is an issue with the wireless feed.
Working this way may seem challenging, but I assure you it is incredibly intuitive.
Yesterday, we shot 12 hours worth of footage in a 5 hour day. We used locations we couldn’t have had access to with a bigger crew. And we got tons of bonus shots, since there was virtually no downtime in between setups.
Shooting the film with exclusively natural and available light has also helped speed things up in a noticeable way.
Camera Package: Fuji X-T4
I went back and forth for ages trying to figure out what to shoot this movie on. I considered all options from my Arri Alexa to the iPhone.
It was pretty clear early on that the Alexa would be overkill. What I might gain in image quality would take away from my ability to run and gun spontaneously.
Going to the other extreme and shooting iPhone would pose different issues. Sure, it would be the easiest camera to shoot on, but there would be a tradeoff in terms of image quality.
Ultimately, I decided to shoot the film with my Fuji X-T4. I wrote about the setup in this blog post for those interested.
For me, the X-T4 was a perfect happy medium. It was enough camera to give me the manual controls and ease of use that I was looking for. But it wasn’t so big that it would draw attention and work against my goal of keeping a small footprint.
Plus, it has some amazing color science and is just fun to work with.
Single Lens: Leica 50mm F2
I wanted to impose a creative limitation on the visuals of this film, so I decided to shoot the entire movie on a single 50mm lens – one of my favorite focal lengths.
There were two 50mm lenses I considered using – the TT Artisan F1.2 and the Leica R F2. Both are very small and very lightweight, which is what I needed. A traditional cinema lens would be too bulky and work against my goal of a small footprint.
I tested both lenses and eventually chose the Leica. It’s not as fast as the TT Artisan, but the quality is hard to deny. It also has a really cool vintage aesthetic, which I like.
The entire movie is being shot handheld, and 50mm is about as long a lens as you’ll want to use without a tripod. Thankfully the Fuji X-T4 has great internal stabilization, so even if things get a bit shaky the footage still looks really great.
In some situations (like shooting inside the car), a 50mm focal length is longer than what I would normally choose. That said, it’s been an amazing creative challenge to work within those parameters. The shots I’m getting are often more interesting since they can’t help but be unconventional.
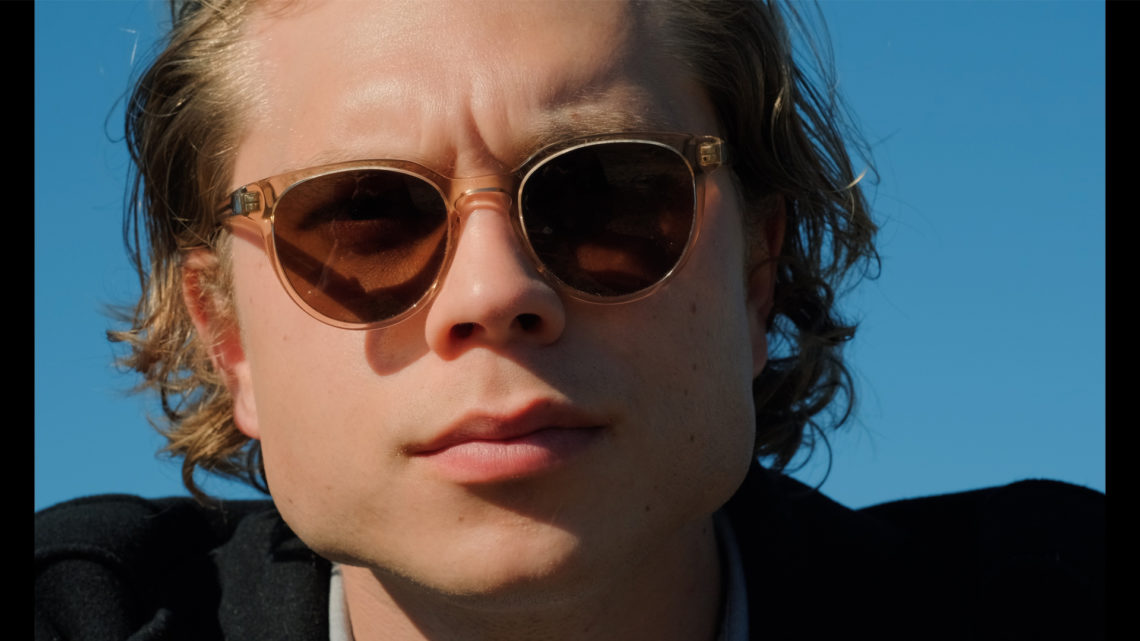
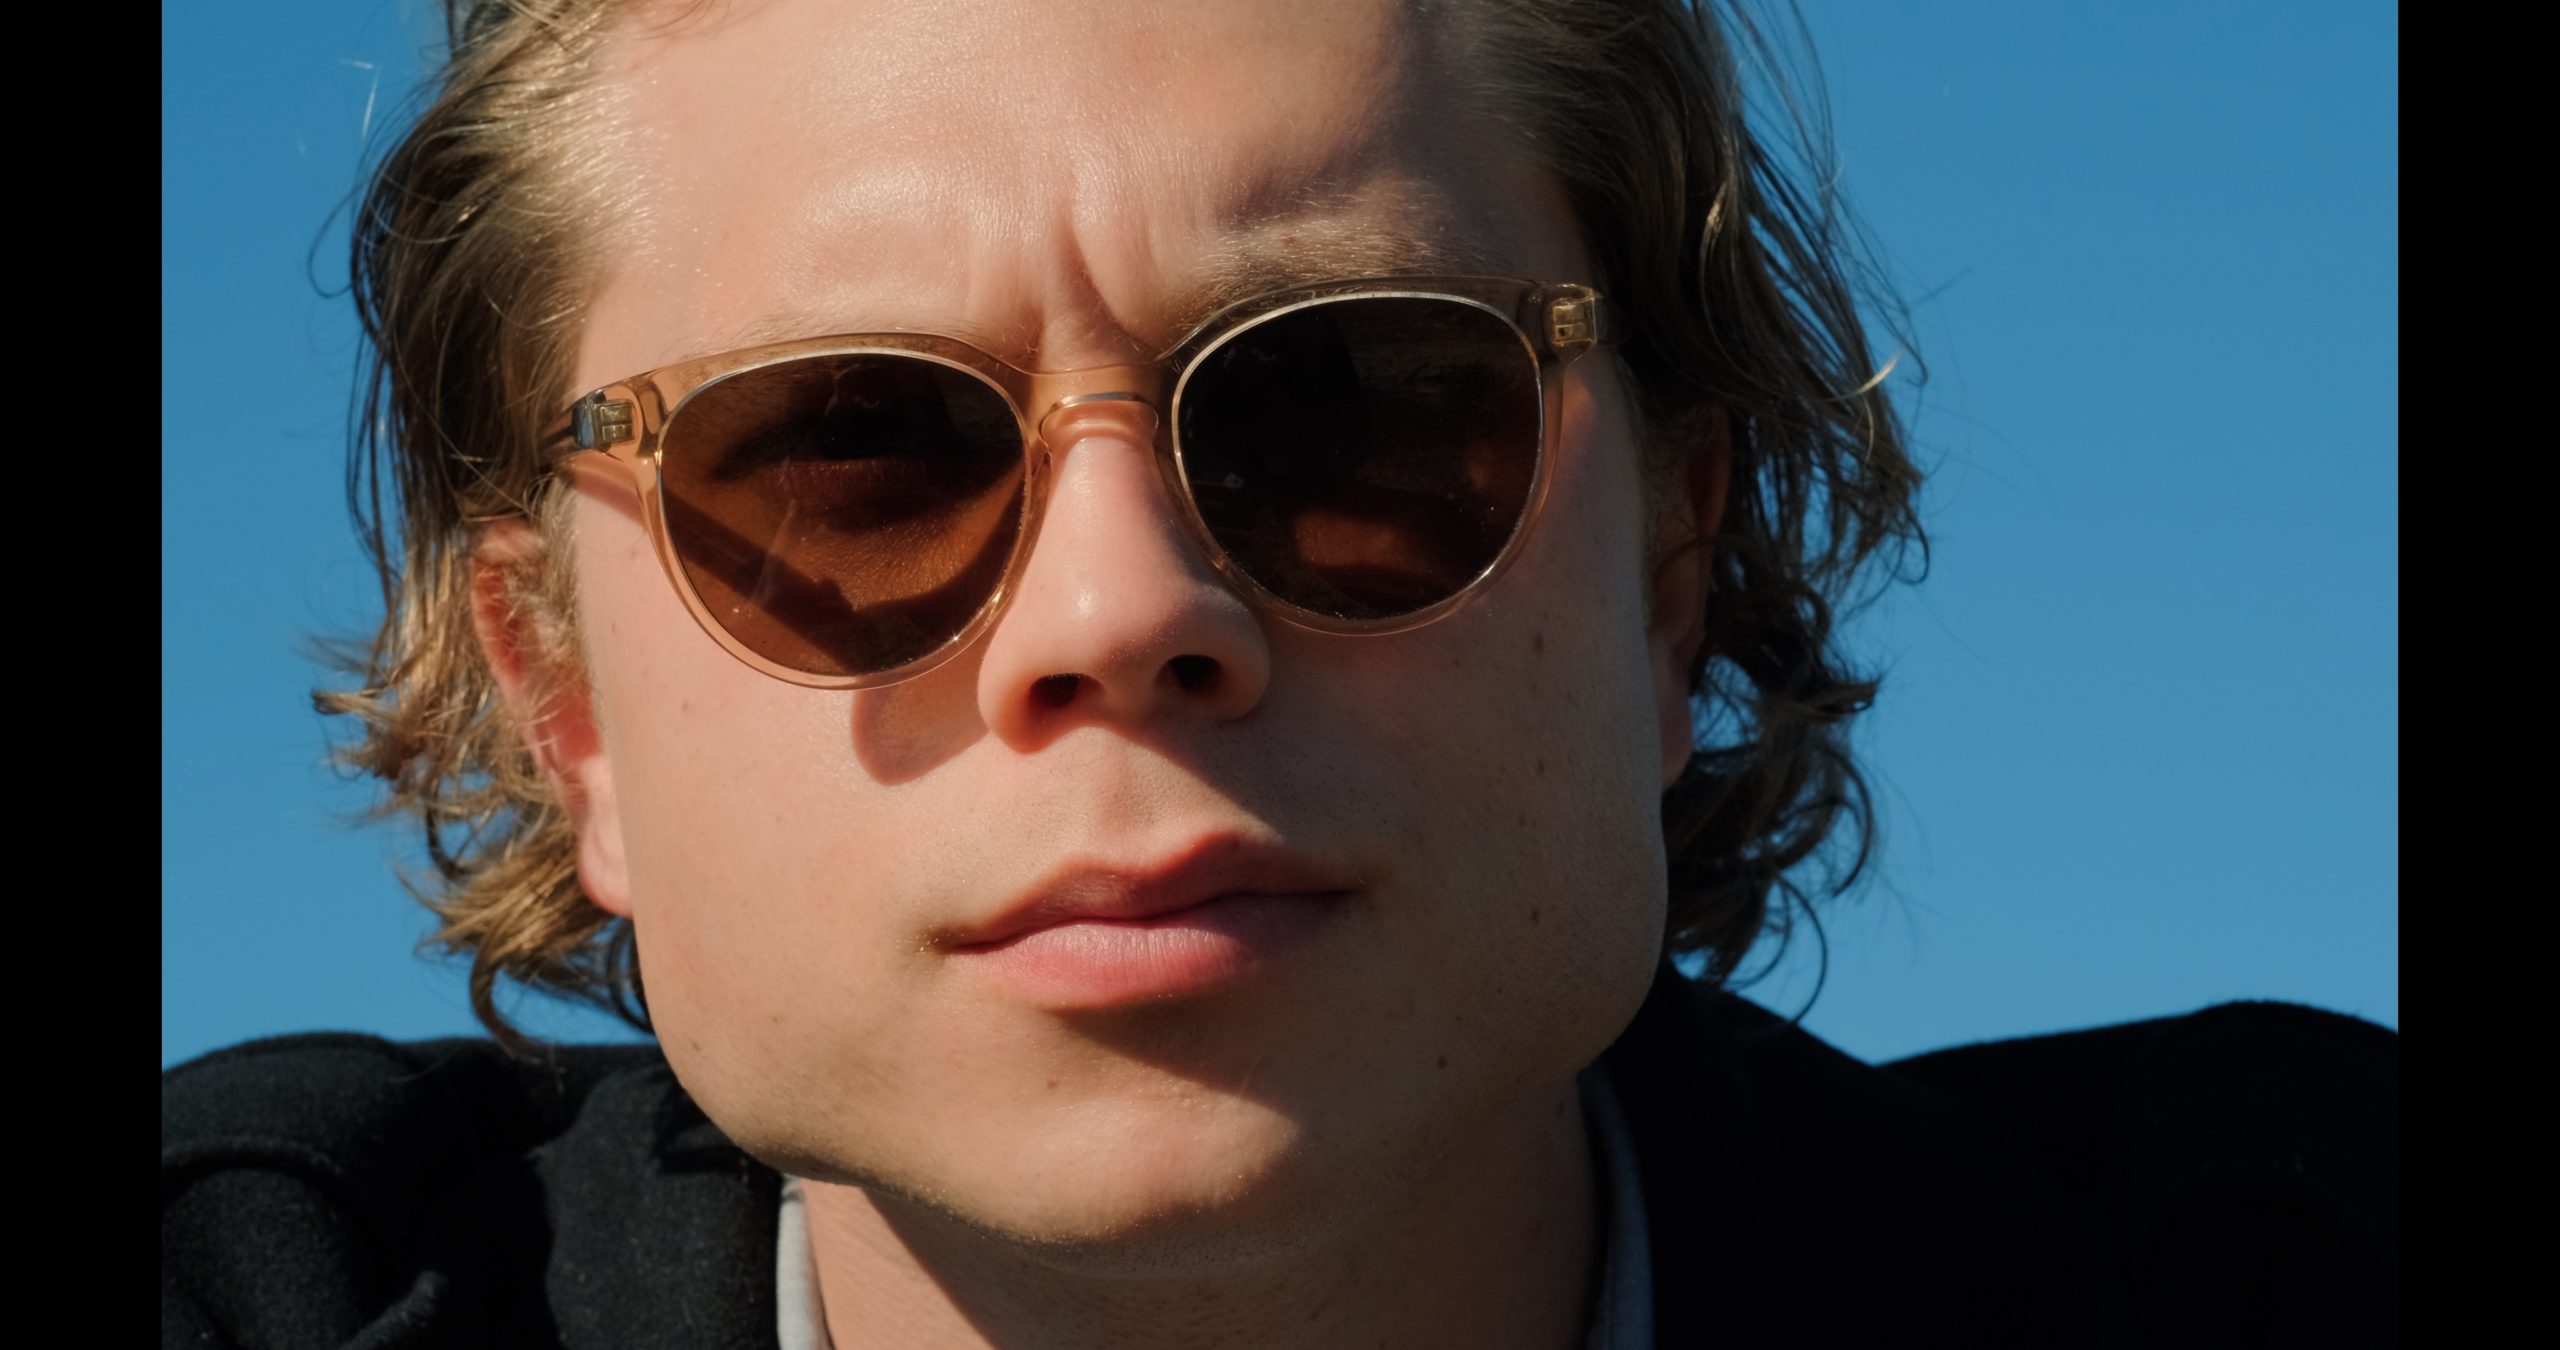
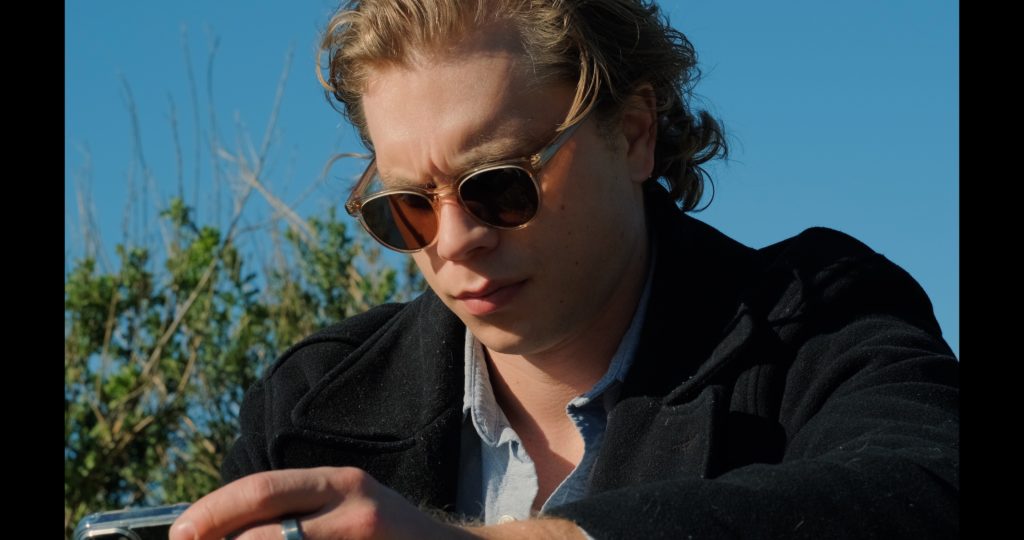
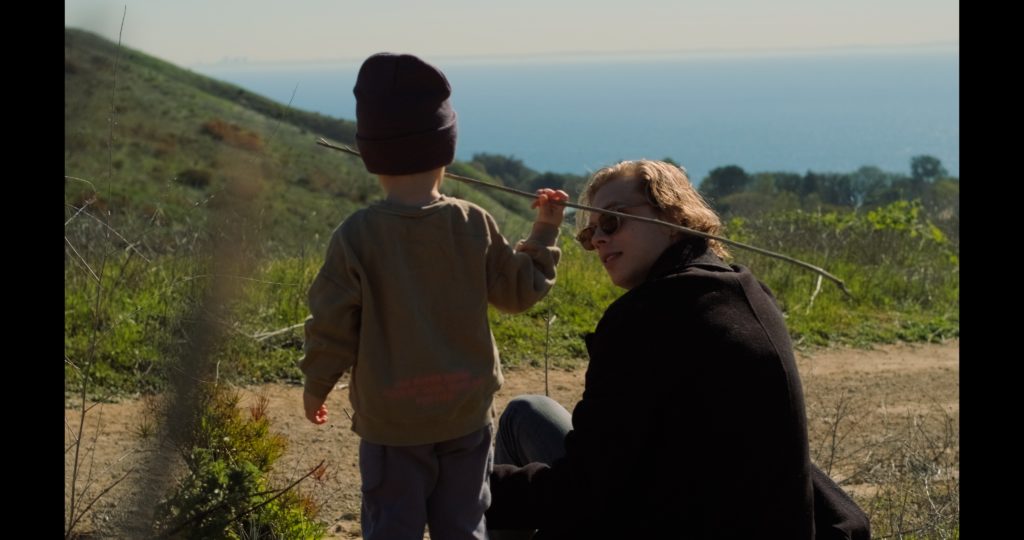
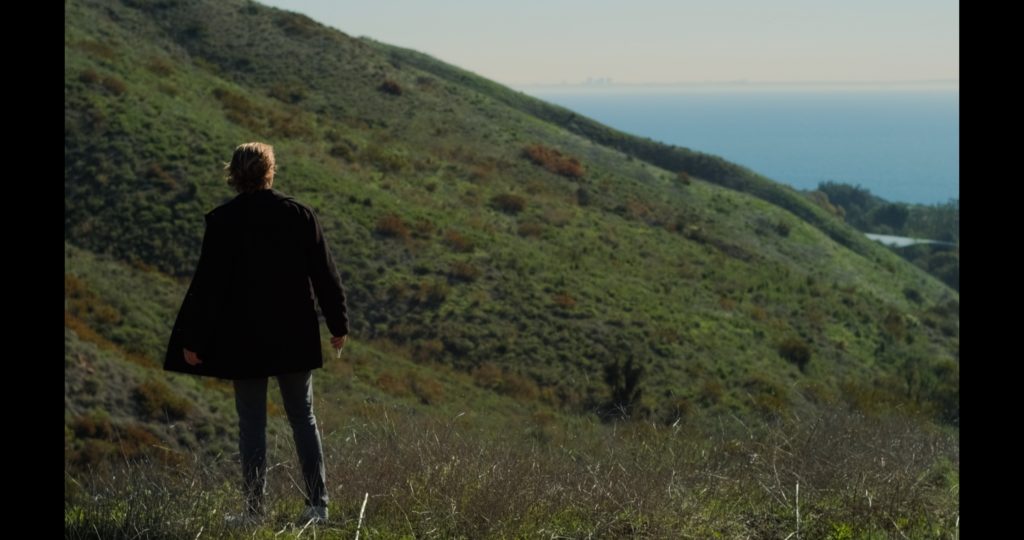
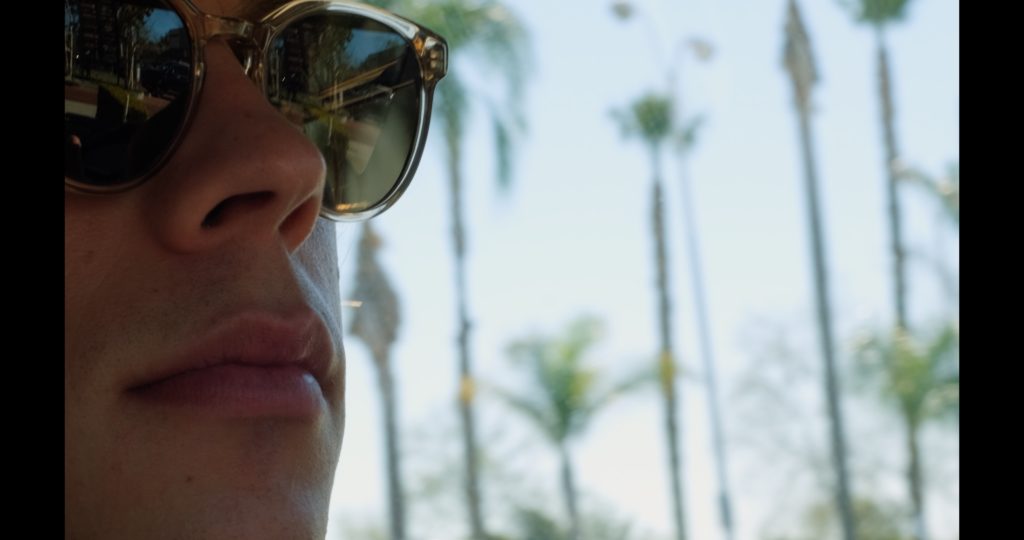
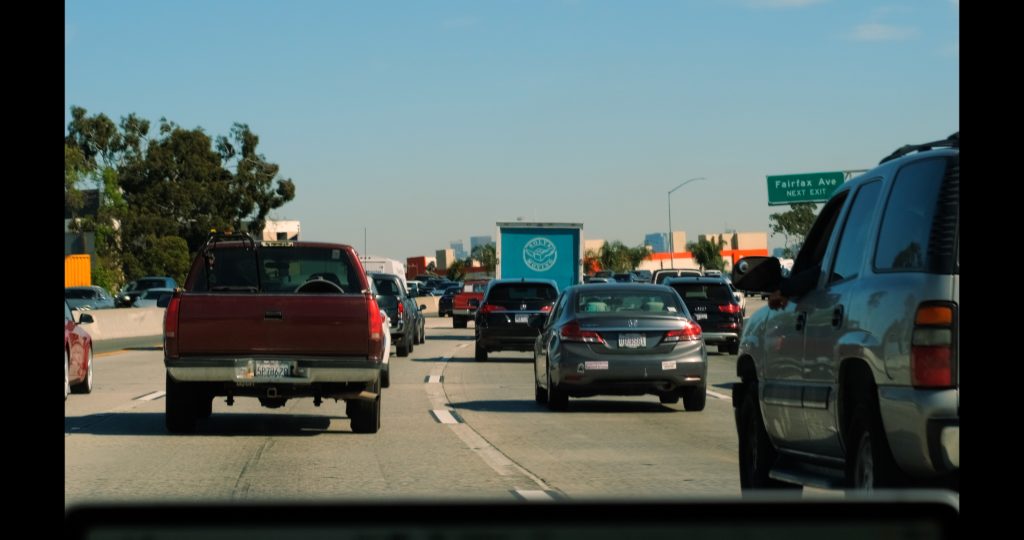
Screenshots
Below are a few screenshots of actor Josh Pafcheck from our first shoot day. You’ll notice they were all framed in 1.66:1 aspect ratio, another experiment with this film.

We’re only at the very beginning of production, so there will be lots more to come over the next few months.
I’ll be sharing more footage, along with updates on the creative process as it evolves… If there’s anything specific you would like covered, leave a comment below!
And for more exclusive articles like this every Sunday, sign up for my newsletter here.
16 Comments
Tempo Garments
atDiscover unmatched comfort and quality with Tempo Garments undergarments collection. Crafted with soft fabrics and meticulous attention to detail, our range ensures ultimate comfort and confidence every day.
Larry Martin
atExciting news! Best of luck with the production of ‘The Canyon’ – looking forward to seeing your creative vision come to life on the big screen!” 🎥✨
boat bottom cleaning services in Fort Lauderdale FL
Jack Kierski
atI have question, when it comes to looking for cast and crew to work on a no-micro budget feature or short with no money compensation (or non-paid), what are the cons of cast and crew working on a film, non paid?
Noam Kroll
atI would say the biggest con is less reliability, since most unpaid cast/crew are willing to take other projects that pay up front, even once they have already committed.
Ita Jansen
atThis looks great! Congrats! Looking forward to the finished film. I’m also self shooting with available light, but with a Bolex D16. Any tips on shooting with Digital Bolex with available light are welcome 🙂
Chris
atGreat colors. Great look. I know you did a blog post on the Fuji rig, but I’d love to learn more about your workflow — settings, logs, luts, tricks in post post, etc — with the Fuji. Thanks.
Noam Kroll
atWorking on it as we speak, thanks for the suggestion!
Sai Ashwin
atWhy the XT-4 and not something like a BMPCC 6K PRO or even one of the autofocus beasts from Canon or Sony? Especially considering the one man band type of situation.
Noam Kroll
atMainly because I love the color science of the X-T4 and it is just so easy to use. The 6K is great too, but it’s a bit too big to shoot guerrilla style.
Tim
atWow. Beautiful screen grabs. Looks so good.
Noam Kroll
atMuch appreciated, Tim!
Jim Henson
atGood stuff! What image issues were you concerned with regarding the iPhone?
Noam Kroll
atMainly the motion cadence/performance. That gives the footage away as iPhone, to me at least… And the low light performance as well.