Adding film grain to your project in post is one of the best ways to create a unique finishing touch and add polish to your visuals. However, in many cases, filmmakers struggle to achieve strong results due to three primary issues.
It’s worth noting that like any other visual choice, what makes film grain look “good” is entirely subjective.
For instance, some filmmakers may prefer the look of digitally created grain, despite it not accurately emulating true motion picture film. There are no right or wrong choices when you’re making art.
That said, my personal preference is to use grain to emulate an authentic film look as closely as possible. And in order to do so, I must keep these critical variables in mind:
1. Digital Vs. Real Film
This is an obvious one, but worth stating upfront. There are a number of different ways you can apply film grain to your digital footage, but some methods rely entirely on digital tools.
In many cases, built-in NLE tools and software plugins simulate the look of film grain by synthetically creating digital artifacts. Sometimes these digital tools can yield semi-realistic results, but anyone who has ever shot real film will know the difference.
The alternate method is to use scans from real motion picture film, such as those available on www.cinecolor.io
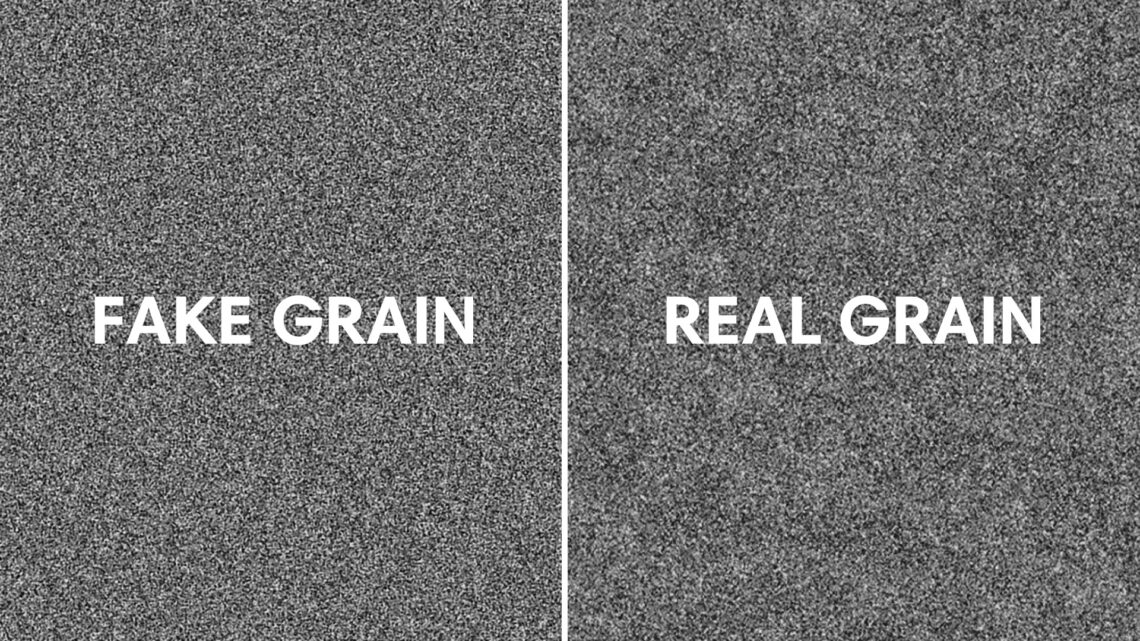
Real film scans not only have technically accurate grain structures (because they aren’t a simulation) but also have slight imperfections that gives them charm. This is the biggest differentiating factor between real and fake film grain. Even the most well captured real film grains will have some minor inconsistencies, subtle flickers, and non-uniform patterns.
Take a look at the difference below:
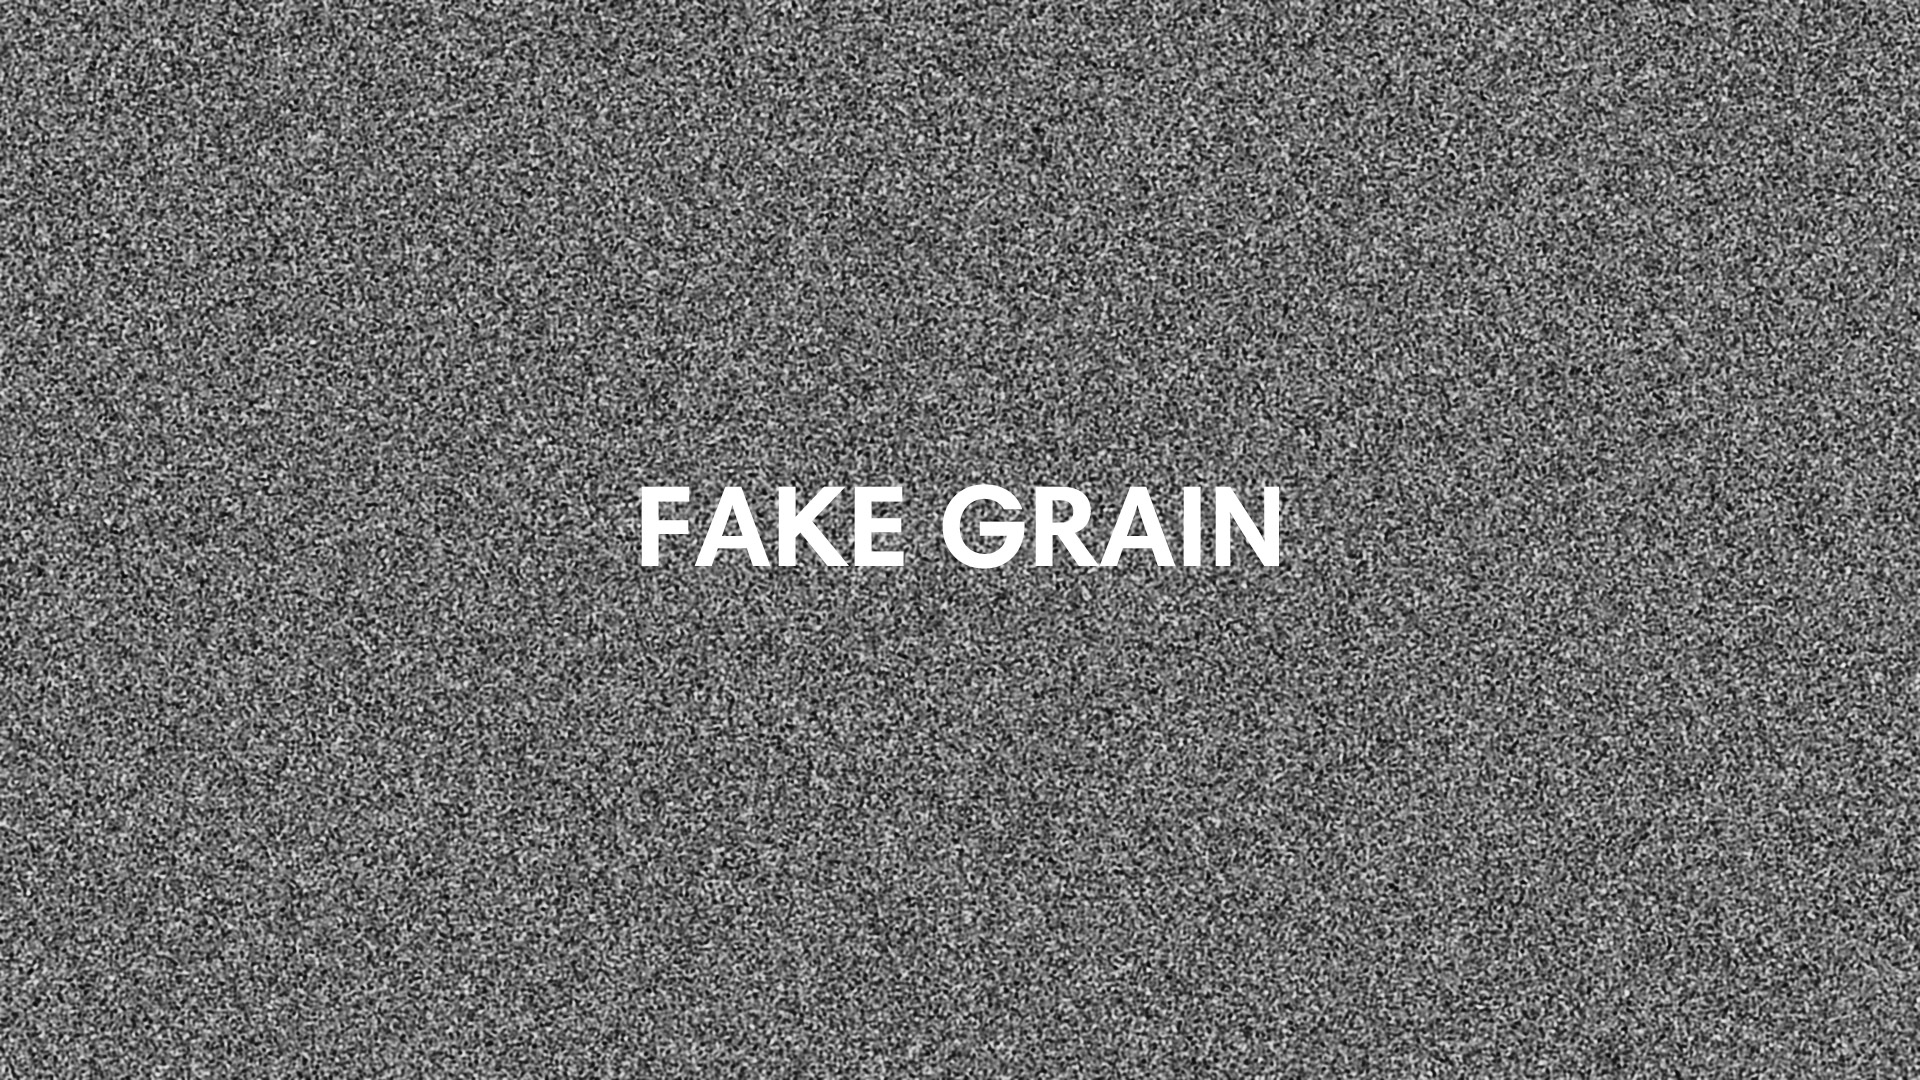
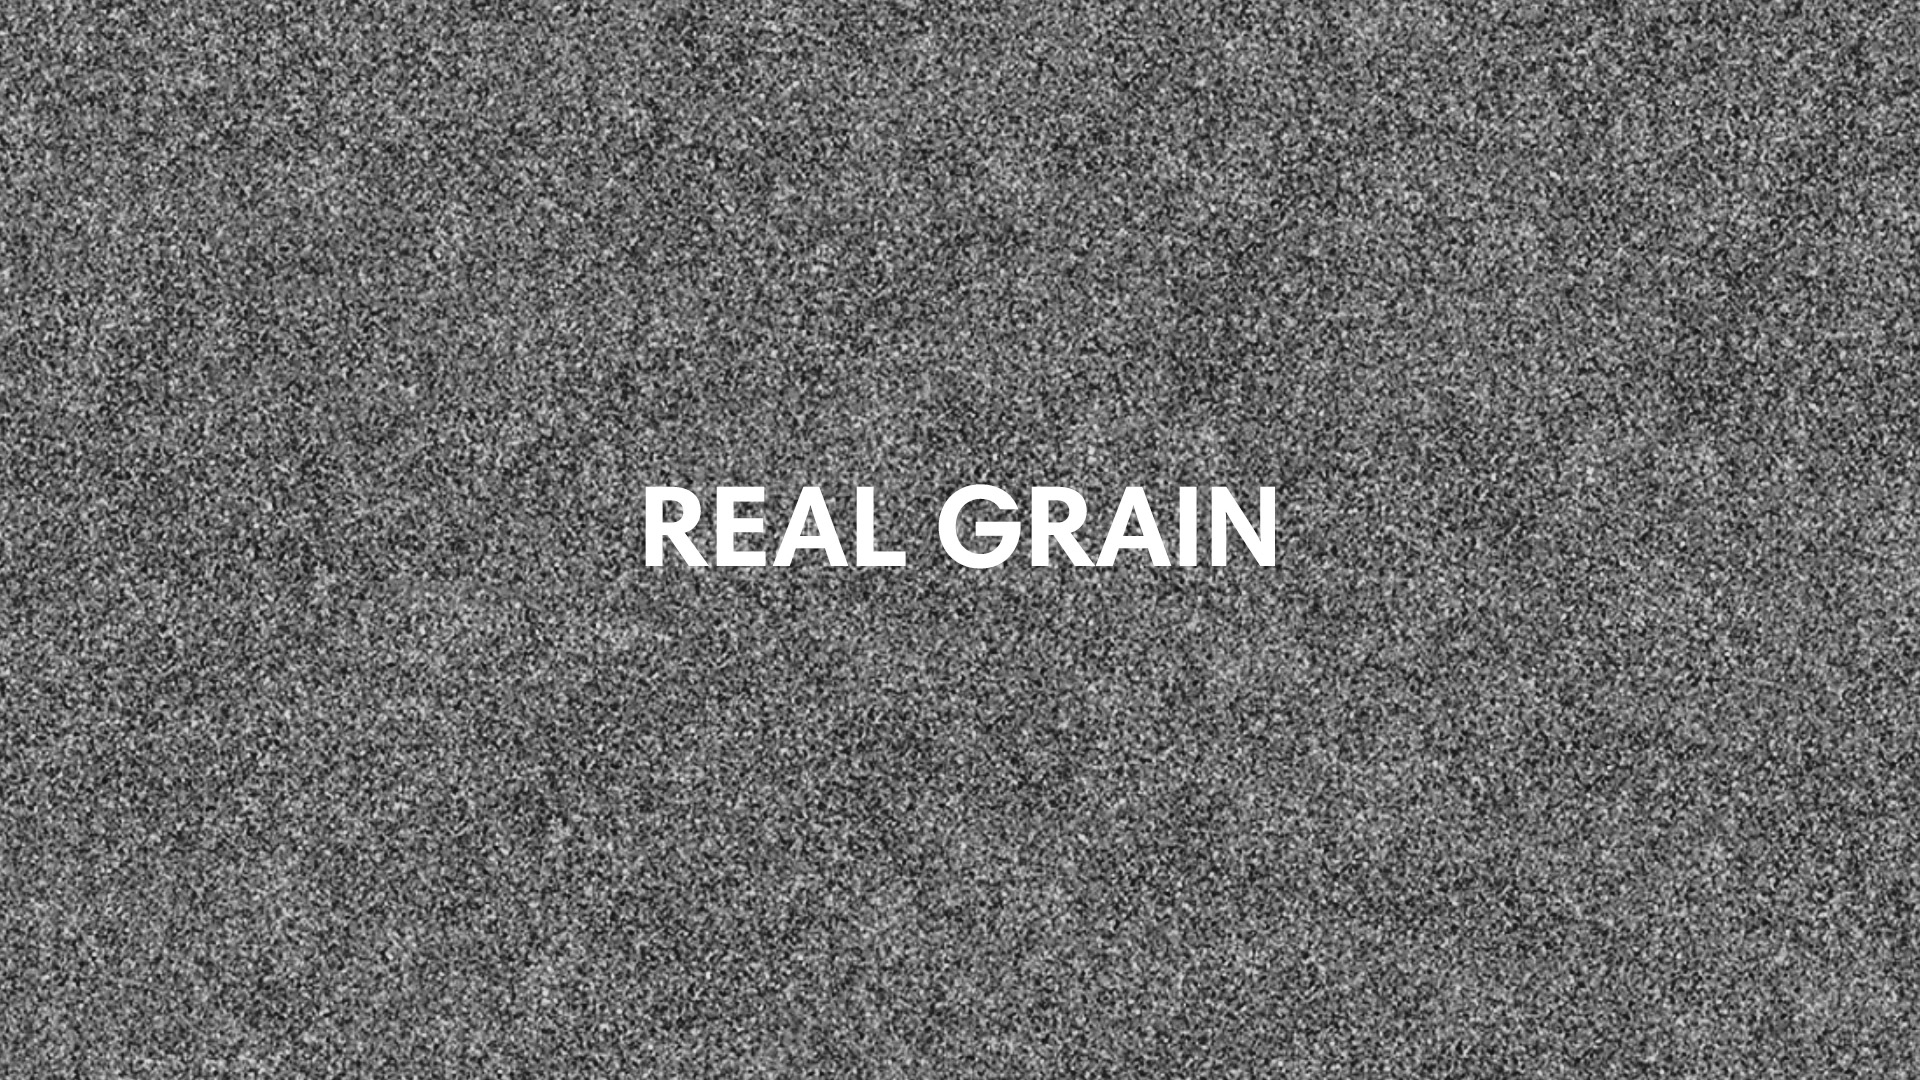
Real film grain is unpredictable, especially at smaller formats. The uniform nature of digital grain just has a different look.
2. Quality Of Real Film Scan
Let’s assume you want the most authentic final look and have decided to use real film grain, AKA digitized film scans. The next step is to choose the best quality scan for your needs.
There are many film grain options on the market, all of which have their pros and cons. Some come from high quality scans but are only mastered to HD, making it difficult to customize them.
Other grain files are rendered out in higher resolution but have too many inconsistencies, flickers, dirt, or other issues that add an additional (often unwanted) layer of stylization.
Again, this is entirely subjective. But in my opinion, the best and most versatile grains are scanned at a minimum of 4K resolution and do not have any noticeable flicker, dirt, or noise issues.
Sometimes it’s nice to add these additional effects too, but it’s always better to add them later on using dedicated tools. That gives you far more control over the final product.
When I created the 6K Film Grain for Cinecolor, it was not only important to me that the assets were high-res, but also that they were free of unwanted artifacts. I put each frame through a proprietary post process to ensure the grain structure that could be uniformly applied to just about anything.
3. Improper Application
The third and final major issue that filmmakers run into when emulating film grain is improper application.
Even if you choose a high-quality digital grain file, it will not look right unless it’s applied consistently with your source footage.
For instance, if you shot on a full-frame camera with wide-angle lenses, applying 16mm grain won’t look right. You might like the aesthetic, which is perfectly okay. But it won’t look like real 16mm film.
For that reason, it’s critical to match the grain format with your camera format for the most accurate results.
It’s also crucial to use different transfer modes, opacity levels, and contrast settings from shot to shot to create the most authentic final look.
This is where even big post-houses sometimes go wrong. They have good film grain assets to work with, but will simply apply them as a blanket effect over an entire timeline.
If you’ve ever shot film, you know that grain never looks the same between any two shots. Similar, yes. Exactly the same, no.
Depending on your exposure levels, lighting, color balance, processing/scanning workflow, and many other factors, grain will take on different looks on a shot-by-shot basis.
You by no means need to adjust film grain on every single shot in your movie. But if you have a scene shot outdoors in broad daylight, the grain structure should look different than an interior night scene – just as one example.
I recommend looking at tons of references from movies shot on film that have a similar aesthetic to your project. From there, you can match the grain by eye to achieve a similar end result.
There are no hard and fast rules when it comes time to apply film grain to your movie or project. But there are principles you can adhere to.
I recommend starting off with a clear intention of your goals. Figure out the look you want to achieve, and reverse engineer from there.
If you are like me and enjoy the most realistic filmic look, don’t forget to use real scans that are of the highest quality, and apply them in a consistent way with your source footage.
But also don’t be afraid to experiment outside of these boundaries from time to time.


3 Comments
Henry Larry
atI have found that striving for authenticity in film grain truly elevates the visual experience. Real film scans indeed add a unique charm with their imperfections making a significant difference in achieving that genuine cinematic look.
Interior Painting Services in Naperville IL
Serge
atthis “blog” inspires me all the time
thanks, Noam
Soren
atPsst. You can also filmout a digital image on CAMERA STOCK, if you talk to a lab with the machines capable of doing it. Even Fotokem doesn’t do it. Talk to Jaime Busby at Gotham Photochemical in LA. It’s way more worth it if you’re serious about getting it right but don’t want to spend unnecessary or dumb amounts of money. It’s 10 times less expensive than the traditional film workflow; and if you do it right, it’s the dirtiest and sexiest secret in town.