There’s a lot of misconception and confusion around the use of color grading LUTs – in particular whether they can be used professionally and if so, how. As someone who has used countless LUTs as a colorist, and created thousands of my own over the years, I thought I’d weigh in.
Let’s start with the biggest and most unfounded criticism of LUTs: They are only used by amateurs.
This could not be more wrong. If anything, the argument shows a lack of understanding of what a LUT even is.
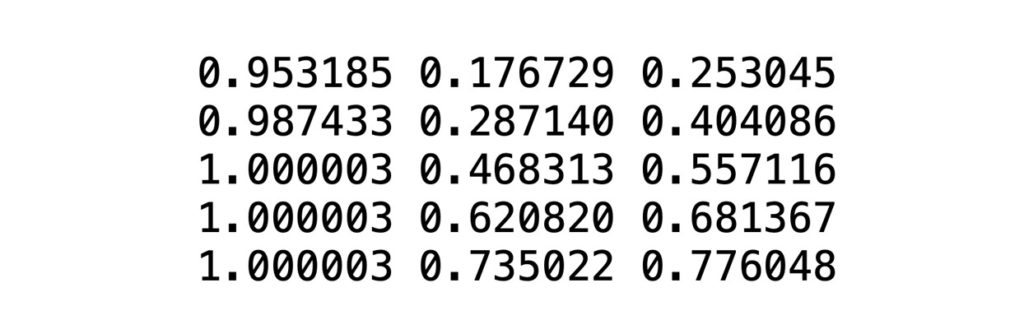
A LUT of course, is simply a computer file that transforms color values. It directs whatever software you’re using to shift colors, contrast, saturation levels and other variables based on math. If you ever look inside a LUT file, this is what you would see:
There is nothing inherently professional or amateur about this process. It’s just a color conversion. A tool. What matters is HOW it’s used, and WHAT it’s used for.
I suppose people who see LUTs as an amateur tool have only learned of them recently. Maybe they’ve downloaded a poorly authored LUT pack from a website, slapped it on some unbalanced footage and (no surprise) didn’t get a good result.
In fairness to them, the majority of off the shelf LUT packs being sold online are quite sub-par, in my opinion at least, so I get why they may have been turned off.
But it’s important to remember that LUTs have been around for decades, and they come in countless different varieties. They’re not only used for creative color grading, but many other critical tasks too: technical color conversions (ex. Log – Rec. 709), monitoring on set, visual effects, and so much more.
The very first time I ever heard the term “LUT” was over a decade ago when I was working predominantly in post-production. My newly formed company was running some services for a large feature documentary, and the producers asked if I could help them apply a “Look Up Table” to their finished movie. They needed to prepare for a theatrical release, and had to convert their film’s color space as part of that process.
At the time, I couldn’t help them as LUTs were a very foreign thing to me. The only people I knew using them were working at the highest levels of post-production/finishing, so I referred them to a large post house who handled the output for them.
That was my brief introduction to LUTs. They were a professional tool to me then, just as they are now.
As I learned more about LUTs over the years, I began using them in numerous capacities on my own projects, for clients, and as part of my overall post-production workflow.
While I still use them for a multitude of applications, today I primarily use them for creative color work as they help me achieve two major benefits:
- They speed up my color grading process
- They help me achieve greater visual results
Color grading is an art, just like writing, editing or playing music. And for me, the best creative work is always born out of spontaneity. If something takes too long or is too cumbersome to handle, that can often work against my goal of working from the gut and being instinctual.
Even if I’m color grading a shot from scratch (not using a LUT), I tend to work very quickly. If I spend too long on a shot, I’ll lose my perspective. I’ll get caught up in some minor detail and lose my objectivity – it’ll take 10x longer to finish than it should.
So naturally, I love the luxury of working with LUTs as a means to speed up my process.
As far as workflow is concerned, I’ll always start by following the correct order of operations, and balancing/neutralizing my shots before doing any other color work. Once complete, I’ll audition a bunch of different creative looks, using my own custom LUTs available on www.cinecolor.io
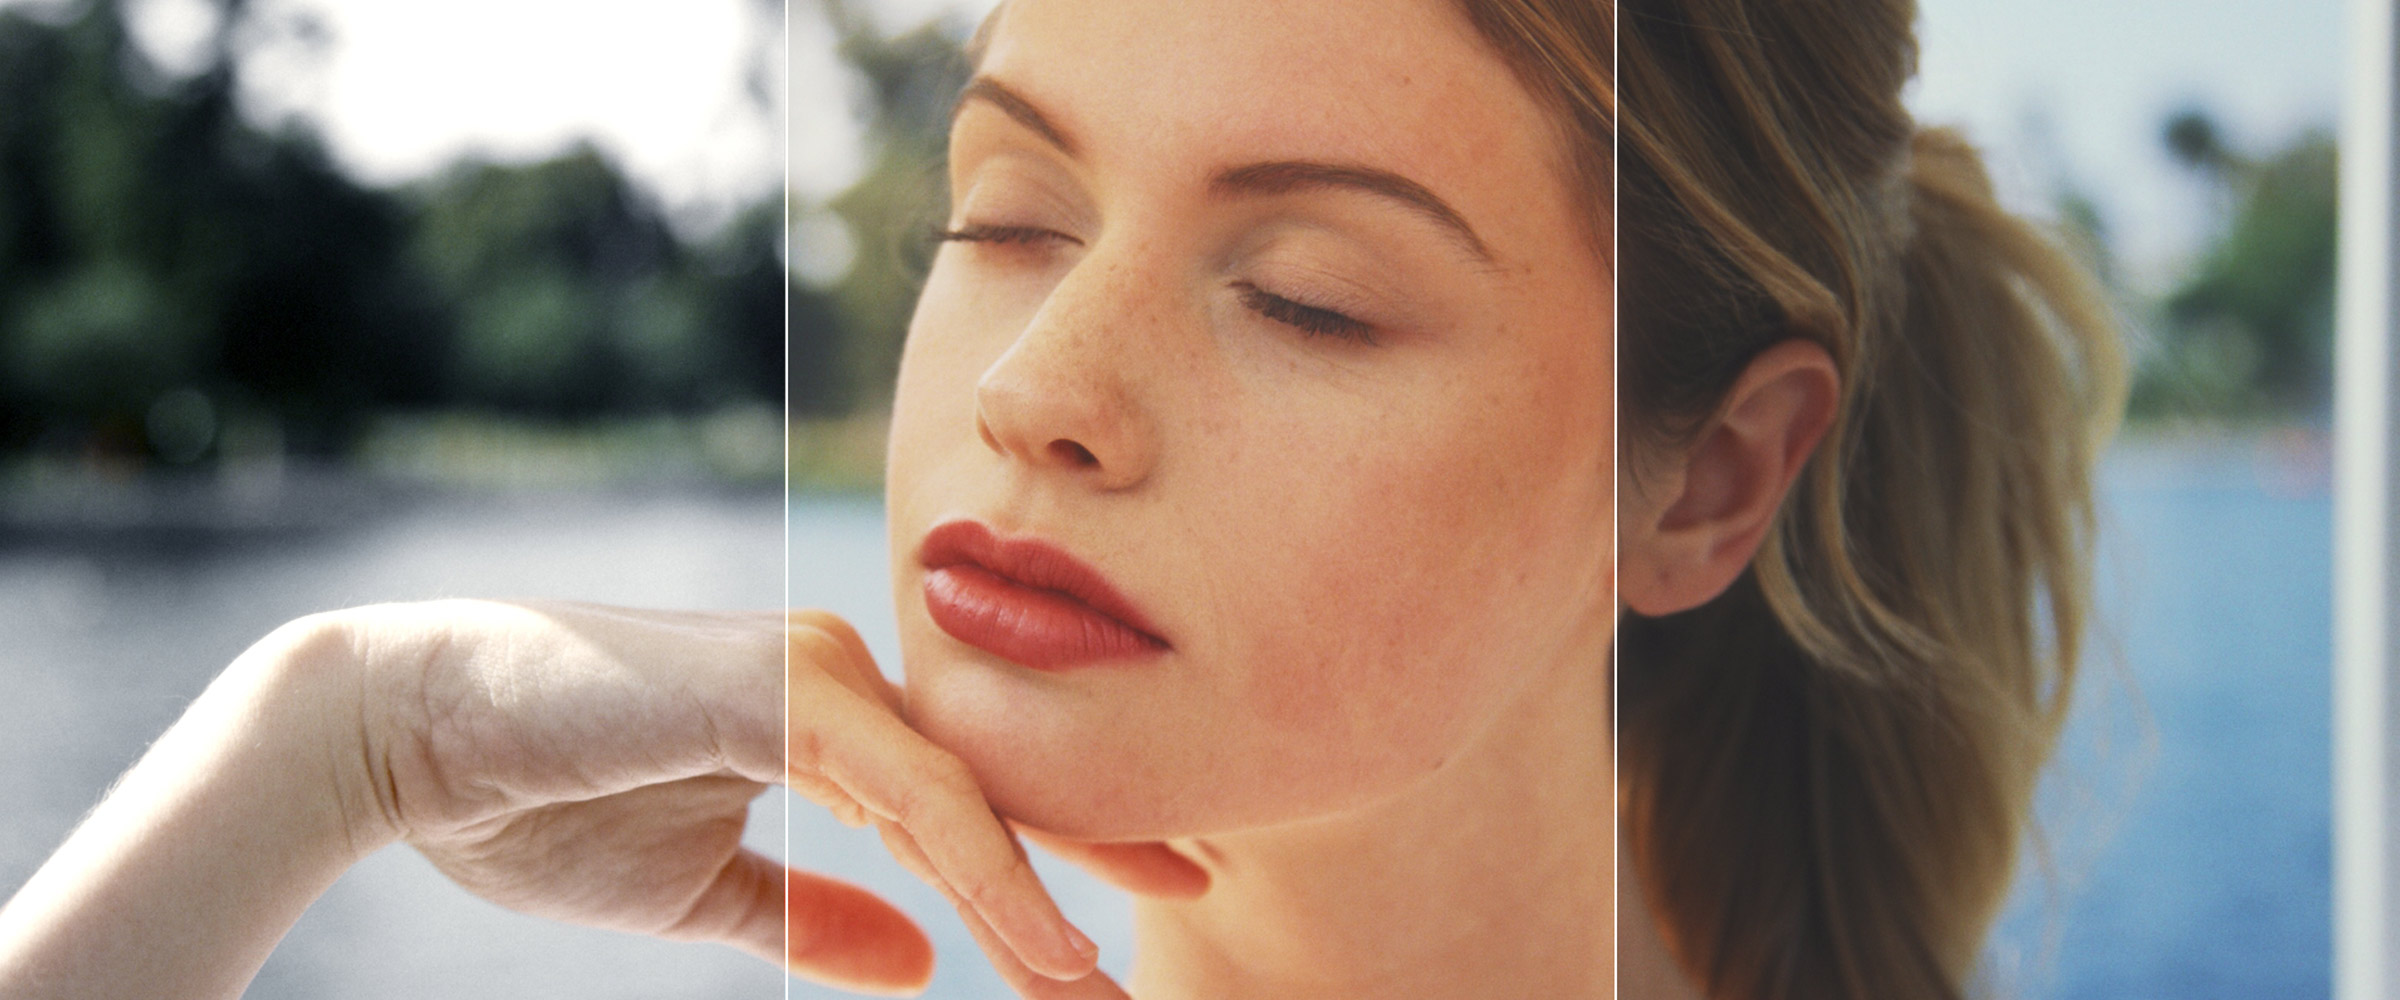
This allows me to immediately get a sense of what might work best from a stylistic point of view. I might flip through a dozen LUTs, grabbing screenshots as I go so I can compare my favorites to each other.
At a bare minimum, this helps identify the broad strokes very quickly and easy – Does the shot look better warmer or colder? Crushed blacks or faded? High saturation or desaturated?
From there, I’ll either keep my favorite LUT applied to the image and move on, OR remove the LUT and build a custom creative look from scratch, using the LUT as inspiration. It just depends on the situation.
Sometimes it’s a little bit of both. I might apply a creative LUT that will get me 95% of the way there, and then make some minor additional color tweaks to take it to the finish line.
In all three scenarios, the end result is a faster and better final product. Faster, because I’ve been able to try many color palettes without wasting time building them from scratch. Better, because my ability to work quickly and instinctively enhances the final visual product.
This is just one way to use LUTs of course… And each filmmaker will choose to integrate them into their workflow however they see fit.
Some filmmakers only ever use technical LUTs to convert their footage from Log to Rec 709. Some use creative LUTs for on-set monitoring with their clients. Others grade entire projects using LUTs exclusively.
No application is any better or worse, and every potential usage for LUTs – technical or creative – can be professional.
Filmmakers often get into trouble with creative LUTs however, by not integrating them into their workflow properly. They will apply LUTs at the wrong stage of the pipeline, before pre-balancing their image. This will make it impossible for them to ever match all the shots together in their timeline.
In other scenarios, filmmakers stack too many LUTs together, creating extreme color palettes that push colors/contrast way too far, and result in an unprofessional grade.
And then of course some people simply have issues because they’ve chosen to use low-quality LUTs (usually without realizing it). Most commonly, the LUTs they are using are not universally compatible, rendering them useless for most applications.
Unfortunately, many creative LUTs being marketed today have created by non-professionals. They are created using test footage from only a single camera source and aren’t extensively tested before release, making them highly unreliable for professional work.
You apply a LUT to shot A that looks great, but on shot B the shadows are way too crushed. Or maybe the LUT you apply is just so extreme right off the bat that it’s unusable unless you dial it back to 10% strength. These type of issues work against the main benefit that LUTs are supposed to offer; Rather than improve your results with less time spent, they require more time for poorer visuals.
Whenever I create LUTs, whether strictly for myself/my client’s usage, or to release through CINECOLOR.IO, I’ll dedicate days if not weeks to testing for universal compatibility. Ultimately, I use these LUTs to improve my working life, and if they aren’t able to deliver great results every time – no matter which camera I’m working with – they wouldn’t serve any purpose.
Unfortunately, the majority of creative LUTs being sold on the market aren’t crafted in the same manner. And the result is a lot of frustrated filmmakers who are unable to achieve the results they’re looking for…
The good news is, achieving professional level results while using LUTs is incredibly simple, so long as you: A) pre-balance your footage properly, and B) use high quality LUTs that are universally compatible.
Do both of these things and you’re well on your way to achieving stunning color palettes with less time spent in the edit suite.
LUTs may not be right for everyone, and some people will prefer not to use them at all – even to convert their camera files. That’s perfectly okay!
There’s never been only one way to achieve strong visual results as a filmmaker. It’s all about using the tools that are most aligned with how you like to work, and maximizing them to your benefit.
If you’re interested in utilizing my creative LUTs on your projects, be sure to head over to www.cinecolor.io to get yours today.
Don’t forget to also check out my Color Grading Masterclass – the first color course of it’s kind, dedicated strictly to creative grading.
And for more content like this, follow me on Instagram, Facebook, and Twitter!
4 Comments
FOTOSPRING
atThank you for this article. It helped me to improve my color grading skills.
Noam Kroll
atGlad to hear it!
Kevin P.
atThis couldn’t be more true. I have found the Cinecolor LUT’s to work great on stock video footage, music videos as well as film use. One of my favorites is still the timeless but retired Avante Garde pack that you put out. In fact, if I ever do make what will most likely be my one and only feature film, it’s probably going to obtain its “look” at least partially from that LUT pack. Thanks for the great writeup !
Noam Kroll
atThank you so much! Really appreciate the feedback and glad you’re enjoying the LUTs. Hope to see your feature down the line.