One of the first things you learn as a filmmaker is the 180 degree rule, which of course helps visually orient your viewers in the geography of a given scene.
Most importantly, it guarantees that the eyelines of your actors match, so that the audience doesn’t become confused or disoriented.
If character A is looking left, then the coverage of character B should be looking right – assuming they are talking to each other. Simple enough.
You can break this rule of course, but if you do, you have to find other visual cues to give your viewer a sense of spatial awareness.
All that said, there is another major factor that filmmakers often overlook when it comes to eyelines…
It’s not simply about the direction the eyes are pointed in, but where they are placed in a given frame.
There is a well known filmmaking principle called “eye-tracing” that usually comes up in the edit, but should really be thought of as early as pre-production.
It’s a technique for guiding the viewer’s eye to specific areas of the frame from cut to cut. With the goal of making each cut as seamless as possible.
Imagine a shot that follows a basketball player passing the ball from frame right to left. Another player (on frame left) catches the ball, and then it cuts to the coach calling a time out.
If the coach is placed on frame left, the edit will feel 100x smoother than if he is placed on frame right. Because the eye of the viewer is already looking in that direction.
This would also allow the editor to cut away from the coach quickly (if appropriate for the scene), because the viewer doesn’t need that extra second to re-orient themselves and find the focal point in the frame. It’s been done for them.
For films that are predominantly center framed – like much of Wes Anderson’s work – it’s simpler to accomplish fluid edits. Because the focal point rarely if ever moves, and is baked into the raw footage.
But for the vast majority of films, it takes a concerted effort in both production and post to ensure the coverage will deliver a seamless viewing experience.
Eyelines and eye-tracing are two very different things, but they are related – and as I’ve discovered recently, they can (and should) be combined for the most precise edits.
Here’s an easy example –
Imagine again a scenario where character A is looking to the left in their shot, and character B is looking right in the coverage.
Technically their eyelines match. But what if character A is framed very high up, and character B is extremely low in the frame and on the opposite side, with lots of negative space?
The edit will feel jarring. Especially on a wide aspect ratio (like 2.39:1), where there is more surface area for the focal point to jump around.
Now, imagine that same edit, but this time both characters are placed at the bottom of the frame. Not only does the direction of the eyeline match, but the shots themselves match better too.
Ultimately, it’s the combination of multiple variables that creates the fluidity in the edit. Using just one technique over the other only gets your part of the way there.
An easy way to assess your eyeline placement, is to simply revert to the good old rule of thirds.
Filmmakers tend to focus mostly on the rule of thirds from a vertical perspective – placing characters either in the left, right, or center of the frame. But the horizontal lines are critical for eye level placement, and are often overlooked.
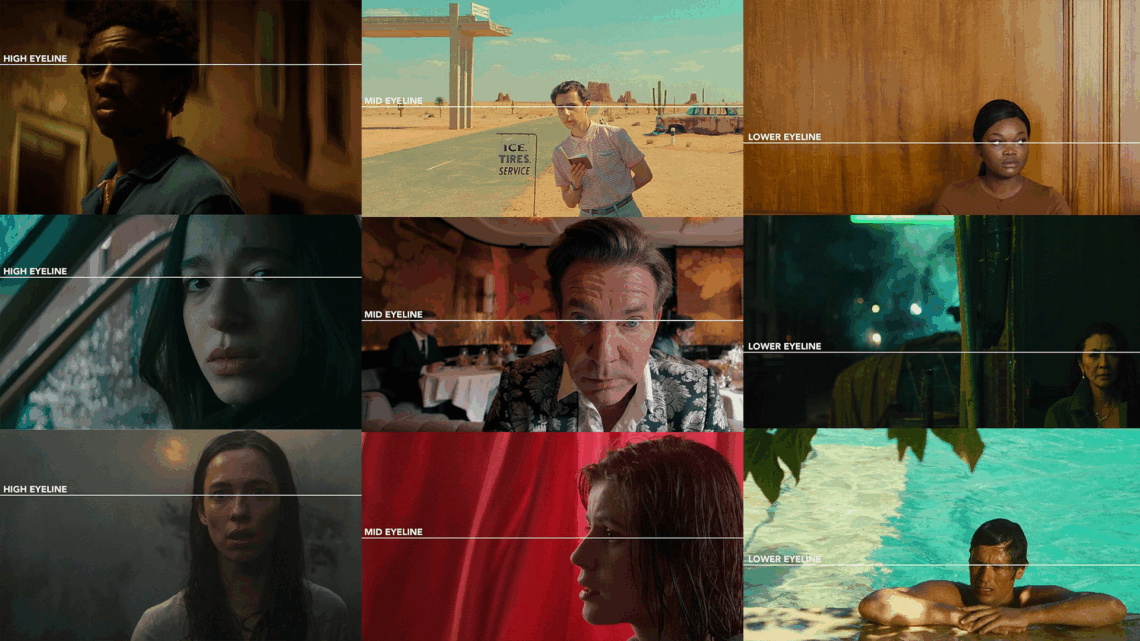
Below are some visual references to put it in perspective –
In essence, when you’re framing a character, it’s important to remember that (unless you are on a very wide angle), the actor’s body is not the focal point. Their eyes are.
As humans, we look at people’s faces and eyes instinctually. So when framing up any given shot, it’s crucial to place the eye level of your actors consistently. That’s where your audience will look first.
Like any other rule, this can be broken. Sometimes to great effect.
But if you choose to follow it, you will find some common threads from shot to shot.
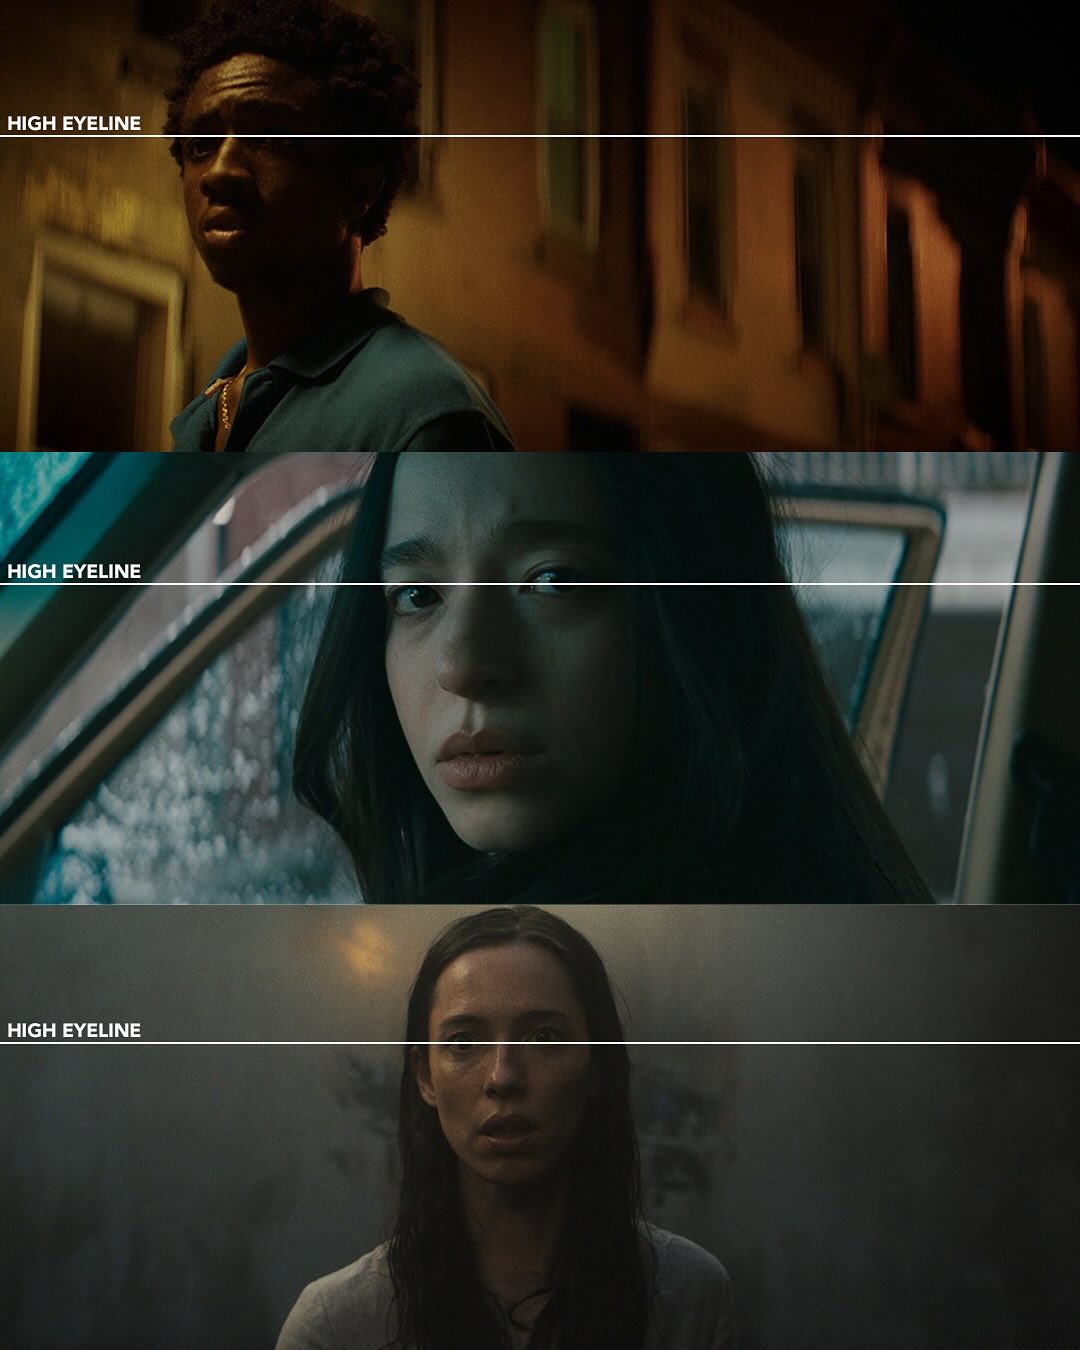
Notably, you may find that a high eye level is the most universal placement, compatible with almost any shot size or aspect ratio. A wide, medium, or closeup will all look good with the eye level placed on the top of the frame.
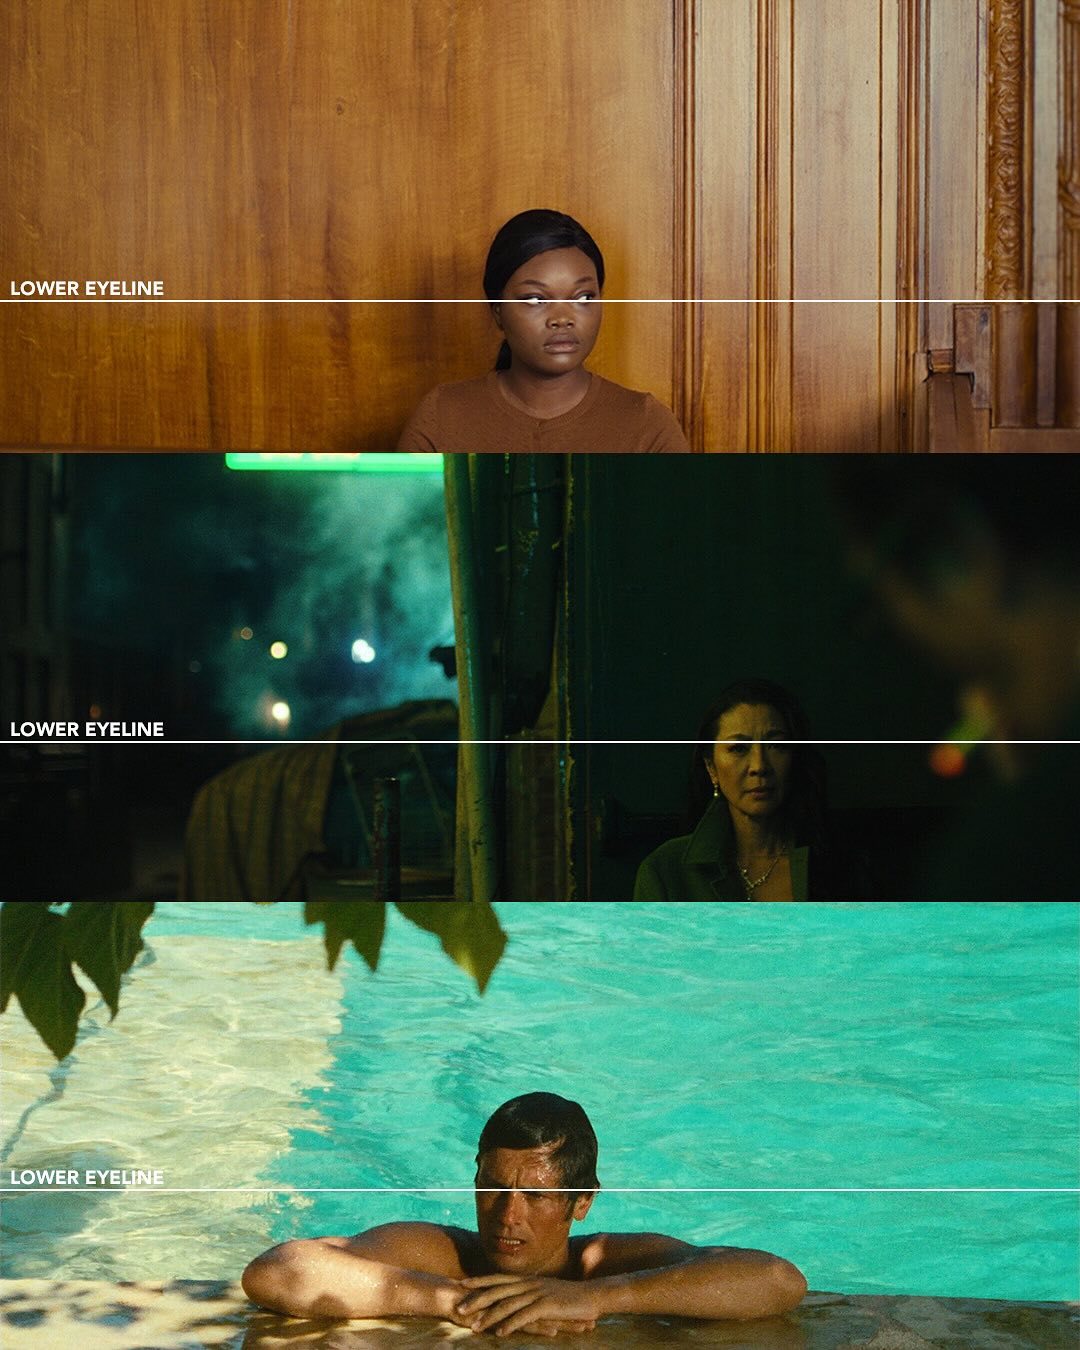
You will also find that low eye levels are more challenging to pull off as they require consistent negative space. But can look fantastic under the right conditions.
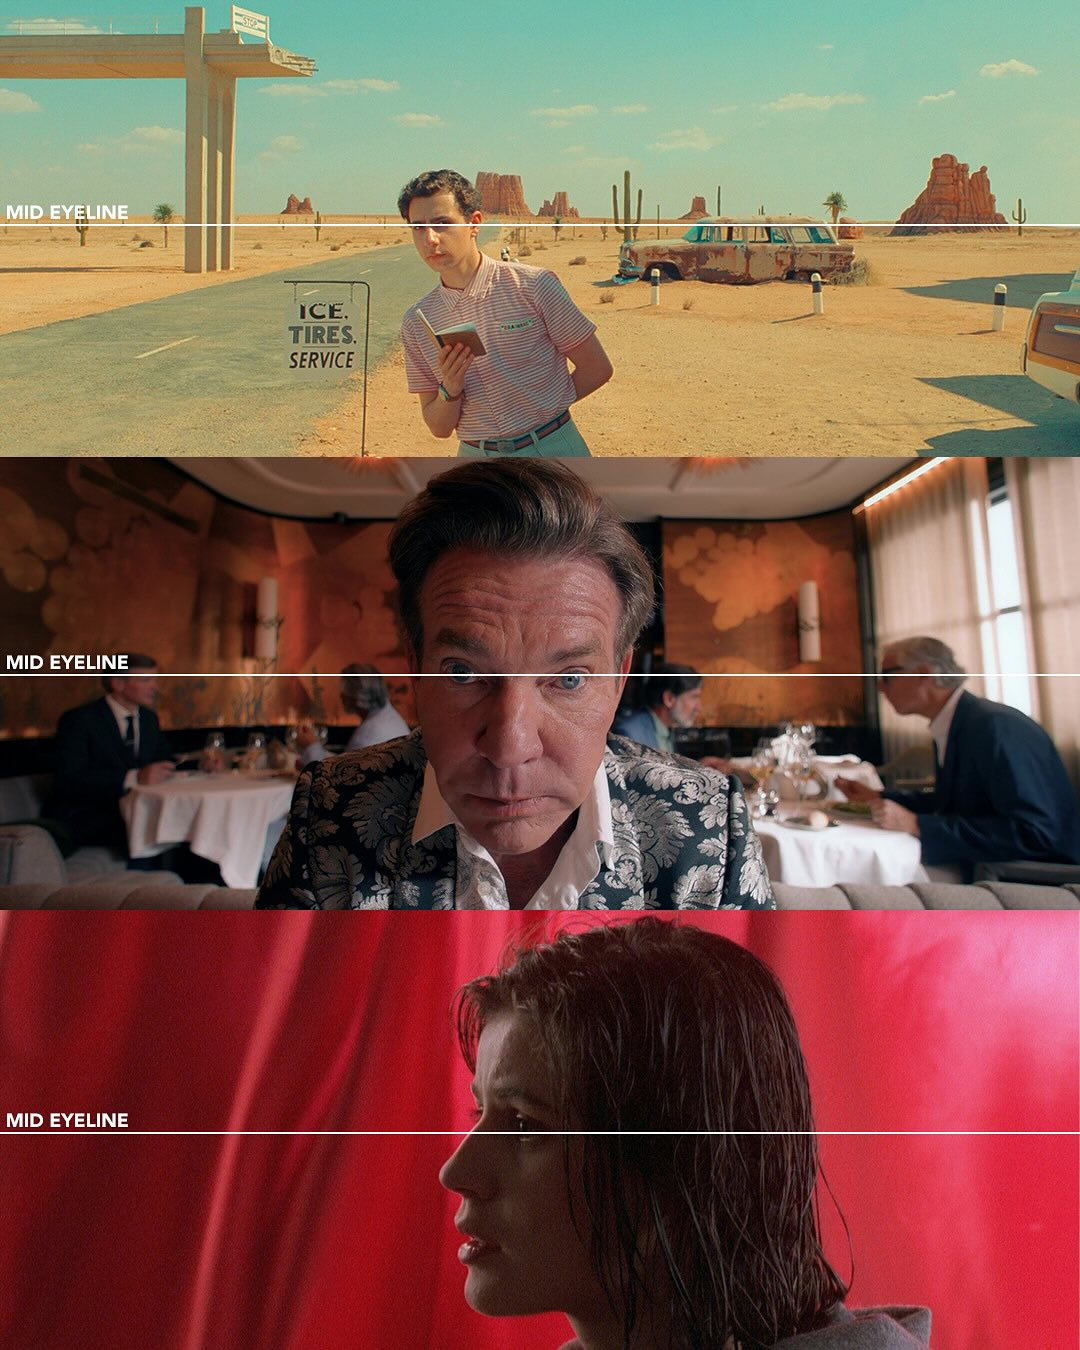
And of course there is mid level eye placement, which works well for wider angles or center framed projects, but is probably the least common of the three.
How you frame and cut a sequence is always up to you. But the more consistent you are in considering these key principles (eyeline, eye level, and eye trace) the more immersive your edits will be.
For exclusive filmmaking articles every Sunday, sign up for my newsletter here!


No Comments