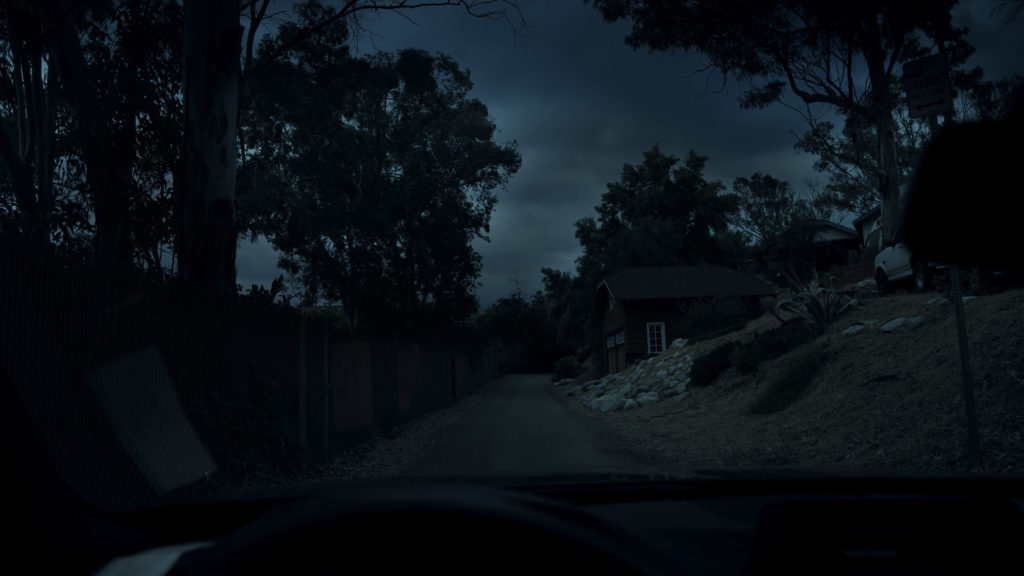
Shooting scenes at night can be incredibly expensive due to additional lighting and logistical requirements, but the “Day For Night” technique offers an alternative solution.
The idea is simple: Shoot all of your footage during the day and simply color grade it to look like it was shot at night.
While the look is never quite identical to actually shooting at night, you can get pretty close by following a few basic steps while color grading.
It’s important to note that executing a realistic Day For Night look is as much about production as it is about post.
In short, you want to frame and light your shots very carefully so as not to give away the effect. Everything from a harsh shadow on your actor’s face (cast by the sun) to a glimpse of a bright blue sky in the background can make the final image look completely synthetic.
But assuming you’ve followed all the right protocol in production, achieving a Day For Night look in post is actually quite straightforward.
In fact, I’ve even released a free Day For Night LUT which you can download from my www.cinecolor.io color grading website to help automate this process.
For those of you who want to build your look from scratch and have additional control over the image, you’ll want to follow the steps outlined in my video tutorial below.
The video offers a brief breakdown of each of the 6 major steps I include as part of my post pipeline, every time I need to execute a Day For Night shot. I’ve also included a little written cheat-sheet under the video for easy reference.
Keep in mind that this video is demonstrated in DaVinci Resolve, but the techniques are entirely universal. You can apply the same workflow no matter what software you may be using, only the tools will change – not the process.
Here we go!
DAY FOR NIGHT CHEAT SHEET
Step 1 – Neutralize the image
As with any color workflow, you always want to start your process by neutralizing the image. Fix any glaring issues with while balance, contrast or color temperature before moving forward with stylistic changes.
In some cases (as in the example below), the adjustments in this phase may be quite minor.
Before

After

Step 2 – Reduce luminance and contrast
Next, we’re going to set the stage for the more dramatic changes to come by reducing the luminance (brightness) and contrast. I like to start by pulling the midtones way down, followed by the highlights. At the end, I often bring up the shadows a touch. This helps to bring back some detail in the darker areas while also reducing contrast.

Step 3 – Cool down the color balance
Again, I like to kick this step off by focusing on the midtones – pushing them into a cool, slightly magenta arena. Once the mids have done much of the heavy lifting, I will slightly adjust highlights and shadows to further cool down the image. If the shadows seem too saturated with color at this point, I will reduce saturation only in the shadow areas to make it feel more natural.

Step 4 – Re-adjusting levels
At this point the image is already looking vastly different from the original. To help finesse and blend some of the changes made so far, I like to push around my contrast and luminance levels again, this time optimizing them for the new color palette created in the previous step. In this specific example, the visible change in this step is quite minimal.

Step 5 – Custom masks
In some cases, this step won’t be necessary. But if you are working on a shot that has a specific problem area (such as the shot in this tutorial that shows bright white clouds), you need to adjust those areas separately. This if often best accomplished by using a mask or power window to isolate the area in question.

Step 6 – Final tweaks
Now that all of the heavy lifting has been done, I recommend doing one final color adjustment to help everything blend together more seamlessly. By re-adjusting contrast and color balance slightly, all of the minor visual differences we’ve created throughout the pipeline will start to melt away. And we’re left with a final image.
Before

After

Be sure to download my free Day For Night LUT to automate this process at www.cinecolor.io
I also just launched 100 brand new color grading LUTs, which you can check out here!
And for those of you looking for even more advanced color techniques, be sure to check out my Color Grading Masterclass.
Happy coloring!
And don’t forget to follow me on Instagram, Facebook, and Twitter!


4 Comments
Christopher Sieber
atif you did a mistake in the editing how do you correct it or save your files? did you just have several Save files as Backup or whats the best way?
Thank you + live long
Henry Larry
atYour emphasis on careful production and the free LUT really simplified creating a convincing Day For Night scene. Can not wait to apply these techniques.
Professional Pool Remodeling in Sylmar California
Why Do Guinea Pigs Squeak at Night? Understanding the Reasons and Solutions - Piggyquestions.com
at[…] What can I do to reduce nighttime squeaking in my guinea […]
Carl Angel
atHi Noam,
Just want to thank you for the great tutorial. I’m trying to learn color grading and a producer friend of mine is asking me to learn how to do day-for-night color treatments. I enjoy this tutorial very much, but are there more resources available for me to learn this particular skill? I know a lot depends on the shots/scene itself, so I’m looking for as many perspectives as possible. I looked on youTube and most of those tutorials aren’t that convincing (at least not as much as yours). Also, do you know of any sites with log footage that I could practice on? I’d appreciate any advice.
Thanks,
Carl
Noam Kroll
atThanks Carl! I think the Blackmagic site should have some log footage you can download.