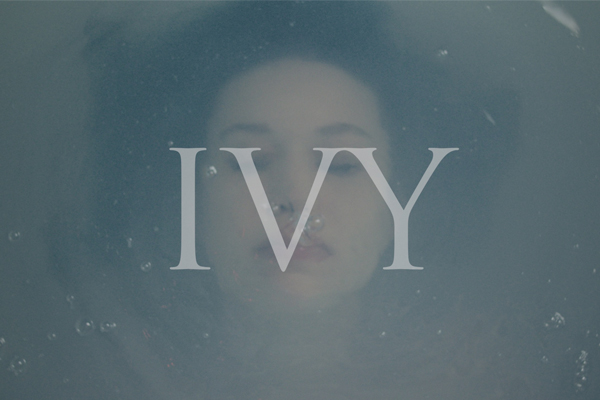
Over the last couple of weeks I’ve been working on a short mood film with the intention of showcasing it to a number of producers and investors as part of the development process for my upcoming feature film, titled ‘Ivy’. As of yesterday, this no-budget project is now complete and I am thrilled to share it with all of you today.
Rather than just posting the film here, I’ve decided to do a thorough breakdown on our entire process for those of you that may be able to benefit from a behind the scenes look at how this all came together. Throughout this article I’ll go over everything from pre-production to post, and explain how we created this film in 5 hours (of shooting) and a single afternoon in the edit suite.
Pre-Production
The whole point of this project was to create an engaging, teaser-style mood piece that could be sent to potential collaborators alongside the script and creative package. Since the success of the feature will hinge so heavily on the execution and style of the final product, I really felt that it was necessary to create a short piece like this as a mini proof of concept. That said, when it came time to actually execute the project, I was working with some extremely limited resources and had to think out of the box – especially during the development stage.
The trickiest part of the development/pre-production process on this was simply nailing down the idea. The screenplay for the feature is complete, but it’s only on draft one and there are some big changes that are currently in the works. So with that in mind, I didn’t want to create a piece that was too specific to the current iteration of the script, as the piece would risk becoming less relevant as future screenplay drafts emerge.

In the end, I decided to pull some dialogue from a couple of scenes that I knew would stay in the next versions of the script, and marry it together with b-roll from other important scenes in the film. I also felt that this approach would help us logistically, since we would only need to shoot a single dialogue scene and everything else would be shot MOS.
Although I had been thinking about doing this project for a while, the actual process of crafting the idea and then prepping for it happened very quickly. I needed to cast in practically no-time and unfortunately that meant I was not able to hold any auditions. I accepted casting submissions through an on-line casting service and after reviewing demo reels I was able to quickly book my talent. The only actor that was not booked through our casting service was Timothy Lee DePriest, who I have collaborated with many times and will also be in the feature film.
Other than casting, pre-production was very straight forward. This was a guerrilla shoot so there was no real paperwork/permits involved, and other than bringing on two crew members (makeup and AC), and scouting some locations, there was little else that needed to be done. Other than of course picking up and prepping our beautiful Arri Amira camera (with Schneider Xenar lenses) which was generously loaned to us by Jens Jacob and Scott Davis of Redefine Rentals. They are a really fantastic rental company in Los Angeles that has helped me out on countless productions.

Production
Since this was a no-budget project, there was very little time to actually shoot. When you’re dealing with little or no money, you always need to be ultra considerate of everyone else’s time as they are usually taking time off of work or something else important to help you out. In this instance, it meant that we literally only had 3 hours or so to shoot at our first location and another 2 hours or so at our second location.
The fact that we had practically no crew was actually a good thing in terms of speed. We didn’t have to shuttle around 20 people from location to location, or take a couple dozen lunch orders. With that said, it also meant that we needed to be much more limited with our lighting setups so we could move quickly from take to take. We used exclusively natural light and when needed shaped it using bounce boards/modifiers. Normally this approach could become problematic (especially when dealing with a fairly lengthy shot list), but thankfully the Arri Amira allowed us to move very efficiently.
This was my first time shooting on the Amira and it was an absolute dream. Unlike a RED, the Amira can be set up in seconds and is fully functional after simply throwing on a v-mount battery and popping on a lens. It has a built in shoulder mount, ND’s and many other incredible features that allow you to use it straight out of the box, even as a single operator. The image is virtually identical to the Alexa, which is why so many Alexa productions are now considering Amira as a viable alternative.
It doesn’t do RAW, but so few of us actually need RAW recording on the majority of our projects… And in the end it is a very small tradeoff for the ease of use on set. The fact I was able to shoot with this as a single operator all day (trading off from time to time with my AC), is pretty amazing. Even with a RED Dragon which is relatively small in comparison, I wouldn’t have been able to shoot nearly as efficiently as I could with the Amira since the ergonomics of the RED just can’t compare.

Not to mention the dynamic range and image quality of this camera is just off of the charts. This isn’t meant to be an Amira review (hopefully I can do one in the future), but I did need to go on this short rant to let you guys know just how amazing the camera really is. Yes, you could buy a couple of cars for the price of the body – but if you can afford to rent one for an important production, I highly recommend it.
Now back to the production…
One of the biggest issues we had on set was that one of our actors just didn’t show up. That’s right – he just bailed on us. When dealing with unpaid actors (especially when you haven’t worked with them before) this is always a risk that you run. And it goes without saying that is not a situation any of us want to be in.
In this case, it was an actor that was supposed to play Ivy’s father. He didn’t arrive on set and we couldn’t reach him for about an hour. In a frenzy I started calling a few actors from our casting short list and eventually found one that was available right then and there. He flew through the Hollywood traffic to get over to our location and miraculously made it there in 20 minutes. Unfortunately, his time was also severely limited so there were a number of shots we missed out on, but even still we were able to capture two key moments that ended up making the cut.
From a technical standpoint, his scenes were shot at a more dramatic shutter angle. I normally shoot everything at 180 degrees (as that’s the standard), but I shot a lot of the father’s scenes with a 90 degree shutter to create a more intense look.
In terms of other camera settings, we shot about 75% of it at 24p in 3.2K resolution. Why not full 4k? Well mainly because the 4K option on the Arri Amira is actually just upscaled 3.2K and there was no reason for us to upscale in camera… We also did shoot some scenes at 48fps – such as the shots with Ivy’s brother, and the bath tub scene.

Our last setup was in Topanga Canyon and it was the scene where we were going to finally roll audio. We all jumped in a car and drove down some side roads through the mountains until eventually finding a quiet enough spot to shoot the scene. In the actual script, this dialogue scene takes place in front of a motel (well actually it’s a combination of a few scenes, but none of them are in a park), but for the purpose of this film it didn’t really matter. We just needed a nice looking environment that was also quiet enough to capture the dialogue.
I was using two mismatched wireless lav mics (one Sennheiser and one Sony), and ran them both into my Zoom H6 recorder. The set up worked nearly perfectly. I had no audio issues at all, and although I’m by no means an expert at on-set audio, I think the results in the end were actually quite good. Depending on the take/angle we were shooting, I would trade off operating the camera with my AC and one of us would always be monitoring the Zoom.
All in all production was fast and simple, and other than our actor not showing up it actually went pretty smoothly!
Post Production
I often love to jump into post right away after a shoot, but this time it just wasn’t possible. The last few weeks have been insanely busy as I’ve been directing a couple of commercial spots, so unfortunately the footage just sat on my hard drive for a couple of weeks. Other than looking at some dailies here and there, I really didn’t touch it at all until yesterday when I started and finished the edit.
The entire editing process was about 4 hours. In that time I ingested all the footage, sync’d up the audio takes, did my offline edit, color corrected the footage, and did an audio mix. In the interest of time (and to challenge myself) I did everything inside of FCP X. That includes color and audio.

My editorial process was pretty simple. I chose my music track first and dropped that into the timeline to help guide my creative choices. From there I simply chose the best take from our dialogue scene, and dropped that on top… I swapped out a few lines from other takes that worked better in the end, but the initial take I chose still made up 50 – 60% of the final dialogue that was used. From there, I went through all of the b-roll and dropped in any relevant clips as I saw fit before moving onto audio.
As I mentioned before, all of the audio editing was done inside FCP X. I am the furthest thing from an audio engineer, but I do know how to get things sounding the way I want them to, even if my process is sometimes a bit backwards. In this case, I started by bringing up all of the audio levels since I had recorded the dialogue a bit lower than I probably should have on set. From there, I added some audio sweetening to give some texture to the sound before key framing the levels very specifically. It took a few passes, but eventually I got all of the levels evened off and then created a compound clip inside of FCP X, on which I added compression and a bit of gain.

In terms of color, it was a fun challenge for myself to work completely within FCP X as well. DaVinci Resolve is my comfort zone (since I use it nearly every day on professional gigs), but ultimately it wasn’t necessary in this case. Instead, I used Film Convert’s FCP X plugin to generate my looks. Each shot had a different film stock on it, so I wasn’t necessarily going for consistency, but rather choosing the best film stock for each individual shot. From there, I dialed in the settings more intricately and made some levels/color wheel adjustments inside the plugin.
On a side note, I always recommend that you do this. Never assume you can just drop a filter onto something and call it a day. Always look for ways that you can improve the look by pushing and pulling your color wheels.

Once the color was done, so was the final piece. I mastered it in 3.2K with a 2.35:1 aspect ratio and uploaded the HD version to Vimeo. You can watch it below!
I hope this article has helped to shed some light on my process and how I like to work when dealing with minimal resources. If there is anything to take away from this, it would be that you should never be afraid to take on a lot of the legwork yourself. It’s not always the most ideal way to work, but you need to do whatever it takes to get the end result you’re looking for. For this piece I wrote, directed, shot, recorded audio, edited, colored, mixed, etc. because that was the only way it would get done. It wasn’t easy, but in the end it worked!
Check back soon for more updates on Ivy, as well as the usual reviews, tips, and insight.
Also – be sure to follow me on Twitter and Instagram for more updates!


10 Comments
Why I Shot Most Of The Closeups On My New Short Film On A 28MM Lens | Noam Kroll
at[…] of the development process I’ve been shooting some shorts and spec content. Not too long ago, I put together a little mood film for my screenplay titled “Ivy”, and most recently my focus has been on this newer initiative, […]
Tom
atNoam, you did a very good job with the audio. I know you are using lavs, but where did you hide them?
Noam Kroll
atThanks Tom! The Lavs were hidden right under their shirts, middle of the chest.
Johnny Cinematic
atWhat’s incredible is that you cut it so fast. I usually get bogged down in post. Thanks for sharing so much with us.
Noam Kroll
atThanks Johnny! That’s really the only way I can work in the edit suite… I try to just work off of instinct and go with my gut to save time and stay spontaneous. If there are problem areas, I can always go back and address them later on. But much like writing a first draft of a screenplay, I usually try to get the first pass done as quickly as possible so I have something to chisel away at.
Tom
atGreat!
Are you working in a 24p timeline? 48 fps is meaning for no blurriness?
Noam Kroll
atHey Tom! I am working in a 24p timeline, and the 48fps shots were captured that way so I could slow them down to 50%. That’s why some shots have a slow motion effect.
trey e
atGreat article! I learned a lot from it! I always wondered how some no-budget projects are able to shot on expensive cameras and lens. lol
Loved the short and the lighting.
Noam Kroll
atHey Trey! Thankfully I partnered up with Redefine Rentals who provided the gear… Otherwise the camera package alone would have been really expensive as you might imagine.
ruben rodriguez
atThat was pretty sweet… I love it. Nicely done. I am shooting a quick run and gun short this weekend… so, I know exactly what you are talking about. Congrats on the short and keep up the amazing work.
Noam Kroll
atThanks so much Ruben. Much appreciated and good luck with your shoot too.