When I was first starting out as a filmmaker I would constantly make little short films as a means to experiment with new techniques. I never went to film school, so instead I would write, direct and edit little experimental video projects whenever I could. Some of them turned out well, and others not so well… But I always learned something from them, and they each played their own part in my learning process and growth as a filmmaker.
These days, unfortunately I have much less free time than I did when I was starting out. Between my commercial work, and my longer term directorial projects (including an upcoming feature film), it’s become harder and harder to set aside a week or even a few days to just get out there and shoot something spontaneous. And while my needs from a creative development standpoint have certainly evolved over the years, my desire to shoot these small projects has never really gone away.
Thankfully though, last month a small window of time opened up that allowed me to get back to my roots, and shoot a fun no-budget short film. My goal going into this project above all else, was to experiment with a number of new techniques and approaches that I might later put to use on future productions.
Over the last couple of years I’ve been working with larger crews, which has been a lot of fun. That said, with this project I wanted to challenge myself to create a film where I did everything myself. This is by no means how I normally like to work (part of the reason I love film is because of the collaborative nature of the medium), but in this case I thought it would be an interesting challenge to do everything – from directing/DPing to sound and color – by myself. I was curious to see what would happen by working this way, and how the limitation of having no crew would affect the end product.
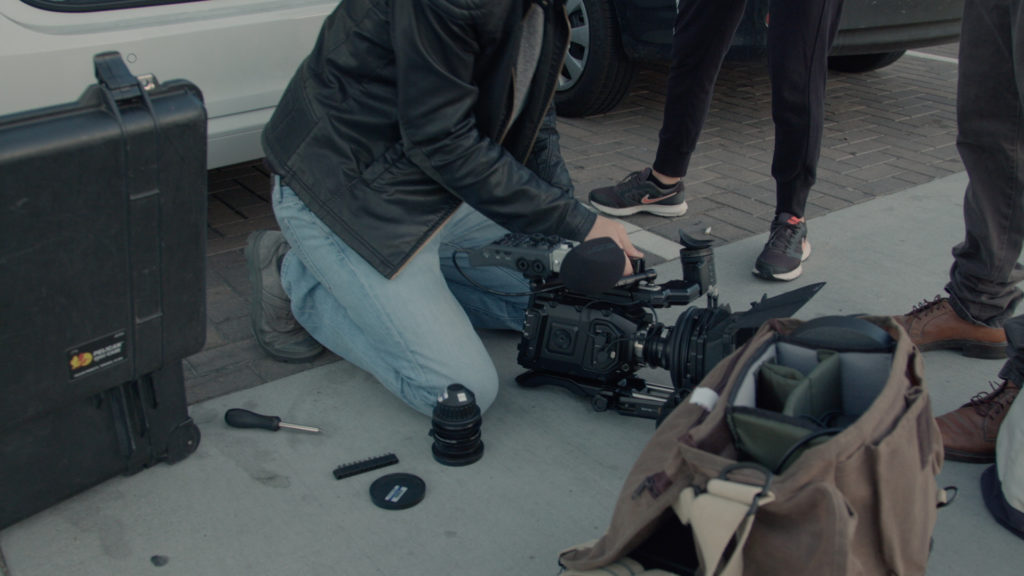

I also wanted to experiment with shooting something in a cinema verité style, and in this case that translated to blocking each scene so that virtually no coverage would be required. This is a style that I’ve been particularly drawn to for a while, but haven’t really had the opportunity to put into practice until now. Part of taking on this documentary-inspired approach meant that in addition to being my own DP I would also run my own audio, which I documented in this blog post from last week.
Camera-wise, I decided to shoot on the URSA Mini 4.6K – again as a means of experimentation. I’ve been shooting with the 4.6K for months, but I’ve mostly been using it on commercial or corporate projects, and wanted to put it to the test on a narrative shoot. Not to mention I was really eager to try out the new URSA 4.0 firmware, and even created a BTS video on it that will be released soon.
One final element I wanted to experiment with involved utilizing some new film grain that I created from scratch.
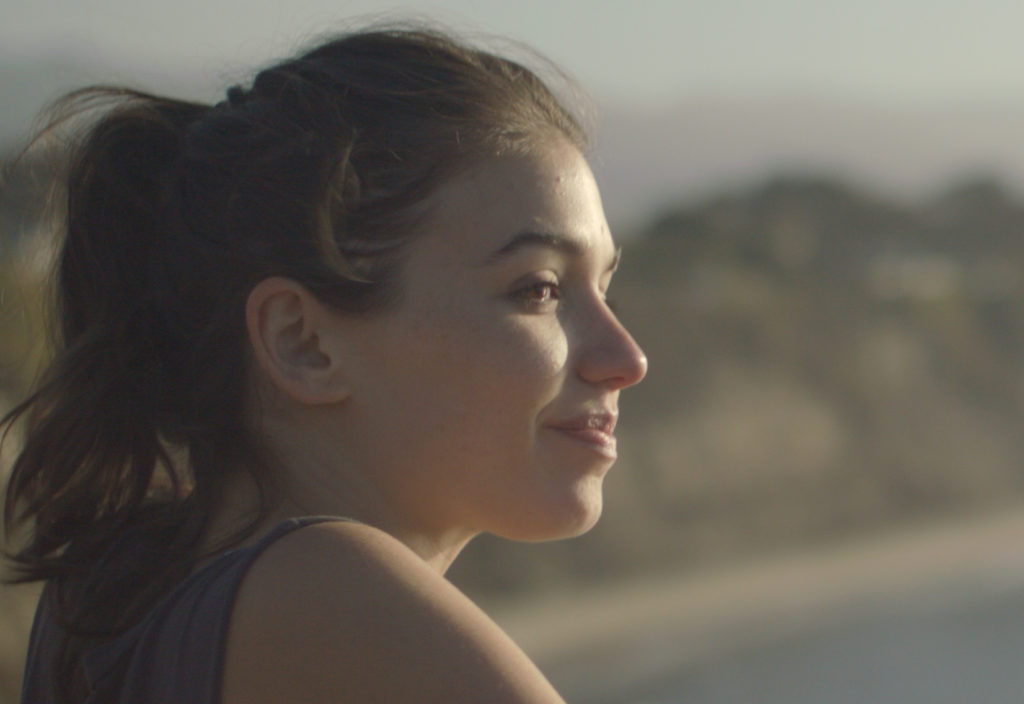
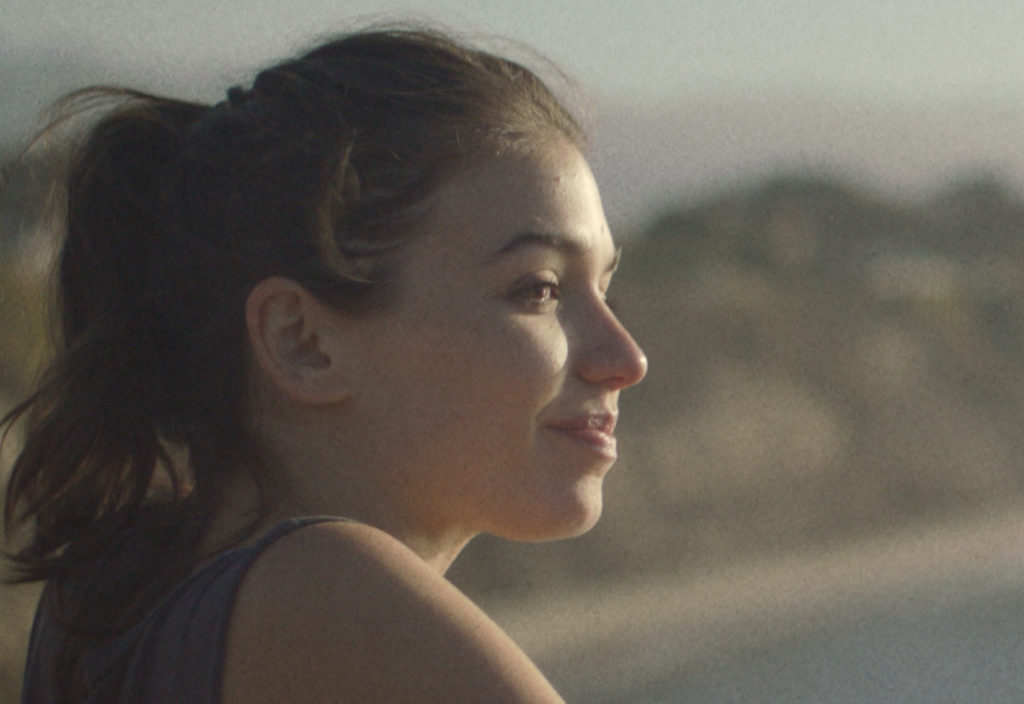
As many of you might know, I am a big fan of adding film grain to my footage, but I have never been a hundred percent satisfied with any of the film grain that I have access to in my library or through plugins. Recently, I decided to shoot some film grain on my own using 35mm film (which was scanned at 6K resolution), and I am currently in the process of developing a number of grain packs that I will release through NoamKroll.com soon. Some of these packs will offer clean film grain, and others will offer dirty film grain. On this film, I used the dirty grain which still has some dust, scratches, and hair on it, and even has some authentic 35mm flicker. I am very much looking forward to sharing the grain packs with all of you soon, and hope to release them within the next month.
Below are a couple of screen grabs from the film (blown up to show the grain). The first is clean, and the second uses my 35mm dirty grain scan. Please forgive the JPEG compression, which somewhat diminishes the effect of the grain structure:
THE PROCESS
Once I decided to go ahead with this project, everything moved very quickly. Knowing that I wanted to test out a lot of different things with this project – from a new type of shooting style, to the camera, to post-production techniques – I decided to write a minimalistic concept that would serve each of those needs.
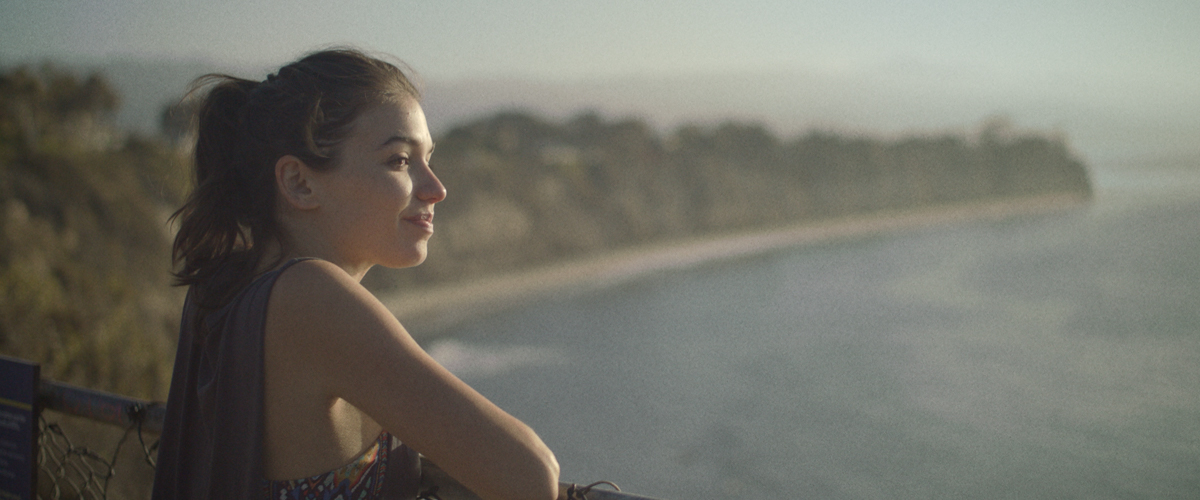
To keep things simple, I set the entire film in one location and limited it to only two characters, as I knew this would make it easier for me while shooting as a one man crew. Within a day or two I had my locations and cast locked down, and I was ready to go. It also helped that I was working with two actors that I’ve collaborated with before – Timothy Lee DePriest and Flavia Watson – who in fact were both in my short film The Mechanic, a couple years back.
The shoot itself took place in Malibu, CA and was shot over the course of four hours beginning right around sunrise. Initially I thought we would need closer to 5 or 6 hours (as the script was about 5 pages), but since there was so little coverage, things moved very quickly. It really made me realize how much material you can shoot in such a small amount of time when you aren’t over-covering your scenes. Shooting 5 pages in one location can take four hours or four days. It all depends on how elaborate you want to get… But sometimes less is more, and for my personal taste, using less coverage often yields a much more interesting creative result.
My URSA Mini was rigged up primarily with the standard Blackmagic URSA accessories (EVF and Shoulder Kit), as well as my Zoom H6 audio recorder. I also attached a Chrosziel Mattebox with some IRND filters, but didn’t use a follow focus or any other accessories.
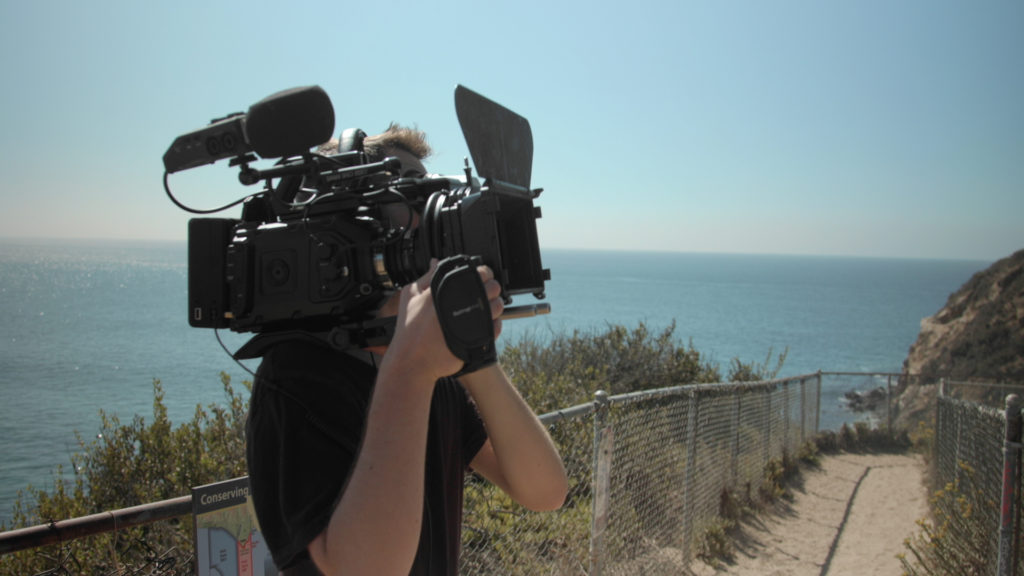
I had a full kit of vintage Zeiss Superspeeds (MK I) with me, but decided to shoot the whole film on a single lens – the 35mm. Knowing that I would be shooting with a very limited amount of time, and no AC to help me swap lenses, it just made sense to shoot everything on one lens. I considered shooting everything on the 50mm at one point, but ended up sticking with the 35mm since I knew it would be a bit more versatile.
These vintage superspeed lenses are absolutely incredible and really add a unique quality to digital footage. Sometimes they flare in a very unusual way, and some of the colors they produce are a bit unpredictable, but that’s the whole beauty of shooting on vintage glass.
When it came time to shoot our main dialogue scene, the fact that I was essentially only shooting a master (again, with no coverage) was pretty liberating. It didn’t matter if the actors changed their marks from take or take, or even improvised some lines. There was no continuity that had to be adhered to, so it was really great to be able to let the actors work and not get in their way, or have to cut a take short for strictly technical reasons. We shot at least 10 takes of the dialogue scene, which is far more than I would usually shoot. But because we were moving so quickly, we used the extra time we had to try out a bunch of different options for the scene. In the end, it was the very last take that made the cut.
With regards to the edit, I once again wanted to keep things as simple as possible. I have recently been using DaVinci Resolve 12.5 to edit most of my projects, but I wanted to challenge myself to both edit and color this film inside of FCP X. Normally I would either edit and color entirely inside of Resolve, or edit in FCP X (or Premiere) and then send the project to Resolve for color. But in this case my goal was to step out of my comfort zone and color the film using the very limited toolset available in FCP X.
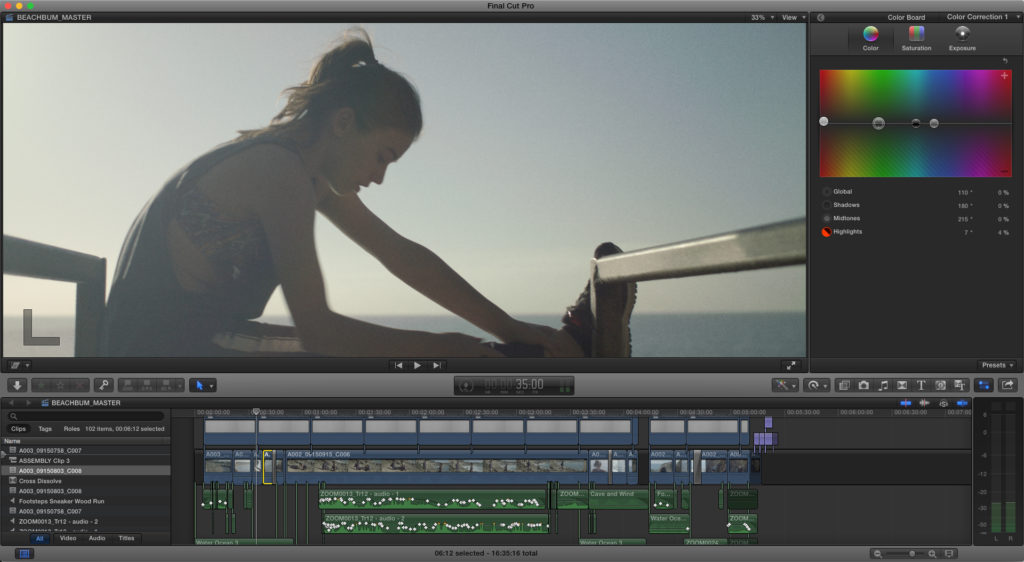
Ordinarily I would want to have the full color control that Resolve gives me, but in this case I opted to treat the color as I would if I were color timing motion picture film. I wanted to make minor, overall corrections, and not focus too much on making everything perfect.
After coloring the footage in FCP X (giving it a low contrast, but natural look), I added my custom film grain to it. I will be sure to do a separate post on this in the future once the grain is publicly available, but for now I will say that I overlayed my “dirty” 35mm grain at 80%.
The film itself was shot entirely in ProResHQ at 23.98 in 4.6K 2.4:1 aspect ratio. Even with the color and grain added, it held up really well and I didn’t regret not shooting in RAW! If I had more CFast cards with me or at least some time to dump cards on set, I probably would have shot RAW just to be safe. But given my situation I opted for the extra record time, and didn’t feel like I took a hit in the image quality department at all.
That’s about it for now. The film is embedded below for you to check out!
For more content like this, be sure to follow me on Instagram, Facebook, and Twitter!
42 Comments
Antonio Vavalle
atThis scene and your filmmakers touch are unbelievable! You have the gift no doubt about it. Im doing all I can to get my projects out of my mind on on film, Saving up for that Ursa mini as I write. I’ve researched for months on what camera to get and taking all pros and cons into consideration the ursa mini is an excellent choice. RED would be ideal, even ARRI… but for someone who does not come from money… not attainable. In the end its your story and skill that truly breathes life into the camera you use 🙂 and you NAILED it man! looking forward to your work on the big screen. I have a question for you. for the lens you used in this scene. the 35MM Zeiss. since the one you listed is next to impossible to find, would this be its replacement?
https://www.bhphotovideo.com/c/product/1334211-REG/zeiss_2177_938_cp_3_35mm_t2_1_e_mount.html
Thank you for doing all of this.. There are a lot of us out there with stories to tell and most don’t even know where to begin. 🙂
-Tonio
Noam Kroll
atThanks so much Antonio! The lens you referenced could certainly be used as an alternative. Or as another option, any vintage 35mm cinema lens from Zeiss, Schneider, etc. could work well too.
christopher shivers
ati know you said you used the zoom h6, but what microphone did you use because the audio is outstanding
Noam Kroll
atThanks! It was just a couple of Rode Wireless Lavs, nothing fancy!
Mohamed Fekry
atI usually never comment on stuff, but this was beautiful
Noam Kroll
atThank you so much!
Dane Hoy
atIncredible work done by you..Keep it Up!!
Noam Kroll
atThank you so much Dane! Appreciate it…
Wes Langdon
atI’m shooting a music video next weekend, and we would love to use this beach… Where exactly in Malibu was it?
Noam Kroll
atSorry I’m late on this! It’s Point Dume.
cwebb4
atAnother nice film and article Noam, really like the look of the film and the coverage/blocking. Feels natural but not too loose. Did you use lav’s on the actors for audio? You got very clean sound. Can you talk a bit about mic placement, are they fixed under a layer of clothing?
I always agree with you on aesthetics. The film/textured/illusory look being better than an inherently digital one and shall be purchasing some of your grains.
Would also like to see the bts when you put it up.
Thanks
Noam Kroll
atThanks so much for watching, and I appreciate the feedback! As for audio, I used Rode wireless Lavs and ran them into a Zoom H6 recorder. The actors did have the mics under their clothing, and I had to be very careful about how the were taped to avoid rustling. I ended up using tape on both sides of the mics to minimize movement.
Hope to see you around the site soon!
Ivy Schexnayder
atAwesome work and great article! I love the suspense that some of the shots brought, just by the simplicity and what they didn’t reveal right away! Thanks for sharing!
Ivy
Noam Kroll
atThank you so much Ivy – Very much appreciated.
Vivienne Diane Neal
atI am not a filmmaker, but this is great work. What an awesome audio, a beautiful backdrop with such clarity and a surprise ending. Continued success in your endeavors.
Noam Kroll
atThank you so much! I’m happy you enjoyed it and am looking forward to sharing more in the future. Appreciate the note.
Ruben Rodriguez
atNice work as usual Noam… You rock. Keep up the amazing work. You are truly talented.
Noam Kroll
atReally appreciate it Ruben – that’s very kind of you to say! Hope to have some more content for you in the near future.
Tony Virili
atVery inspiring to see what can be accomplished by one person when properly planning a shoot, albeit one person with a considerable amount of experience 🙂
I love a film that leaves you thinking long after. And it was great to watch characters who didn’t reveal too much in their dialogue. Only so much background was exposed in conversation. Most of their thoughts remained in their heads. Plenty of pieces for the viewers to piece together however they choose. Nicely done.
Noam Kroll
atThanks so much Tony. I always aim to leave the viewer thinking, which can be a tricky thing to accomplish… There’s a fine line between confusing the viewer and leaving them wanting to know more, so I appreciate the fact that the ending worked for you!
Dan
atLove that it was a one man crew, 2 cast members one location!
Noam Kroll
atThat was the whole fun of this project, so glad to hear that resonated with you! Appreciate the comment.
Flaaandeeers
atWell done, Noam. Really nice work.
Noam Kroll
atThanks! Really glad you like it.
Manny
atThis was really good keep it up.
Noam Kroll
atThank you Manny!
Kim
atI did like it a lot, watched two times, overall very well done and I like the actors too, I especially liked the long dialog.
Maybe I should leave it to that, but must say that on some shots there was too much shaking for my taste, (but I am a gimbal developer ;), I am not saying that this film required a gimbal or even tripod, but it felt like the camera was shaken on purpose and I did not realise the purpose. Also on some shots there was distracting lot film grain.
The sound was good, but felt that maybe a little too perfect. There was good ambient sound but the dialogue sounded too clear and not belonging to the surroundings. But it was good, I almost like the sound, but it left a bit strange feeling.
Considering though this was one man band handling all the filming and sound just excellent.
Noam Kroll
atThanks Kim! Appreciate the feedback and kind words. I was going for a rougher/grittier look with this one, so to offset the beautiful scenery of the beach I decided to use some noticeable film grain/dirt, and shot everything hand held. The audio was actually all recorded on set (no ADR) and in fact the ambient sounds you hear in that scene are from the actors lavs, so what you are hearing is the real environment!
Simone
atBeautiful images!!! Thanks Noam! The audio is also perfect!
Noam Kroll
atThank you Simone! Appreciate the feedback.
Jay
atNoam,
Awesome work, makes me exicted to own the 4.6K! What brand of IR ND’s and what stop strengths were they 2,4,6 etc?
Noam Kroll
atThanks a lot Jay! I used the Schneider Platinum IRND filters, which were great. I believe I was mainly using a 1.2 and a 6.
Chris
atCool film – I love the look and I’m impressed you were able to do it all in FCP X. I use FCP X a lot too, but it seems like everyone uses some external color option these days.
How did you do sound by yourself – I see you have the zoom recorder, but did you use wireless mics on the actors with it?
Noam Kroll
atThanks Chris! Glad you enjoyed the film. As for audio – I recently did a full post on my audio setup that you might want to check out. If you scroll up near the top of this post, there’s a link to my previous article that outlines the audio setup.
Stefan
atReally nice work and insights !
Noam Kroll
atVery much appreciated, Stefan. Thanks for watching!
Robert B.
atNice work Noam!! Btw, you don’t have to be afraid of coloring stuff in FCPX. Just get Color Finale plug-in, and you will be all set 😉
Cheers,
-Robert
Noam Kroll
atThanks Robert – Appreciate the kind words, and it was definitely a fun exercise to color in FCP X. Even with the built in tools!