Practically every editor and filmmaker I know has had a copy of DaVinci Resolve on their laptop since the free version was made available. Unfortunately though, most Resolve users are only using the software on it’s most basic level and haven’t yet discovered how powerful some of it’s basic features are – including Layer Nodes.
Nodes
Most first time users of DaVinci resolve are confused by Nodes as they work very differently than layers, which are what most editors are used to working with in various editing programs. Nodes are simply a different way of connecting and representing changes that are being made to a clip, and they offer far more flexibility than layers since they can be used in so many different ways. For the purpose of this post I’m not going to do a crash course on nodes, but rather focus on one of the most powerful types of node structures that you can use: The Layer Node.
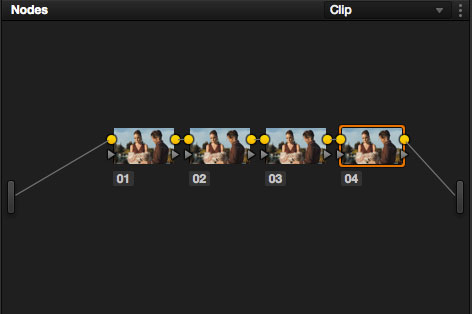
Most often, when beginner colorists are using DaVinci Resolve they will use nodes in very much the same way that they would use stacked layers in an NLE. In other words, they will make a correction on node 1, and then another correction on node 2, and so on. Their node tree might look something like this:
This is an okay way to work, however in some instances better and faster results can be achieved by stacking nodes so that multiple operations can be consolidated into one single operation. One of the simplest examples of this involves utilizing composite modes (which can be activated when using a Layer Mixer), in order to quickly achieve some unique looks. In this example I will show you how to quickly use a composite mode to achieve the bleach bypass look.
The Bleach Bypass Look
I want to take a quick moment to explain what the bleach bypass look is for those of you not familiar with it. Essentially, it’s a look that is characterized by high contrast, low saturation and sometimes an overall coolness to the image. Think of movies like Saving Private Ryan or other war films which very commonly make use of this technique in order to create a highly stylized world that feels raw, intense and gritty. This look is certainly not going to work well for every project, but for some types of films – specifically action films, intense dramas, thrillers, and horrors, it can be an exceptional choice.
In Resolve, you have the option of achieving this look somewhat manually by adding lots of contrast on one node, desaturating on that same node (or another node), then creating an additional node for final color and contrast adjustments. This will work, however if you are coloring a whole lot of clips it can become fairly time consuming, as your first step (coloring that first node to have a lot of contrast) will require a fair amount of fine tuning each time, and your results throughout your project may not be very consistent right off the bat.
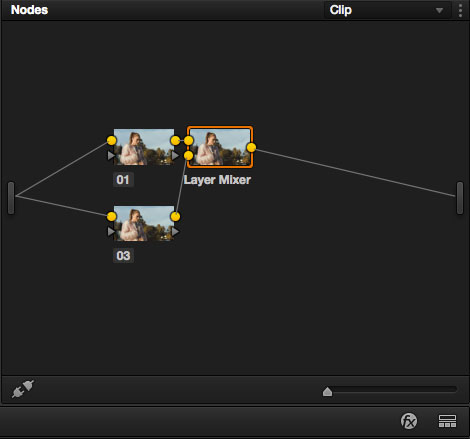
In my opinion, the much more efficient and consistent way to work is by using a Layer Node to achieve this result. And it’s actually quite simple. Rather than starting off by color correcting on node 1, simply add a new layer node which will create a structure that looks like this:
At the end of that node structure is the Layer Mixer. You’re going to right click on that node, click on ‘Composite Mode’ and then select ‘Overlay’:
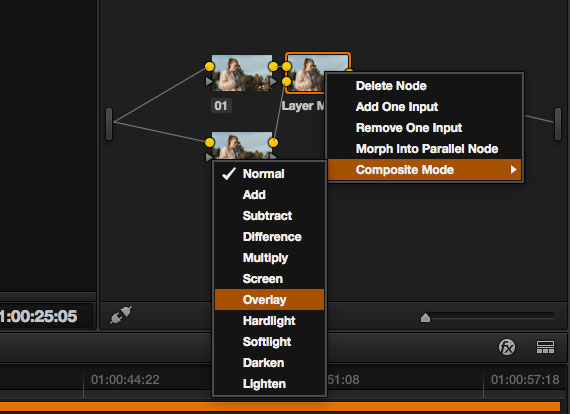
Essentially this will overlay the two stacked layers on top of each other, which will give you a very high contrast image. For those of you that use Photoshop or After Effects, you’re probably quite familiar with composite modes and how they can affect your image, and in DaVinci Resolve it’s no different. You can use any of the composite modes (add, subtract, difference, etc.) to achieve unique looks, however overlay is your best bet when going for the bleach bypass look.
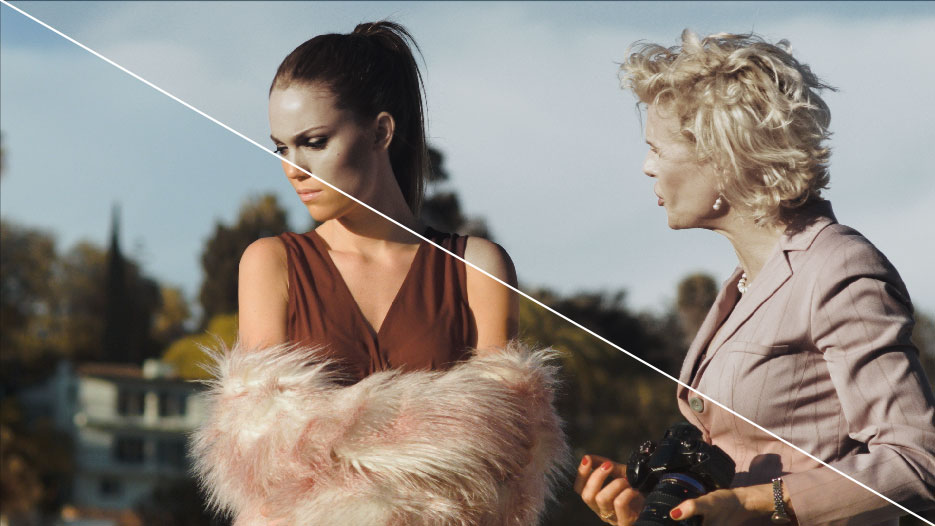
With my composite mode set ‘Overlay’, my resulting image had a very high contrast look to it just as I had wanted. In this case, it was actually just a bit too high contrast for my taste, so I created another serial node at the end of my node tree and reduced the contrast slightly, while also pulling down the saturation just a touch more. Here is the final result:
Before
After

There are practically infinite ways that you can use DaVinci Resolve (and Layer Nodes in particular), and this is just one small example. If you’ve only been working with basic Serial Nodes in Resolve, hopefully this post has given you an idea of what is possible when using some of the other functionality built right into the software. Like Photoshop or any other creative software, you can achieve the same end result many different ways, but knowing the best and most efficient way to get there will always be a tremendous help.
For more on color grading, check out my recent post on the best order of operations for color correction here.
Be sure to keep posted this week for more tutorials, tips & reviews! And Sign up for the newsletter on the right panel of this page!


1 Comment
Henry Larry
atGreat insight into leveraging Layer Nodes in DaVinci Resolve. Understanding their flexibility and power truly elevates the editing experience beyond basic corrections.
Paver Installation Services in Gainesville FL