Skin tones are arguably the most important element of your image to get right when color grading, yet most editors and amateur colorists approach skin tones completely the wrong way. Throughout this post, I’ll outline my favorite technique for grading and matching skin tones within DaVinci Resolve in just 4 simple steps…
It goes without saying that skin tones are what give life to your image. Unless you’re grading a montage of landscape shots, chances are the focal point of every shot that you grade is going to be your talent. If their skin tones don’t look natural, or don’t match the environment and other shots they are integrated with, you are in trouble!
Typically when inexperienced colorists attempt to grade skin tones, they make one of two mistakes:
1. They base their entire grade around the skin tones, and neglect everything else.
In other words, before actually balancing their image, adjusting contrast, fixing white balance issues, etc. they start to focus on skin tones, which inevitably throws the rest of the image off balance.
Imagine you are working with an image that is shot in a mixed lighting environment, where window light is spilling on your talent’s face, but there is a lot of tungsten light in the background. If you were to grade that image based around the skin tones (and obviously you would need to warm the skin up since it would be blue in comparison to the tungsten light), then the warm light sources in the background would become far too warm, and the image would look really strange.
2. They start giving their footage a “look” before they have fixed any skintone/matching problems.
Rather than following the correct order of operations (as outlined in this blog post), they will jump straight into giving their footage a creative look and then will have major issues trying to adjust skintones later on, because the look that they have created is so extreme. There are ways to fix this without having to rebuild the entire grade, but it’s a lot better to just get it right the first time.
How To Approach Skintones
We’ve touched on a couple of fundamental issues you want to avoid when it comes to skin tones, so what actually is the best way to approach them?
Well, as I already alluded to above, a lot of it comes down to your order of operations. Like any other proper color grade, you need to start your process by balancing and matching your shots to each other as closely as possible using one or two nodes that are simply dedicated to fixing technical issues. You want to ensure that your white balance/contrast is consistent with other shots in your sequence, and ideally each shot is at a neutral starting point. From there you can start to isolate elements in your image (skintones being the one we are focusing on here of course), and then eventually you will add an overall creative look to your footage.
For the purpose of this article, we are focusing mainly on that middle stage – isolating the skin tones and grading/matching them to the rest of the footage. Here are the four steps I recommend following:
Step 1
Assuming you have already balanced all of the shots in your sequence, there are still going to be some differences from shot to shot. Lenses all have different characteristics, lighting can change, and all sorts of other variables can come into play that affect the consistency of skintones from shot to shot. So don’t worry if you feel like no matter what you do your images don’t match perfectly yet… That’s what this step is for.
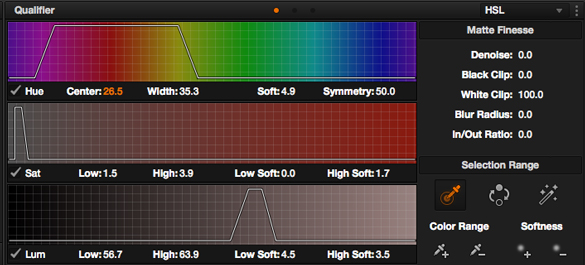
The first thing you want to do is open up your qualifier tab in DaVinci Resolve, and use the eyedropper tool to select the skintone of your talent.
You are going to wind up with something that looks like this:
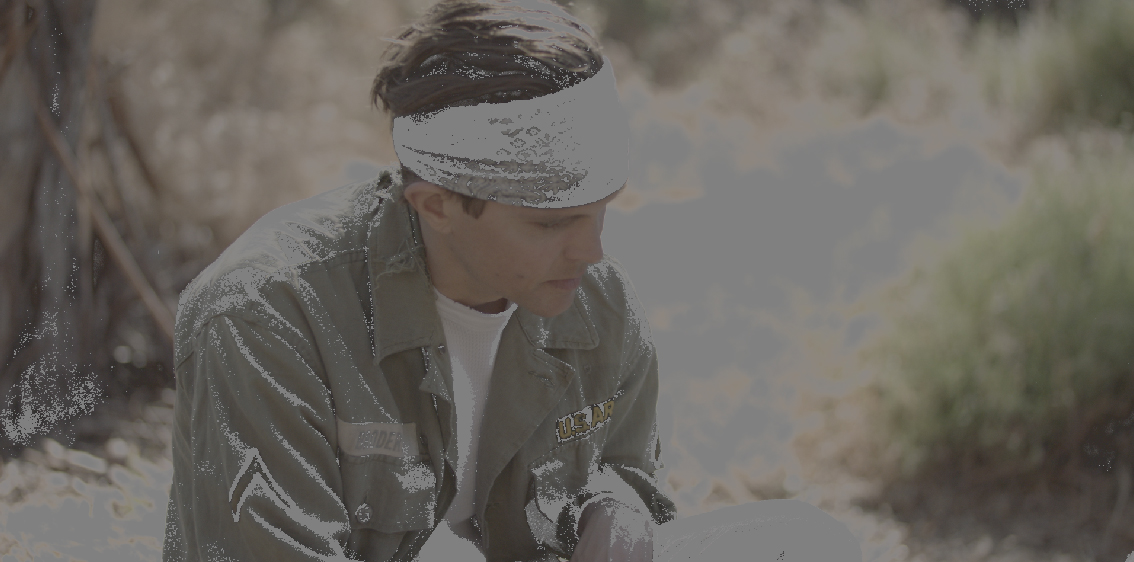
By the way, you’ll want to hit SHIFT + H to toggle between this view, and a regular view of the footage without the skin selected.
As you can already tell from the image above though, we have selected a lot more than just skintones here. This is very common. There are always other elements in your shot that will have a similar hue/luminance value to the skintones you are trying to grade, so you need to do a bit more work to really isolate them.
Step 2
This step is pretty simple. You are essentially going to fine tune your qualifier settings to isolate as much of the skin tone as possible, while minimizing other colors/areas of the frame. Depending on the specific piece of footage you are working with, any and all of the parameters in the qualifier window may need to be adjusted. I usually start by adjusting the width of my color key, then the high/low points, and then the softness. I will sometimes also use the ‘negative’ eyedropper tool to select the colors in the selection that I want to remove, but I don’t rely on it as I find that tool to be hit or miss.
Step 3
Even once you’ve fully fine tuned your settings, you may still have areas of your frame that are being selected along with the skintones. For instance, in my example the bushes in the background are a pretty similar hue to the actor’s face, so they are being keyed as well – even after all of the fine tuning.

This is obviously a problem as you don’t want whatever adjustments you make to your talent’s skin tones to appear on other elements in the frame. The best way to deal with a situation like this is with a power window.
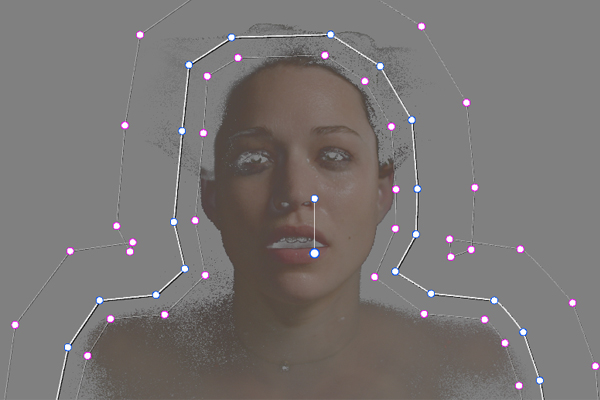
Many of you have probably used power windows to create vignette effects on your footage, but they are just as useful for masking parts of your frame to isolate selections even further. In this example I am using a circular power window (you can use a custom or square window too), which isolates the selection even further. I also made sure to adjust the softness of the mask so that my grade would transition seamlessly.
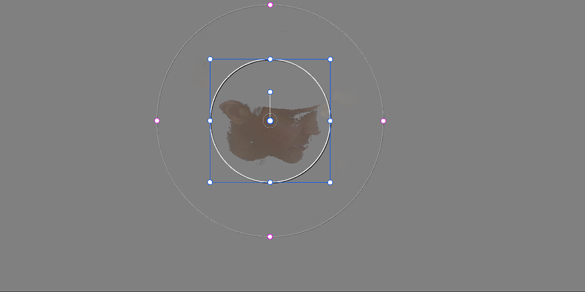
Always remember to use the tracker to track your power window to your actors face, otherwise they may drift out of it’s effective area.
Step 4
This is the fun and relatively easy part. Now that you have fully isolated the skin tones you can finally start to grade them and match them to different shots in the sequence. I normally like to start with a closeup shot to set the look, since the skin is most clear and apparent in a closeup.
The most common initial adjustments that I’ll make are to the midtones and saturation… Usually I’ll push the midtones either warmer or cooler to fix any glaring color issues, and then will reduce or increase saturation to help the skin blend in more effectively with the rest of the frame. It’s worth noting that sometimes I will also adjust the highlights and/or shadows (depending on the color of the actor’s face), and sometimes I’ll even pull two separate keys on skin tones – one for shadows/midtones, and one for highlights.
Once you have accomplished your look on your close up (or hero shot), you need to go ahead and match your other shots to it. Simply follow the same steps above (1 to 3) on each one of your shots, and then bring up a still frame of your graded shot to compare with each of the new shots you are coloring.
Remember to always use the same baseline shot to match each new shot to, in order to maintain a consistent look throughout the scene.
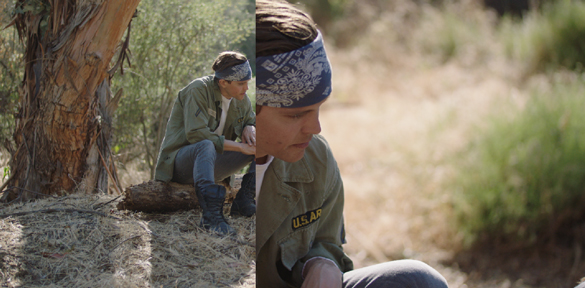
If you’re really new to DaVinci – You can bring up a still reference frame like this by right clicking on your graded image and selecting grab still, and then double clicking that image in your stills gallery.
That just about sums it up. There is no exact science to color grading, and much like creating looks in Adobe Photoshop there are 10 different ways to get the same result… But for me (and for many other colorists), the steps outlined above prove to be the most effective.
Check back soon as I have some great articles coming up in the next little while, including a comprehensive video review of the Blackmagic URSA.
Also – be sure to follow me on Instagram, Facebook, and Twitter for more updates!


7 Comments
Nick Oak
atLoved your article. Do they do this process for each shot when grading a feature film or series? That must be taking a too long.
Rafael Perez
atHi Noam
Nice article. Do you aim any number for the skin tones (eg: a specific range of hues)?
Noam Kroll
atThanks Rafael! I usually just match by eye, as using scopes/numbers for me doesn’t seem to be very intuitive… At least when it comes to skin tones. Hope this helps.
idowu
atgreat article, i’m not so good with resolve so i’ll ask this, in a medium closeup shot where the actor’s face and hands are visible, how do you create a qualifier to isolate both parts of the skin?
Noam Kroll
atHi Idowu! If the skin tones are similar on the hands and face, the same qualifier can be used for both and you can make all of your adjustments on a single node. That said, if the hands are a different color (maybe in a shadow, or not lit with the exact same temperature bulb) you can pull a second key on a separate node just for the hands.
Hope this helps!
Danny
atLove your articles, especially this one in regards to skin tones. So do you recommend using a tangent wave panel ? I read that it makes coloring easier and faster. I’ve been looking into some affordable ones and the single wave panel cost 1500 bucks. Thx
Noam Kroll
atAbsolutely! It’s especially great for long format (features, series, etc.) since you can fly through the process.