Over the past few weeks I’ve been working tirelessly on the finishing work for my feature film Shadows On The Road. I’ll have some big news about the film’s release very soon (and the full trailer!), but for now I want to take a moment to share my finishing workflow, which was quite unique.
For those of you that aren’t as familiar with the terminology, finishing is essentially everything that happens after the picture edit is locked. It includes color correction, stabilization, noise reduction, and audio mixing amongst other things.
Below I’m going to break down each of the finishing stages that the film went through, and why I chose to take an unconventional path in some respects.
If you’re interested in hearing about my offline editing workflow and why I decided to lock picture reel by reel, be sure to check out this article here.
RESOLVE TO FCP X, AND BACK TO RESOLVE
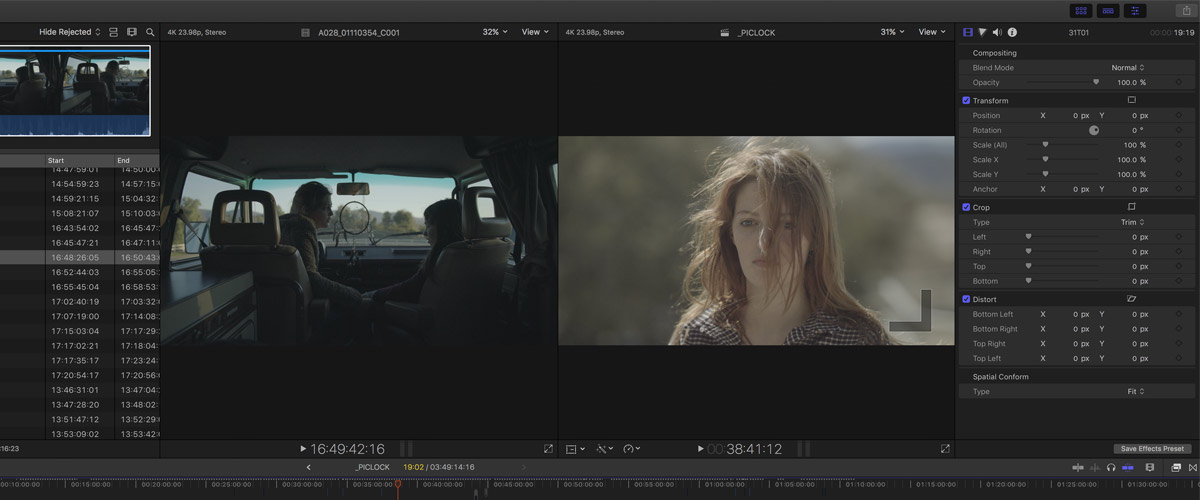
While I initially intended to edit the feature in DaVinci Resolve, for a number of reasons I decided to cut it in FCP X. I love Resolve and certainly could have cut this entire film on the software (in fact, I even started cutting the first few scenes in Resolve), but ultimately realized I could work faster on FCP X. I hadn’t yet edited any other long form projects on Resolve, and at the time I didn’t have the same shorthand that I did with FCP X.
The film was shot entirely in RAW on the Blackmagic URSA Mini 4.6K, so I decided I would ingest the RAW files into Resolve, convert them to ProRes for editing in FCP X, and re-link the FCP X edit to the RAW files in Resolve later on, during the color correction phase. The plan was quite typical workflow-wise, with one important distinction…
I converted the RAW files to ProRes 4444, not LT or Proxy as most workflows would call for. Hard drive space wasn’t an issue for me (nor was performance), and I wanted to have the full 4444 clips living in FCP X in case I wanted to experiment with any color grading ideas during the picture edit.
I also wanted to hedge against any potential workflow issues that could have come up when round tripping back to DaVinci Resolve. I knew I’d likely be using a lot of compound clips, some speed adjustments, transitions, etc. in FCP X, and in case any of that didn’t translate properly to Resolve, I wanted to know I could output a full 4K ProRes 4444 data master straight out of FCP X that could later be brought into Resolve to be colored. This would never be my plan A, but it was a backup option in the event that I needed to turn around a quick deliverable, but was faced with potential translation issues when relinking to the RAW.
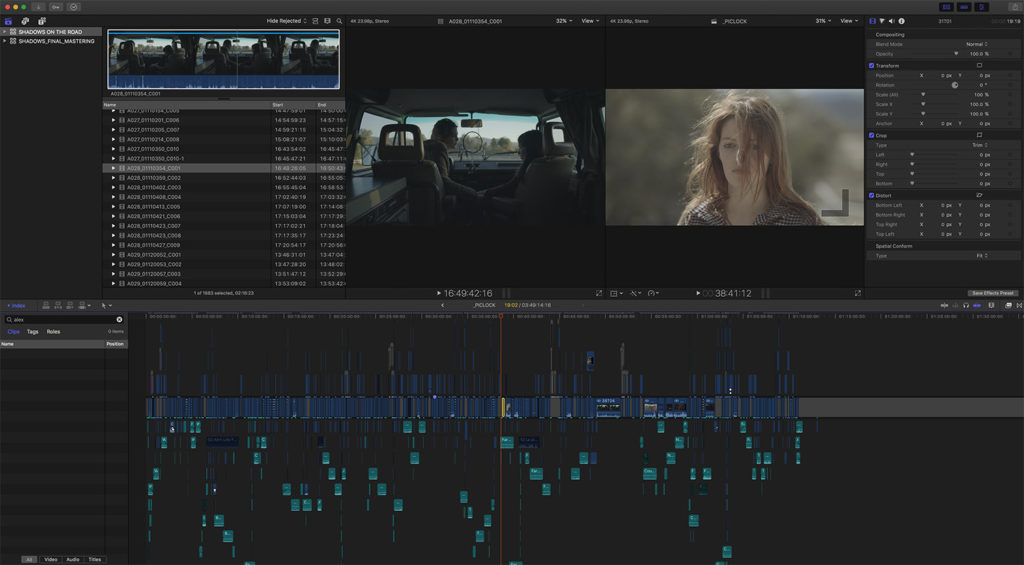
When the picture was eventually locked and ingested into Resolve via FCP XML, there were no issues reconnecting to the source material, so in the end it was a non-issue. I simply imported the XML, pointed it to the RAW files in the session, and I was ready to start coloring.
That said, I didn’t start coloring just yet, as I wanted to get through post-audio first…
POST-AUDIO
At the outset of this project I had no plans to edit dialogue, do sound design, or mix the project myself… But that’s exactly what happened in the end. When the picture was first locked, I had been working with a sound editor who was working some magic in Pro Tools, and things were coming along slowly but surely.
Once festival deadlines started approaching though, we realized it would be faster for me to complete the first audio pass inside of FCP X myself, as I already had laid a lot of the groundwork while editing. Not to mention, I knew exactly what I wanted, so to avoid any unnecessary back and forth (when we had virtually no time to spare), the best option was for me to do a quick pass myself. At least for this version.
Within a week or so, I was able to clean up the dialogue in FCP X, do some minor EQ work, drop in in the background textures, and even do a little bit of sound design. It was far from perfect, but certainly good enough for a basic stereo mix that would be submitted to festivals.
While I intended to eventually move the project back to Pro Tools, at a certain point I decided it would be best to keep the audio work contained entirely within FCP X. After revisiting the festival cut, I was feeling confident I could get the audio where it needed to be myself. Had we re-opened the ProTools session at this point, a lot of the work I did would have been lost (much of which was sounding great), and it seemed to silly to virtually start from scratch when my pass was already most of the way there. Especially because the audio requirements on this film were quite simple, and the source material was recorded really well.
As for the audio workflow, I followed a standard protocol – starting with dialogue before moving on to music, backgrounds, and effects.
The dialogue was a challenge in some respects, as many of the scenes were shot in noisy environments – loud streets, at the beach, windy farms, etc. – which of course all created issues when editing.
This meant that I needed to do a lot of trickery in post, including swapping audio from different takes, using wild lines, and carefully mixing in background textures, room tone, or sound design elements to mask any flaws. I tried to do as much dialogue editing as possible on it’s own (in isolation of music/effects), but at a certain point I actually worked on all three together, specifically in scenes where there were problem areas. This is definitely not standard practice, but it was what the film called for, at least in certain scenes, and it got the job done. In the end, I was very happy with the final mix.
I’m also happy to report that working on audio within FCP X was relatively painless. I simply gave every audio clip a role (dialogue, music, or effects), and organized the timeline into audio lanes. This allowed me to easily toggle things on or off by group, and create compound clips to add master effects to each stem as needed.
When I finished editing all of the audio, I created one giant compound clip of the entire film which allowed me to make global changes to just the dialogue, music or effects. All I added at this point was some minor compression on all the dialogue to even it out, and some levels adjustments for the music.
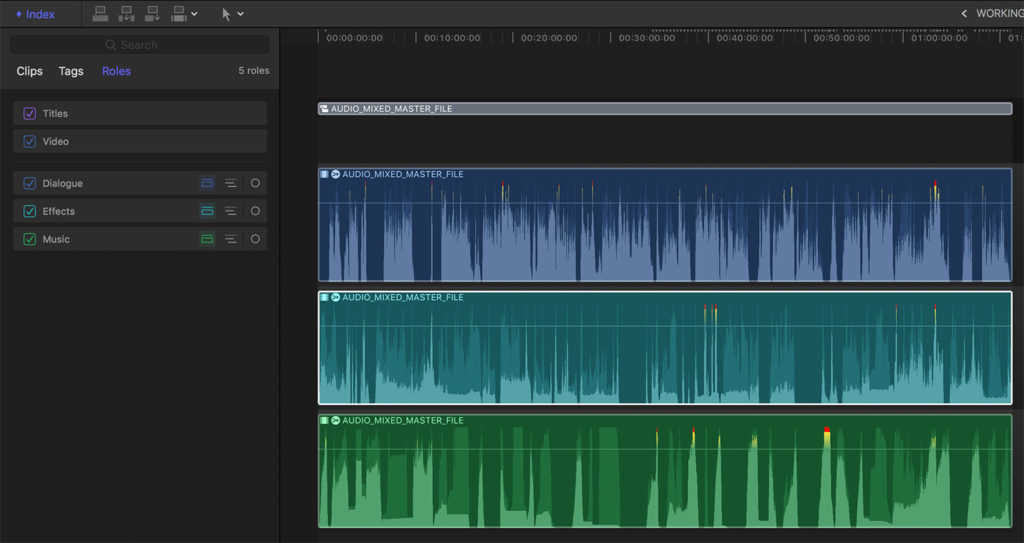
Once that was done, I went back to my master compound clip (which included the “stems”) and applied a limiter to it. This was needed because there were a few sections of the film where the audio peaked just barely above 0db, so the limiter was used to crush those moments back down.
And with that, my audio work was virtually done. It took 2 – 3 weeks in FCP X (not including my first festival pass) to get it where it needed to be, which is not bad all things considered. It will live as a stereo mix forever (not 5.1) and I’m totally fine with that. There are virtually no moments in the film that really call for a 5.1 mix, and I don’t feel that anything will be lost by mastering in stereo.
COLOR GRADING
I waited to color the film until the audio was done, as the grade is the easiest and fastest part of finishing for me personally. Once I jumped in, it was relatively smooth sailing –
I started out as always, by following the standard order of operations and matching all my shots first, to prep them for the creative grade. That took a couple of days to complete, but laid the foundation for the more fun and creative work to come.
With everything matched, I did a quick and dirty color pass on the entire feature to get some creative ideas on the table. While I had a concept of what this film should look like visually, I did want to experiment a bit, so I did a full pass working purely off of instinct – coloring shots and scenes as differently as I wanted to, and experimenting as much as possible. I’d say about 50% of this pass actually made it in some form to the final version.
After doing a second full pass to implement some new ideas, I felt like I was getting really close, at least creatively… From there I worked on a few problem shots that needed some extra technical attention – for instance shots that needed power windows or noise reduction, and then was ready to do one more full pass. This time around though, I took a different approach…
I started by adding a global look to the entire film by using one of my LUTs on a Timeline note. This applies the LUT to everything in the timeline, not just an individual clip.
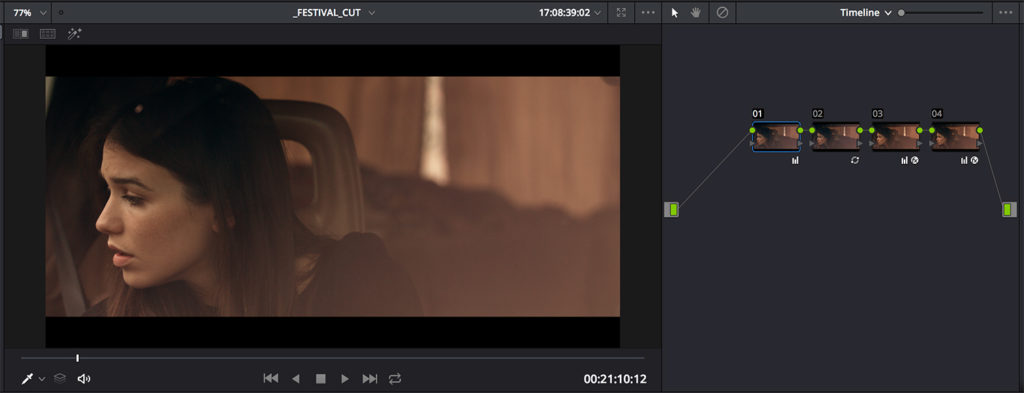
For hours, I experimented with different LUTs, modifying them, spot checking them across different scenes, until finally I found the perfect combination. It was one of my Summer LUTs with some minor tweaks to make it a little more subtle, as I had already stylized the film to some degree. This gave everything a really nice warm wash, while still allowing each scene to feel distinct. The warmth just helped everything blend together a bit better without overpowering the image.
Then I went through the film shot by shot to see how the LUT was affecting each individual frame. I would say that 80 – 90% of the film worked well as is (with the LUT applied), which made things very easy on me. There were a couple of scenes that needed some additional tweaking to enhance the effect of the LUT, but that was really easy to handle at this point. Within no time the color work was complete.
In total, I probably spent 1 – 2 weeks on and off with color, which is a quick turnaround by my standards! During the color stage I also did some light noise reduction on certain scenes and added a subtle 35mm grain overlay to the entire piece.
THE WORKING MASTER
Normally, when I finish whatever color work I’m doing in DaVinci Resolve, I’ll either output a final master file right then and there, or at least output a picture master that will be combined with the final audio stems in FCP X. In this case, again I did something a bit different…
Being as this was a feature (and not something short form), I thought it would be wise to export what I called a “Working Master”.
I assumed that once a master was rendered out, there would be a handful of shots that would need to be re-exported for one reason or another. For instance, I wasn’t able to smoothly playback shots that had noise reduction on them in Resolve, so I figured some of them might need to be tweaked/re-rendered once I saw them in full motion.
It made sense to export one big master file of the whole film, bring that into FCP X to combine with the final audio mix, and if need be, export any individual shots from Resolve that I wanted to re-color or adjust.
In reality, it actually took about 3 passes before I even got my working master. I was experimenting with different settings for noise reduction and grain, which took several attempts to get right. What ended up looking best, was a very minor temporal noise reduction on the entire film, and then an addition of Super 35mm grain, overlaid at 50% opacity. It seemed to give me the best balance of cleaning up the image while also giving it some character.
Once I had that working master looking good, I went back into Resolve to adjust a handful of shots that needed some more work. Those shots were exported as a series of patch files, dropped back into my FCP X timeline, and re-assembled.
I took things one step further in FCP X by bringing in one of my earlier attempts at a working master (which had too little noise reduction for most scenes), and using chunks of it for particular sequences that looked better with less NR. There were only a handful of instances like this, and the two files looked pretty similar, but sometimes the second pass just looked a bit better. Wherever that was the case I used it in place of the main working master file.
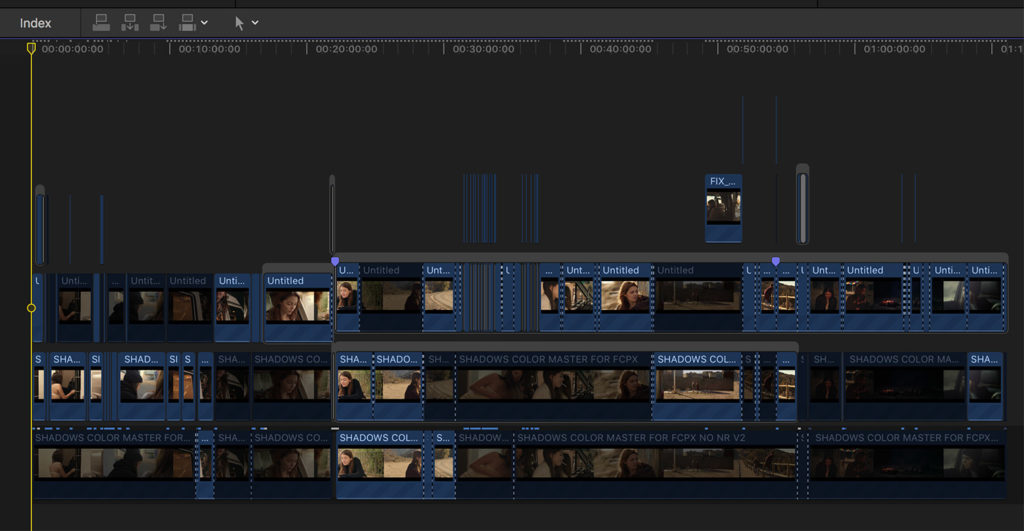
Something else FCP X was surprisingly great for was stabilization. I’ve used Resolve’s stabilizer many times before and it’s excellent. But on a couple of stabilized shots on this film, I ended up getting better results with FCP X. I’m not sure why this was the case as my settings in Resolve seems to be optimal, but for a handful of shots I actually did the stabilizing in FCP X directly.
Now with all the assets in place – the working master, patch shots, stabilized shots, etc. – I watched it all the way through to catch any final color tweaks. I noticed half a dozen or so extremely minor adjustments that needed to be made across a series of shots, and actually made those changes in FCP X too. The work was so minor and was easier to complete in FCP X as opposed to going back into Resolve just to drop the saturation 2% (for instance).
With that done, so was the film.
The credits were laid in (previously designed in photoshop, so I simply dropped in the cards and timed them), and the file was ready to be exported. I decided to master the film in 2K, as I had done enough stabilization/reframing in post that it made sense to, and I think the final version is really looking beautiful.
FINAL THOUGHTS
I learned a few key things from this process –
First off is the importance of editing a feature in whichever tool you’re fastest in. I love DaVici Resolve and will certainly consider cutting my next feature in it, but was happy to work with FCP X on this one, and quite honestly surprised at how well it handled the project. Especially considering how bloated the project file became over the months.
I also feel somewhat liberated after doing a really solid audio pass right within FCP X. With any editing software right now – especially Resolve with Fairlight integration – great post audio is becoming more accessible than ever. While I will always value the expertise of a dedicated sound pro, I still like to know I can handle it within my own means when I need to. Much like knowing how to composite or color can save you a tremendous amount of money over the course of a career, knowing audio can do the same.
The working master is also a concept I’m going to apply to virtually all my future projects. It seems to make sense both tactically and philosphically. On one hand, it makes the process run more quickly and efficiently as there is less wasted time running unnecessary exports. But it also helped me get to the finish line faster from a mental standpoint. I wasn’t tempted to delay or put off the final export process, or to procrastinate in any way. I knew there was a safety net, and I could still make adjustments if I noticed anything substantial. That made it easier to get to the finish line on the Resolve session, and commit to a final version to be exported.
In the near future, I’m going to be sharing the official trailer for Shadows On The Road, and more news about film so stay tuned for that!
I’ll also be doing a follow up post on my experience editing the trailer, so if you have any questions you’d like me to answer on that note, please leave a comment below.
And for more content like this, follow me on Instagram, Facebook, and Twitter!


16 Comments
Kat Caverly
atI am thrilled I found this post and your site Noam. I use Adobe Audition for audio, exporting a fcpxml, converting it with XtoCC for a round trip with FCPx instead of using ProTools. Have you tried this?
Noam Kroll
atThanks Kat! I haven’t tried that workflow, but will definitely experiment with it in the future. I’m spending a lot more time with post-audio lately… Thanks for the note.
s
atexcellent thank u
Noam Kroll
atThanks!
Adam Langdon
atI watched the trailer before knowing your workflow, and I totally believed it was shot on film! Great job and I FINALLY have a Resolve>FCPX>Resolve workflow!
Noam Kroll
atAh! So nice to hear that. Really glad this was helpful for you too….
kishore
atwhat color space you have used for color grade you film in resolve. is it a default davinci YRGB or davinci YRGB color manged (RCM) or ACES ? while doing round trip did it affects any thing?
Noam Kroll
atUsually I use YRGB, but depends on the specific project!
Erick
atWhat is your round tripping workflow from FCPX to Resolve?
Thanks!
Noam Kroll
atTypically I just export a .fcpxml file from FCP X and import straight into Resolve (after already importing all the source media). The session almost always re-links perfectly.
Cesar O Perez-Beato
atThanks, Noam. Great insight into your personal workflow. Congratulations!
Noam Kroll
atAppreciate it very much!
Laszlo
atGreat write up, thanks for this. Coming from the “other side” (sound design, audio, 5.1 mix) great to see that you realised the potential of FCPX audio. My go to tool is Logic for scoring and Audition/RX for precise cleaning, however, for mixing 5.1 audio I use FCPX, because leaving the main tool is always a compromise.
In case you need any help with anything, happy to help! 😀
Noam Kroll
atVery good to know, Laszlo! Appreciate the note, and feel free to keep in touch.
Jacob
atNice article and insight into doing it the way that works for you. Cheers.
Noam Kroll
atThanks Jacob!