I’m a sucker for natural light, and am always looking for optimal ways to capture and process my shots to ensure I’m getting the best possible results. Those of you that follow me on Instagram know that I love capturing a beautiful sky, and as a result I’ve picked up some valuable tricks along the way.
Whether I’m shooting a scene between two actors that’s staged in front of a setting sun, a portrait of someone backlit by the sky, or a landscape shot – I almost always rely on the same techniques for my color process to ensure I retain as much sky detail as possible.
In this post, I’m going to break down some very simple but effective color grading techniques that I highly recommend for retaining your highlights on high contrast shots. While the focus of this post is largely specific to retaining sky detail, the exact same principles I’m outlining here can be applied to just about any other high contrast shooting scenario.
Before we jump in, I want to briefly make the point that these techniques will be most effective when you apply them to footage that has been shot with the color process in mind. In other words, by understanding your camera’s dynamic range capabilities and how to best expose your images to maximize DR, you’ll give yourself the best starting place to work from. For the purpose of this article, I’m not going to get into detail on exposure techniques or anything else camera related, as my advice on that front would vary quite a bit depending on which camera you’re working with… But just make sure you do your homework and understand how to get the most out of whatever camera you’re shooting on from a dynamic range standpoint.
So assuming you’ve done your best on set to capture as much DR as possible (and of course have avoided clipping your highlights), here is how to retain as much sky detail as possible in the grade –
COLOR GRADING FOR SKY DETAIL
Recently I directed a music video which was shot partially on the beach in Malibu, using the Blackmagic URSA Mini 4.6K. For the most part we were shooting the artist right in front of the water, which was a challenge to expose as we had a bright sky behind her that created a relatively high contrast scenario.
This is a pretty typical situation to encounter, which is why I decided to use one of the shots from this shoot as the primary example for this post.
Here is what it looked light straight off of the card –
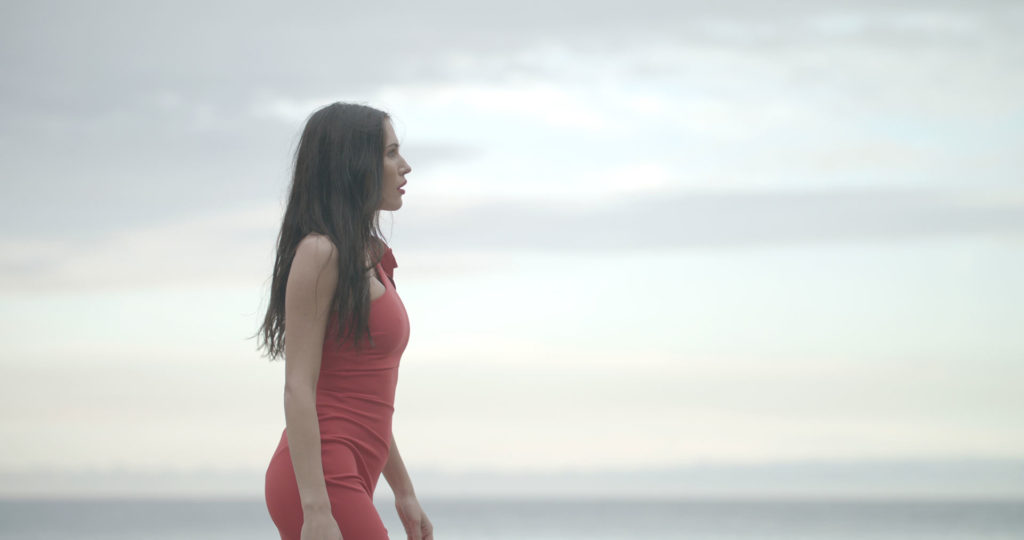
As you can probably tell, the detail in the sky is not clipped at all, and the image was exposed to the right – meaning it was intentionally overexposed to give cleaner shadow results in the grade later on.
On a quick side note, I didn’t apply the Blackmagic URSA Mini 4.6K LUT to this image, as it would have added far more contrast than I needed. This is the starting point I would be working from with the 4.6K LUT –
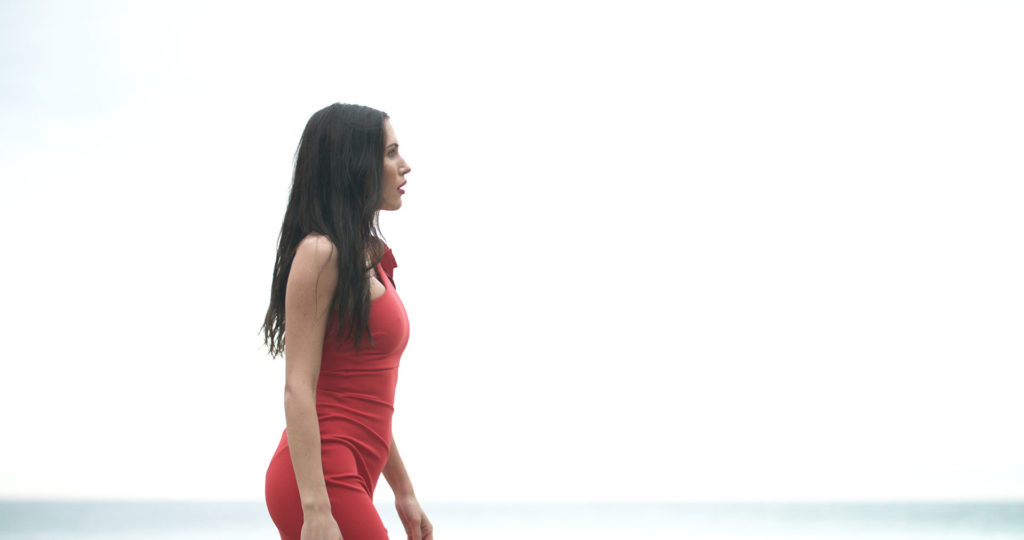
If this were simply a landscape shot (with no talent in the frame) it would be much easier to grade, as I could drop the exposure down as much as I’d like, add some contrast, enhance the color balance, and call it a day.
But since there is someone in the frame, if I were to simply drop down the overall exposure by a few stops, this is what would happen –
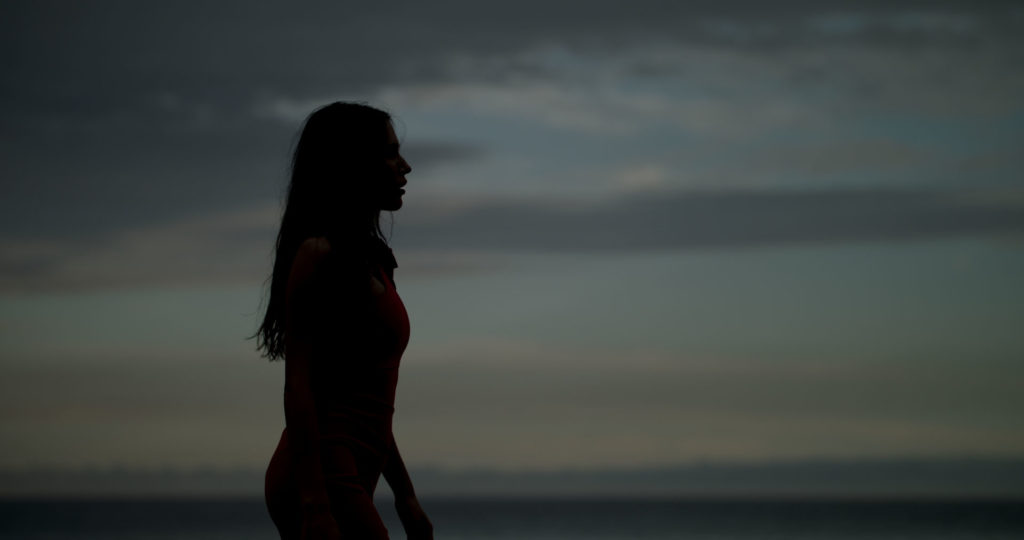
While the sky detail would become more apparent (and I could even bring up the highlights to add more contrast to the sky), our talent would fall almost completely into silhouette. If I were to continue going down this path, I would then be tempted to lift up the shadows to bring back some of the detail that is now crushed.
But then I would end up with this –
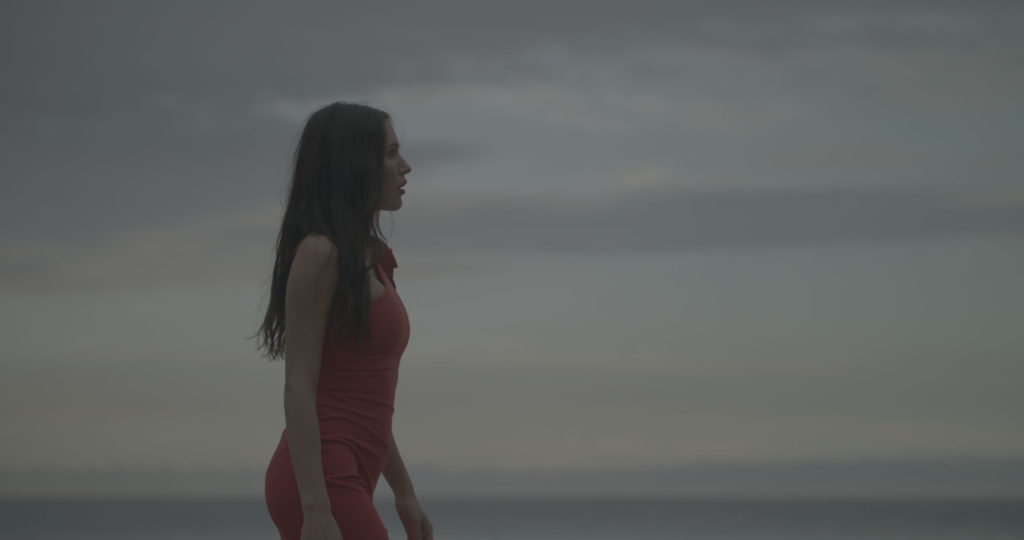
This image is essentially what we started with, but with a slightly lower overall exposure.
It clearly doesn’t look very nice, and a similarly poor looking result could have been achieved by just dropping the highlights, and leaving the mids and shadows alone –
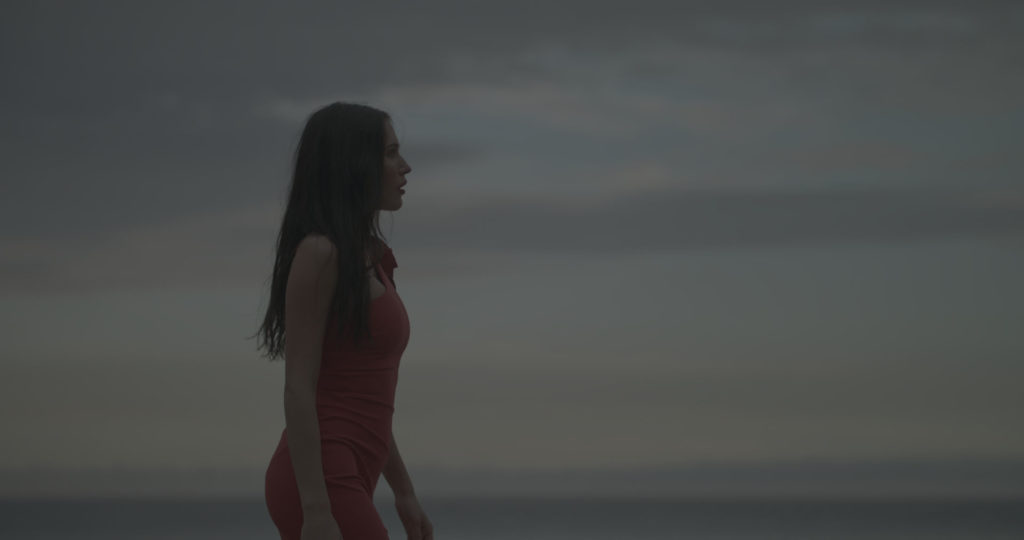
Technically it would be possible to keep working on either of these images in DaVinci Resolve, and add more nodes with additional corrections to push up the highlights and push down the shadows, little by little until a relatively usable result was found…
But I really don’t like to work like that. I far prefer to use only one or two nodes with as little correction as possible, and always attempt to get the most bang for my buck per operation. That was especially true in this case, since this footage was highly compressed as it was recorded at 120fps. I was not dealing with a RAW file that could be pushed and pulled like crazy. If this image took too much of a beating, it would start to fall apart.
So instead, my approach was to utilize a technique that I find works almost every time – start with the midtones.
Although it’s tempting to bring down overall contrast or crush the shadows on an image like this, I always find that working on the mids first is the best starting point. By pulling them down a stop or two until I see some detail emerge, and then working on the highlights and shadows, I find that I need to do a lot less heavily lifting… And the image gets pushed around a lot less in the process.
Below is the shot with some minor adjustments to the mids, highlights, and shadows –
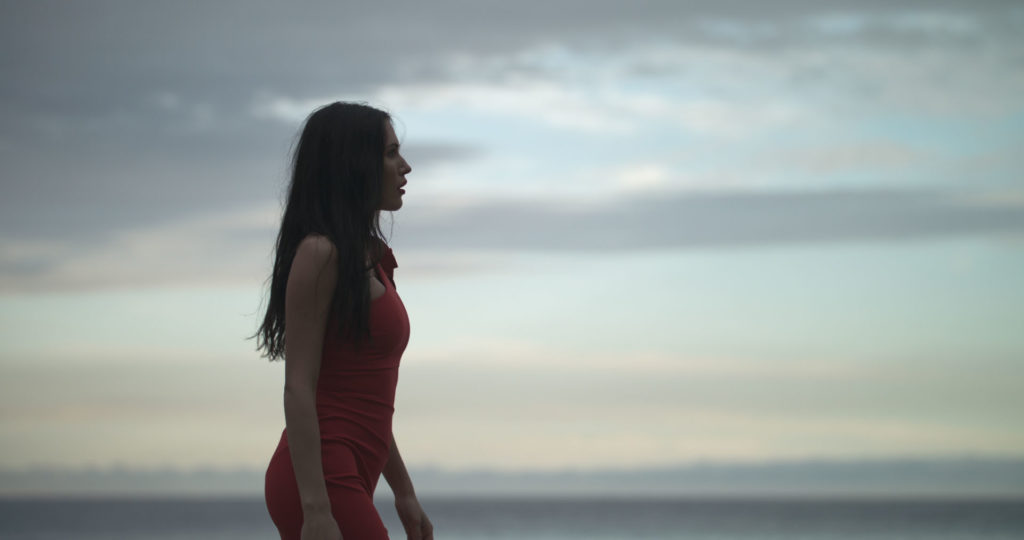
Now, we’re getting somewhere. While this may not yet be a final image, the contrast and luma levels are sitting in a much better place, and I’m ready to refine things further. At this point, all I really want to do is add some saturation and adjust the color balance to push some nice warm/golden hour tones into the sky.
This is what it looks like with my more stylized adjustments –
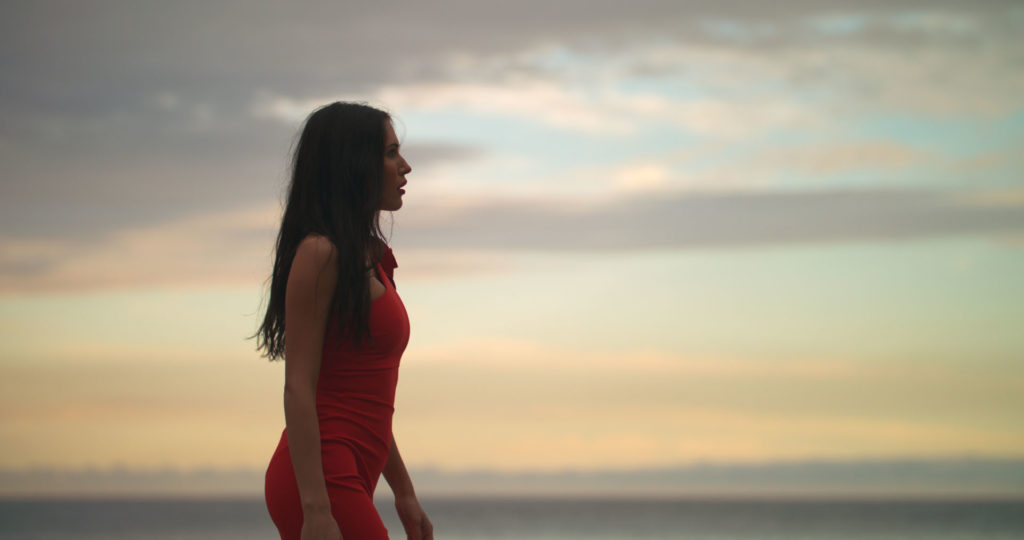
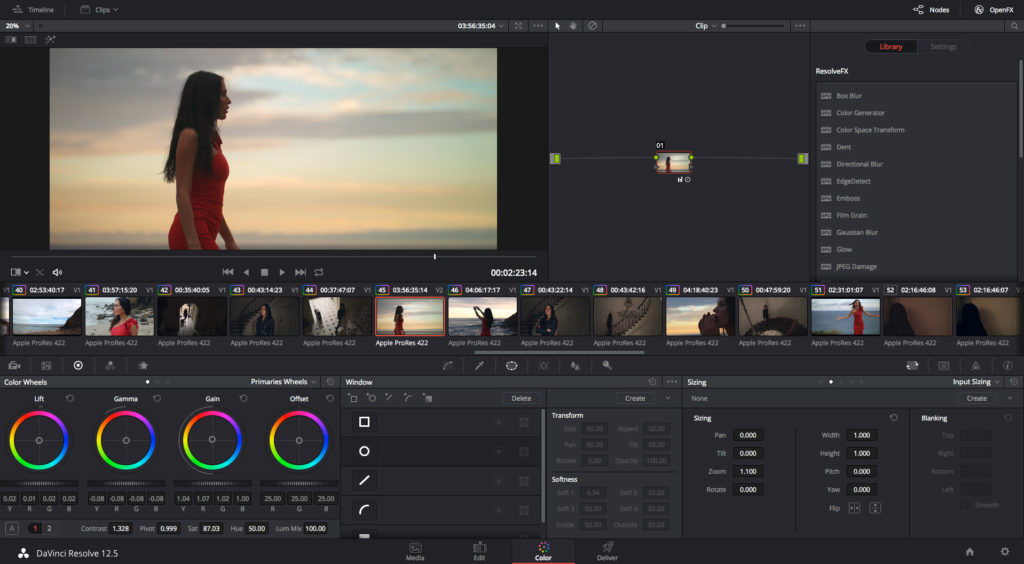
This could be my final image, and just to illustrate the point of how few color adjustments actually had to be made, take a look at my Resolve window below.
Note I am only using a single node, and minor adjustments on the color wheels –
For this particular piece, I wanted to go for a slightly more bold look.
So, even though the image above could have been a final version, I’m going to apply one of my Cinematic LUTs from the Art House pack.
This is the result with the LUT –
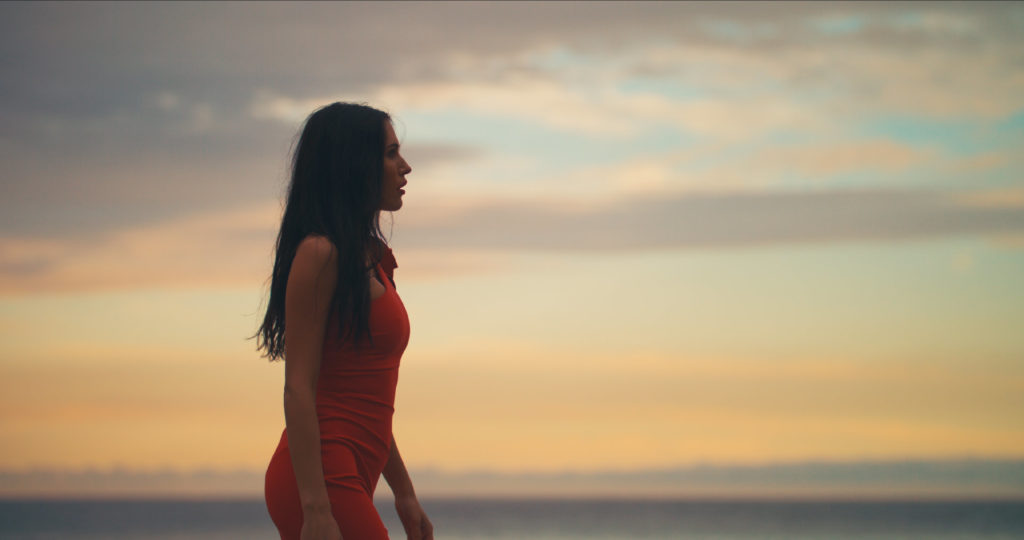
The subtle differences in color contrast, tonality, and overall balance that the LUT creates, seem to give the image more vibrancy while further enhancing the cloud/sky detail as well… So now we have a completed grade! All done with just one node and a LUT.
Before we wrap up, I have one last note to leave you with –
When coloring these types of shots, it’s always going to be tempting to use a lot of power windows. I could have easily put a window around the talent, and simply brought down the background while leaving her exposure untouched. While this is a viable option (and in some cases necessary), I typically advise against this unless you absolutely have no other choice. On more dramatic shots with even higher contrast ratios, a power window can start to look really obvious, and it can add some unwanted characteristics to your image that often do more harm than good.
So if you really need to, by all means go ahead and use some windows and masks to get yourself out of trouble – I know that I need to resort to that myself from time to time. But if and when you do, be very careful about how you implement them, how much softness you use, and how drastically different the inside and outside of the window is treated. If you can use some restraint, you should be okay!
That’s about it for now…
And for more content like this, be sure to follow me on Instagram, Facebook, and Twitter!


13 Comments
Shalamar Hospital
atShalamar Hospital boasts the best nephrologist in Lahore . Our expert nephrologist specializes in kidney care, offering comprehensive diagnostic and treatment services for your renal health.
Osh University
atOsh University stands out with its comprehensive mbbs doctor course , providing a solid foundation for future healthcare leaders. Immerse yourself in a curriculum that combines theoretical rigor with practical expertise, ensuring a well-rounded medical education.
jewelgalore
atJewelgalore showcases the finest jewelry in Pakistan . Explore their collection to find exquisite pieces that elevate your style and celebrate the craftsmanship of the region.
Retaining Sky Detail – Cameron's Blogs
at[…] Retrieved From: http://noamkroll.com/how-to-retain-sky-detail-highlights-when-color-grading-your-footage/ […]
Derek Hanson
atReally helpful man! Thank you.
Noam Kroll
atAny time, Derek!
Kim
atThank you for this article. But I must admit that it didn’t help much in my case since you left out the most critical part in the process. Which is showing how to get the best image while recording. I always have problems with bright skies. Flat or log profiles don’t help. Clipped highlights are clipped there as well. Still found no optimal solution to this 😐
Noam Kroll
atHi Kim! Sorry to hear you’re having trouble with capturing sky detail in-camera. This post was really supposed to be focused on the color grading side of things, but I am more than happy to share some advice that might help you with your footage.
The first thing I would suggest is ensuring you are always exposing for your highlights when shooting the sky. In other words, you might have to let your foreground get a bit underexposed (or even silhouetted) in order to not clip your highlights.
This will be made much easier if you’re working with a camera that has a lot of dynamic range (such as the URSA Mini, Sony FS7, or Arri Alexa), as there will be less of a tradeoff between shadows and highlights. But even with a low-DR camera, you just need to be willing to sacrifice foreground for sky detail. As long as you protect your highlights, the detail will be there.
And for really extreme scenarios, you could look into a graduated ND filter, which will primarily darken only the top half of your images (the sky) and will leave the bottom unaffected. This isn’t ideal for handheld work, or general use… But for some speciality shots it can work wonders. Hope this helps!
Ada
atHi Noam, and thanks for your posts. In relation to this, If I attached/screwed a polarizer to the lens and then a variable ND to the polarizer (let´s say 77mm both) would that work? Do they attach/screw correctly to each other? Are there unpleasant glares?
Thank you very much.
Noam Kroll
atHey Ada – Most screw on filters I’ve worked with allow you to attach a filter of the same thread size to them, so you are definitely correct. As far as glares, that largely depends on what you’re shooting and the quality of the filters!
Drop
atAny chance u can share the shot in RAW format ? Would love to follow your tutorial!
Noam Kroll
atAbsolutely, in the future I’ll aim to do a follow up on this that focuses on RAW controls. Although, generally speaking my process would be very similar – starting with the mids!
Rodrigo
atThanks Noam! Great starting point! Nice to follow your posts.
Regards from Barcelona!
Noam Kroll
atThank you Rodrigo! Glad to hear my posts are making it to Spain 🙂