A large part of my day to day work involves Color Grading as the business that I run focuses heavily on finishing work. I come from a background in Apple Color, and like many others have now moved on to DaVinci Resolve which is probably my most used piece of software outside of FCP 7/X. Having DaVinci Resolve at my disposal, I often find many of the color correction/grading tools and plugins unnecessary for my personal work, as for the most part anything that those plugins may be able to do, DaVinci can do in a better, more efficient way. Specifically, software like Magic Bullet Looks (which I think is a great concept and a great tool for many editors) doesn’t do the trick for me. Like many of the other software options in that price range it lacks some key professional features and is not intended for the type of usage that I would be using it for.
I mention this to emphasize the point that although it is rare that a relatively cost-effective finishing tool is released that I could have a professional use for, Rubber Monkey Software has just done it and impressed me with their application FilmConvert.
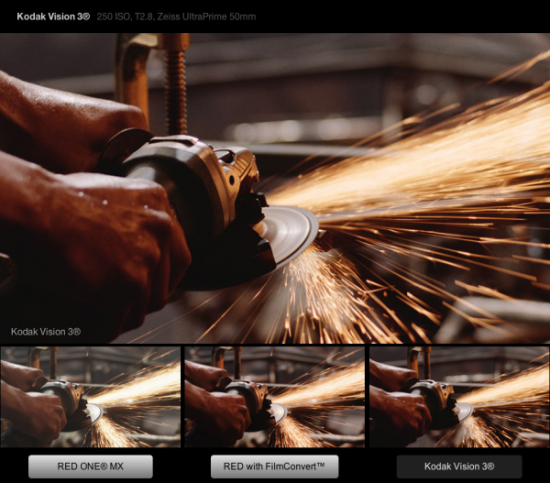
FilmConvert will take your edited or non-edited video footage and apply various film stock looks to it. Here is an explanation from their website: FilmConvert models the characteristics of the digital sensors, and provides a complex algorithm to transform digital footage to match your favorite film stocks – including negative densities, printer spectral responses and grain response curves.
If you want to apply a film stock look to your footage, there are other options out there – but in my opinion none of them can compete with FilmConvert. The reason that I love this software is that it is built to withstand professional workflows, but is simple enough to use on projects of all sizes. The interface is clean and simple, but still has all of the tools you need and exactly where they should be.
On first glance, what I love about the software is that it has “rooms” as I would call them, much like Apple Color or DaVinci Resolve. The first room is called Choose Footage. This essentially acts like the Media Pool in Resolve as it allows you to manually bring in clips to be graded. In this area you can also bring in an XML or EDL file if you have a picture locked edit that you want to bring in for finishing work. Even just in this first room we can see the possibilities of using this not only as a grading tool, but also as a workflow tool. More on that later.
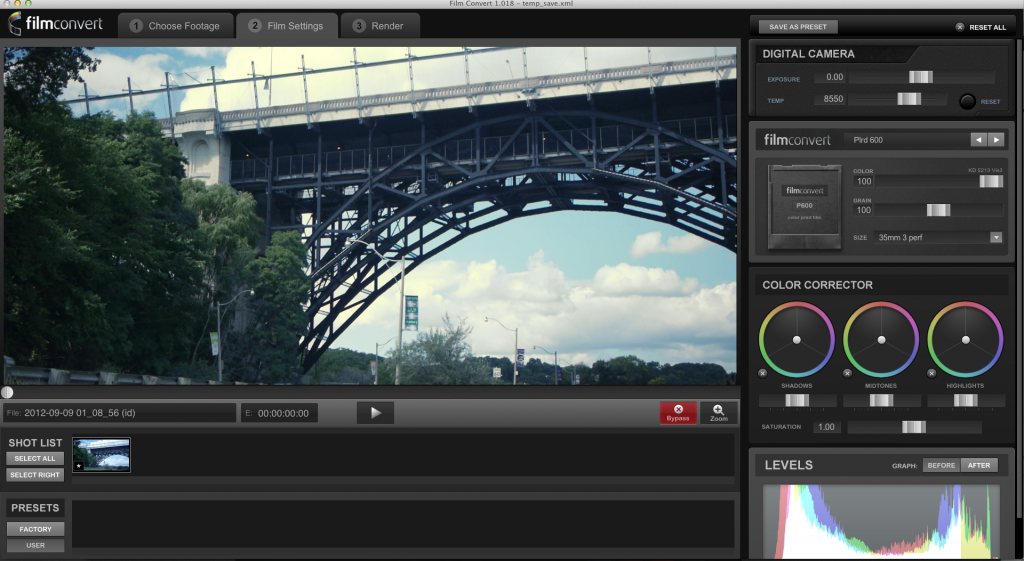
The second room is the Film Settings area. This is similar to the Color room in DaVinci Resolve. Essentially this is where all of the creative work takes place. Depending on which version of the software you choose to purchase, you can have up to 19 different film stocks to choose from. As you will see in the screenshot listed below, there are four panels on the right side to work with. First, you have your digital camera settings. Essentially this allows you to control your exposure and color temperature which is necessary as some film stocks may give the color you are looking for, but may also apply a contrast curve that needs to be fine tuned. Also, FilmConvert recognizes different cameras in this area. I brought in RED footage and GH2 footage to see how it would play with both cameras. With the R3D clip, the top panel actually changes form as it recognizes the native R3D material. It allows you to either use the camera metadata in terms of the levels and other settings, or you can bypass it and push around the levels manually within the software. I understand that Canon footage also has its own custom panel that will appear when bringing in EOS footage. For my GH2 material, it is a standard Digital Camera setting, that I presume is applied to any camera that is not recognized by the software. I wouldn’t be surprised if in a future update support for GH2 and especially GH3 is added.
Also on the Film Settings panel, of course is the Film Stock look and settings. You can choose here from up to 19 different stocks which instantly apply to your clip. You can also dial up or down individually the color and grain that the stock is applying to your clip. This is extremely important and a feature that I have never seen in any other comparable software. Sometimes you want to add just the grain of a film stock without messing up a pre-existing grade, or sometimes the opposite – you want to apply just a color of a film stock but not add the grain with it. Or in other cases, you want varying degrees of each of these parameters. The sliders allow you to have full control over the way the film stock is applied to your clip, which for me is one of the most important features. You can also control the size of the grain with settings that range all the way from 8mm to 35mm Full Frame and have many other sizes (including 16mm) in between.
Below the film stock options, you will find a standard three way color corrector. Again this is essential for you to fine tune your look as even if the film stock in itself gets you most of the way there, this is where you can really customize your final image and make it perfect. Below the three way CC is a scope to allow you to see levels as you are working – again a nice added touch.
The third and final room is called Render and essentially acts as the equivalent to DaVinci’s Deliver area. Again, the set up is very clean, and user friendly. You can choose from a variety of standard formats to export and of course choose your destination here as well. One feature that I would find exceptionally helpful that isn’t in the current version is Blanking. In this area, I would love to have the ability in this software to add a 2.35:1 letterbox for example. This is likely not a feature that most will miss, but I typically have my workflow set up in a way where I will letterbox as my last step in the post process. I do this in the event that I catch something in the finishing stages that may benefit from retaining the extra data such as reframing/tilting a shot.
So how will I use this software?
Clearly the application can serve many purposes. For example, although it may not have been intended for this usage, you could use it to process R3D dailies with a look applied if you wanted to. It can be used as the primarily grading system for an entire film or show if you felt that the tools within the software are suitable for yours needs. Again, not likely what the software was intended to do, but in many scenarios where you don’t need secondaries or power windows, it’s definitely an option for a quick color pass. Since it deals with native R3D files, DPX sequences and TIFF sequences, it also opens the possibility of using it to simply convert a timeline from your NLE into another format that will be ready for your VFX or grading software.
Here are some workflow ideas from the homepage of the FilmConvert site:
- Process an edited timeline to DPX for grading
- Process an edited timeline to QuickTime and reconnect
- Process all daily footage to QuickTime before editorial
To get back to the question of how I will use this software – I will use this in the very final stages of my post pipeline. I also anticipate this is how it will be used by many on-line editors or colorists.
The majority of the projects that I work on require DaVinci Resolve. I need power windows, tracking, node based corrections, etc. And of course, FilmConvert is not designed to do any of that, nor should it be. So if I were coloring a film for example, I would bring the picture lock into Resolve, color the entire project, spit out an XML file along with the rendered color files, bring the XML and DaVinci renders into FilmConvert and apply a film stock to it at nearly the final stage before outputting for titling. There is no harm in bringing in fully colored footage into the software as again, you have full creative control over how much or how little you want the stock to effect your footage.
I have been looking for a piece of software that could do what FilmConvert does for ages. I love the idea of using film stocks to bring video footage back to life, but have never until now been able to use a tool that could actually do it well and in a professional environment.
FilmConvert is also available as a plugin for FCP X and After Effects if you would prefer to have some of the functionality built into one of your other applications. The prices range from $99 – $249 depending on the version you purchase, which is well worth it if you use this regularly. If you’re on the fence, definitely check out the free trial. It certainly sold me on FilmConvert!
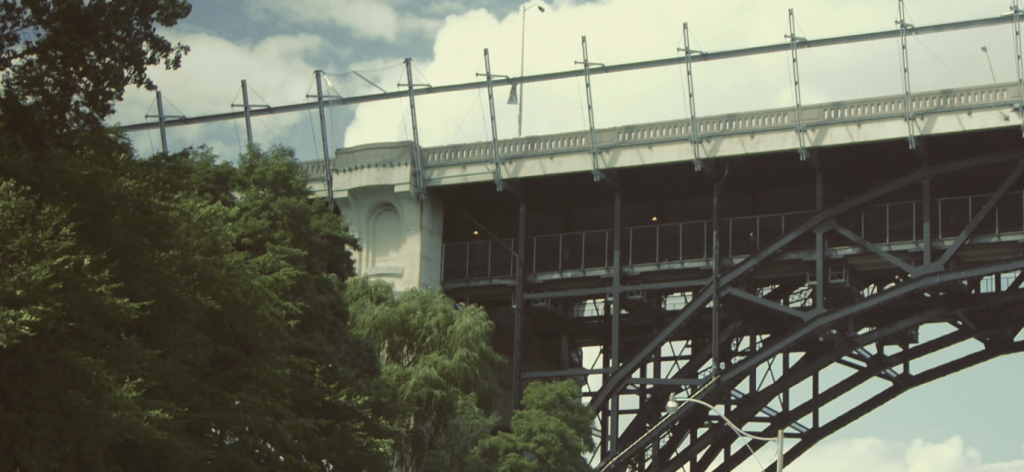
Here is a quick before and after from some GH2 test footage I had lying around. This was done in about 15 seconds.
Before
After


5 Comments
Dr. John R. Brinkley
atIs Filmconvert your favorite program to use adding a “film look”, or have you found another program you like better?
Noam
atIt is definitely my favorite! I’ve tried lots of other options and nothing works as well or as easily as FilmConvert.
ugg boots on sale
atGood post, I always like them.
doudoune moncler femme satomi vert armee
atBest wishes!Your blog is very good!my website http://www.frdoudounem0ncler.com/ welcome to visit!
ugg outlet store
atthanks, nice post.